• Home
  • About Us
  • Podcast
  • Strategy Guide Wit
  • Contact

Strategy Guide Reviews

A Strategy Guide for your Strategy Guides

  • Reviews
    • Strategy Guide Reviews
    • Video Game Reviews
    • Mini-Reviews
  • Features
    • Interviews
  • News
  • Unboxing Strategy Guides
  • Columns
    • Gaming Diary
    • Corner of Randomness
  • Videos

Dissidia Final Fantasy Strategy Guide Review

September 30, 2009 By Keri Honea 1 Comment

I honestly had no idea what to expect from this guide, as I have never bought or thought of buying a strategy guide for a fighting game. I mean, don’t you develop your own strategy for fighting? Develop your own character preferences and styles? So when I picked up this monstrosity of a guide at my local Gamestop, I was shocked by its girth.

After I tried a couple of story levels of the game, I began to see why there is a guide. The combat style is unlike anything I’ve ever played before and am likely to ever play again. Not to mention, there is an ungodly number of unlockables in this game, and it’s nice to have something in print that lists them all. And it’s really for that latter reason that a guide is needed at all. After all, as I previously mentioned, the fun of playing a fighting game is to come up with your own fighting style.

That said, here’s the review.

Review:

Maps
Maps in a fighting game? Oh hell to the yes.

Each level, no matter the part of the campaign mode, is set up like a board game. Enemy pieces and items are scattered across the board, and players have to move their character piece to engage in battles or open chests. Each move the character makes detracts from the given number of Destiny Points (DP), and the final number of DP gets tallied into the final score once the level is completed. Obviously the goal is to complete the level with as many DP as possible, and in addition to including a map of each board with all hidden items and bosses, the guide has a map of the board with a plotted route for the most efficient DP use. However, it also has to be noted that since many hidden enemies and items only appear after the first run-through of the level, most of the DP efficiency routes are only applicable for later run-throughs.

Walkthroughs:

The maps pretty much take care of all walkthrough questions, but the walkthroughs still provide a vast amount of information. For example, each enemy piece is charted out with all individual stats. Each treasure chest has a chart of its contents for each time the level is played, and if a treasure or enemy only appears after an initial run-through, this information will also be listed. But wait, there are two more tables to each level: the awards list for remaining DP for each run-through and the awards for each star rating from level completion.

In other words, players will know every possible award, number, and requirement for every possible outcome when playing each level of the campaign.

Another nicety of the guide is that it doesn’t assume the order the Destiny Odyssey chapters are played. Each chapter has a different difficulty level, and players have the option to play any chapter they want in any order. The guide takes this into account, so at the beginning of each Destiny Odyssey chapter, it assumes that this is the first chapter the player has looked at. It means there is a lot of repeated information, but it also means that players don’t have to flip through other chapters looking for basic information about how the Destiny Odyssey chapters play out.

The only complaint I have about the walkthroughs is that it gives one sentence, if it offers any advice at all, on strategies for defeating the bosses. But as Dissidia is a fighting game, it’s kind of expected for players to get stronger on their own and figure out their own strategies for fighting, no matter if it’s a boss or not.

Appendices

Dissidia may be a fighting game, but it’s still a Final Fantasy game at heart, which means it has all the core features of a RPG, including leveling up, abilities, equipment, accessories, aaaaaand summons. And as one would expect from a complete Final Fantasy guide, all of these goodies, the PP catalog, and countless upgrades and bonus items are all listed in the back along with what it takes to get them. You honestly have to see the fat lot of knowledge in the appendices to believe it. It’s amazing both in what the developers packed into the game and how much detail the writers gave to it.

Bonuses

Writers Joe Epstein and Casey Loe included plenty of game tips in the Game Basics section, including how to activate EX mode to your advantage, recovering bravery quickly, and enhance each attack. But they didn’t stop there. After the plethora of appendices, they included a Secrets & Cheats section in the back, which has information on unlocking the secret epilogue, tips for leveling up quickly, secret passwords for friend cards, how to hack the Mognet, and how to solve all the Moogle quizzes and mysteries.

If all that isn’t enough, there’s also a giant, tear out poster that lists all 151 game accomplishments and all 300+ player icons.

Rating

I don’t think I need to say any further about how much this guide blew me away. Nothing is left out, from the campaign mode to the Duel Colosseum to all the unlockables and awards, and yes, even combat strategies. This contains every piece of information any player could want, and it can all be found as easily as completing the Destiny Odyssey Prologue.

This guide receives and earns a 5/5.
Filed Under: Strategy Guide Reviews

Scribblenauts = Grrrrr

September 25, 2009 By Keri Honea Leave a Comment

Scribblenauts and I have had a love/hate relationship this week. Some days I would just ROCK the puzzles and I’d love everything about Maxwell and his zany lexicon. But then the next day, the damn game locked up on me TWICE in two different puzzles. And of course, it happened right when the Starite appeared. All that work in solving the puzzle…gone.

So far, I seem to have fixed the problem with the freezing (the freezing started when I changed avatars, and when I switched back to Maxwell, voila, no freezing up) but then I encountered different problems as the puzzles grew more difficult. The game mechanics are very frustrating at times. For example, the lack of being able to control Maxwell has been my undoing more than once. While trying to get a beam to fall horizontally–when I summoned it, it appeared vertical and I needed it horizontal–I accidentally tapped off of the beam, which made Maxwell move to the left and well, he fell into a pit of lava and I didn’t get him out quickly enough. Had to start over. If Gabe was napping at the time, I would have yelled oh so loudly.

I’ve also noticed that sometimes a solution for a puzzle will work just fine one time you play it, but if you try it again (because you failed somehow and had to start over) the chances of it working are about 50/50. Okay, that’s harsh. 70/30. So this has made using and reviewing the guide a bit of a challenge. Sometimes what the guide suggested will work, and othertimes not.

Or–and this has been frustratingly hilarious–the guide’s suggestions will work to a T, but something strange happens that didn’t happen to the author and you fail anyway. In one puzzle, I had to get a king, who was riding a sheep, across a lava-filled chasm to his castle. I built a bridge and got him across, but the guide suggested a chain would work just as well, because the king’s sheep will hop over the unsturdy portion. Okay, sure, why not. I place the chain, and the king gleefully hops across. Starite appears. Awesome. Just as I prepare Maxwell to fly up and fetch his Starite, the knight who is milling around the castle decides to run off and falls off the loose chain and dies. FAILED MISSION.

That’s probably my biggest gripe about the game. There have been numerous times that a Starite appeared, and some NPC went off and killed themselves and I lost because I didn’t snatch the Starite before the loony got himself killed.

I would still recommend this game to puzzle lovers. It’s so unique and forces you to think in ways you normally do not–well, at least it does at first. It’s easy to get into a rut and use the same objects in most situations because you know it will work. For me, I’m partial to the Pegasus. Why? Because I know how to fly him, how to attach ropes to him, and there’s no way I can accidentally tip him over like I’ve done with an airplane and a helicopter.

See what I mean? Grrrrr.

Filed Under: Uncategorized

Stack Fresh from Future Press

September 23, 2009 By Keri Honea 2 Comments

I am constantly trying to get guide writer interviews, and I guess these creatures do not enjoy talking to strangers or my e-mails disappear in a void. But when I contacted Future Press about interviewing their writers for the inFamous Guide, I finally received a response. I was told that they are too busy at this time to conduct an interview, and I’m not disappointed about that, because hey at least I was written back. But then the media contact surprised me by reading my review and asking me to review what he considered far better guides. I gave him my address and thanked him, but I never really expected anything to come from it.

Then yesterday, a huge stack of guides arrived at my front door. I have been floored ever since. Future Press is a German publisher, so most of their guides are official from Europe, and a publisher in the States occasionally picks them up to adapt as their own. Like inFamous. In other words, all of these guides I received have US counterparts, so I’m intrigued to how they compare to some of the guides I already own.

The stack includes Final Fantasy III (DS), Tekken 5, God of War II, Killzone 2, and Bionic Commando. I cannot wait to review these and I cannot thank Future Press enough for this opportunity.

Filed Under: This Has Nothing to Do with Strategy Guides!

Scribblenauts = Happy

September 22, 2009 By Keri Honea Leave a Comment

I have wanted to play Scribblenauts since I first heard about it at E3. A few friends have poked at me to pick it up, but I really don’t have much time to play games without guides. Gotta keep reviewing! After a day of Tweets about how awesome Scribblenauts is, I did a quick Amazon search for a guide. Surely there isn’t a guide for a puzzle game. I mean, I haven’t done the research for it, but I’m positive there wasn’t a guide for Professor Layton outside of GameFAQs. Wouldn’t a guide spoil the game a bit?

I was wrong and right at the same time. There is a guide for Scribblenauts, so I visited Gamestop, turned in my store credit and a gift card, and picked up the game and guide. After playing for an hour or two, I’m going to have to put away the guide and then come back to it after completing some levels, because I was right in that it does spoil the game a bit.

The whole point of Scribblenauts is to challenge your imagination. If one uses the guide throughout the game, how is that challenging anything? That said, I don’t think the guide is a waste of money so far. It gives really good suggestions and even provides off the wall ideas for completing a puzzle. I think it would be great to use the guide when trying to master levels and you just can’t think of any other objects to summon outside of one or two.

Speaking of which, I hear it calling me. I need to get as much completed on it as I can before next Tuesday. Hehehehehe.

Filed Under: Uncategorized

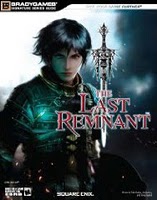
The Last Remnant Strategy Guide

September 21, 2009 By Keri Honea Leave a Comment

The Last Remnant Strategy GuideA strategy guide’s quality hinges on the quality of its maps, walkthroughs and appendices, all of which are crucial for a complete and truly helpful guide. Some people will need a guide to hold their hands throughout the entire game, whereas others need a guide for simply looking up information quickly, such as where to obtain a certain ability. A guide of good quality must be able to do both to appease the wide range of gamers.

But for the maps and some missing enemies, this guide would have been close to perfect. Unfortunately, the missing enemies and even mini-bosses not listed in the guide were so heinous and frequent that I started slapping down post-it notes on each page I found additional enemies or mini-bosses. My guide nearly doubled in size due to the number of post-its.

Maps:

In general, the maps are very well done. Each story mission begins with a map of the area Rush will explore, and if the area has multiple floors or multiple sections, the maps are divided up accordingly (on the same page). Even each sidequest has its own map.

The only complaint I had with the maps was the lack of plotting out harvest points. They designated everything else, including chests, transporters, mini-bosses (sometimes!), special items, special doors, etc., but none of the harvest points are listed. What Mr. Diggs will find in the harvest points changes each time, so I didn’t expect the guide writers to point that out, but the harvest points themselves were stationary with every area visit, so it made little sense to not include them on the maps.

Walkthroughs:

One thing I can definitely say about the walkthroughs, for both the story and side missions, is that they will keep Rush and his party well prepared. The guide always lets users know what shape their party needs to be in before tackling any mission, whether they should wait until they can command 4 unions or if a couple of small unions is more than enough. It will also make suggests of arts units need to learn or how to delegate the leaders throughout the unions. I was always able to at least eke by if I formed my own unions, but when I used the writers’ suggestions, my party had ZERO problems.

I am not sure if I have ever played a game with so many sidequests before. Every region is jam-packed with them, and as the story progresses, each region piles on a few more. Most of the sidequests are easy to find by just visiting the local pub, but some take prodding of other NPCs or will only activate if Rush hires specific leaders from the Guild. For those who cannot rest without uncovering every sidequest, this guide will never let you down. At the beginning of each story mission, just before the maps, the guide lists all the sidequests that are available. If players want to do them, they can occasionally find how to trigger them in the story walkthrough, but most often than not, they will have to flip to the back section and find out how there. It’s no big deal, because players will have to use the information back there anyway to complete the sidequest.

When it comes to offering strategies to defeat bosses and enemies, for the most part, the guide is excellent. It often does not provide a detailed strategy against bosses, but instead tells of the bosses’ weaknesses and prepares players for any special attacks.

However, as mentioned above, the guide was notorious for flat out not mentioning the presence of certain enemies and mini-bosses. Sometimes, this was not a big deal, but several times I found a mini-boss or an ungodly difficult enemy that I was not prepared for. They weren’t plotted on the maps or even mentioned in the list of enemies to be found. It happened so often that I began to wonder if perhaps the enemies change each time, which could be the case. Although, each time I died, those enemies were still there, ready and waiting for me to come flub up another time.

Appendices:

I’m not familiar with the other writers, but Joe Epstein is a season JRPG writer so I shall assume the others have at least some experience, and it shows with the appendices. They detail every battle formation, item, piece of equipment (including customizations!), component, shops, captured monsters and what each monster can split into. In addition, there is a highly detailed recipe chart for all item creation.

What I really like in the appendices is the enemy gallery. Usually guides slap enemies into a typical appendix/chart with their image, attributes, and weaknesses. This guide doesn’t list attributes and weaknesses (with the battle system, that would be a waste of space), but it did turn the enemy and boss appendix into an art gallery. Each enemy and boss has a screen shot of it in the game and a sample of hand-drawn concept art. I’ve never seen anything like it in a guide before, and it’s stunning.

Guide Organization:

This was flawless. Introductory material in the front, story missions, side missions (all organized by location and order of appearance), and appendices. I never had any trouble finding any piece of information I could want, whether it was what components I needed to customize a weapon or how in the world am I supposed to complete this sidequest.

Rating:

The missing enemies does keep the guide from being a solid 5/5, but fortunately for it, the rest of the guide keeps it from falling any further.

The Last Remnant Official Strategy Guide earns a 4/5.

Filed Under: Strategy Guide Reviews

  • « Previous Page
  • 1
  • …
  • 173
  • 174
  • 175
  • 176
  • 177
  • …
  • 183
  • Next Page »

Follow us!

Subscribe!

Upcoming Strategy Guides

 Nothing here. Come back later. 😢

Latest Strategy Guide Reviews

The Walkthrough by Doug Walsh Review

Red Dead Redemption 2 Strategy Guide Review

Mega Man 11 Strategy Guide Review

God of War Strategy Guide Review

Far Cry 5 Strategy Guide Review

Friends of SGR

  • BradyGames
  • Dan Birlew – Guide Writer
  • Doug Walsh – Guide Writer
  • Future Press
  • Game Enthus
  • GameWires.com
  • Piggyback
  • Press the Buttons
  • Prima Games
  • Racing Games

Top Posts & Pages

  • Prima Games and BradyGames Officially Merge
  • Final Fantasy III Strategy Guide review by FuturePress

Copyright © 2025 · Web crafted by Warkhammer


Loading Comments...