• Home
  • About Us
  • Podcast
  • Strategy Guide Wit
  • Contact

Strategy Guide Reviews

A Strategy Guide for your Strategy Guides

  • Reviews
    • Strategy Guide Reviews
    • Video Game Reviews
    • Mini-Reviews
  • Features
    • Interviews
  • News
  • Unboxing Strategy Guides
  • Columns
    • Gaming Diary
    • Corner of Randomness
  • Videos

Pokémon X and Y: The Official Kalos Region Strategy Guide Review

November 26, 2013 By Chris Nitz Leave a Comment

Pokemon X & Y Strategy Guide ReviewPokémon is one of those franchises that seems to have been around for as long as I have been a gamer. I can still remember the first time I played Pokémon Blue on my Game Boy. Fast forward several years and I find I am reliving that same excitement again with Pokémon X. Sadly, where the game invokes fond memories of years past, the strategy guide sparks emotions of irritation.

As I have not played a game in this series in something ridiculous like ten years, I spent a bit of time with the beginning of the guide. Here the basics of the various capture balls, training, new touchscreen controls, and battle systems are covered. There is quite a bit of info here that helped ease me back into this fantastic world.

Wait, where is the phone directory of Pokémon?

Wait, where is the phone directory of Pokémon?

Once I was comfortable that I had a grasp of the complexities that this game contains, it was off to embark on the main story and this is where the guide excels. Those who are looking for an optimal route to becoming a Pokémon Master will find a generous amount of maps thanks to the dust jacket, two-page spread in the beginning of the book, and a pull out map. This does make navigation fairly painless and gave me no excuse as to not know where I was going next.

I found the various routes and cities detailed enough to tackle with a bit of planning. The different Trainer Battles were certainly easier as their Pokémon were clearly on display so I knew what to expect before deciding to take on a fight. It almost felt like cheating as I was able to plan, and level a specific party composition to conquer the more difficult duels.

The road to masterhood fills the bulk of this guide with the last few pages going to things such as super training, photo points, restaurants, and berry farming. These give players some good info for when they need a break and want to tackle a few of the other aspects of the game.

Now to touch on the things that really drag this guide down, such as a complete lack of post-game content. Those who realize there is more to this game than just becoming the supreme master will need to turn to other sources for things like collecting unique Pokémon, special unlocks, or mystical places to explore. As these tend to make up a fair amount of time, their lack from this guide is fairly disappointing.

One of the hardest bits to swallow is the complete lack of a Pokédex. Players wanting that info, along with the missing post game substance mentioned above, need to acquire a different guide. While I can appreciate these guides being under $20 USD/guide, that equates to having to lug around two books while traveling, navigating two books while playing, and twice the inconvenience. To me, this is just unacceptable when you realize that prior Pokémon guides included this information. This is further compounded by the lack of information on legendary or special Pokémon or any real meat to Mega Evolutions. As these all play a role in even just the basic experience of the game, this lack of content is hard to swallow.

Well that makes life a tad easier.

Well, that makes life a tad easier.

Finally, a minor nitpick is that this is a smaller form factor guide. While I appreciate this as it packs into bags a lot easier, it also means the book does not lay flat while I was using it. This made for some awkward yoga positions while playing and trying to use the guide. When you’re playing in four to six hour stretches, this becomes a major drag.

This guide is great for the main story walkthrough and getting old players, like myself, caught up and primed for hundreds of hours of gameplay. However, this book is only half completed and needs a secondary purchase to be truly useful, and is thus receiving a rating to reflect this blatant money grab. Maybe we will see a better, more comprehensive, guide come out down the road, but as of right now, skip this and use Dr. Google to get ya through this complex game.


SGR Rating 2/5

Author: The Pokémon Company International
Publisher: Prima Games
Editions Available: Hardcover and Paperback
Acquired via Publisher

Filed Under: Strategy Guide Reviews

LEGO Marvel Super Heroes Strategy Guide Review

November 13, 2013 By Keri Honea 1 Comment

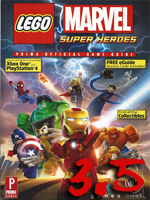
LEGO Marvel Super Heroes strategy guide reviewLEGO Marvel Super Heroes is one of the most fun LEGO games I have honestly ever played. The hub worlds are massive, the dialogue is hysterical, and the gameplay is so fun, you kind of forget how repetitive the game really is. The co-op is awful, but that’s a story for another day. Since it is a LEGO game, it has a metric ton of collectibles, in both the main game and in the hubs. As such, the strategy guide needs to be heavily detailed and accommodating for all of these collectibles, as playing the game in of itself is not that difficult. I am very sad to say that the LEGO Marvel Super Heroes strategy guide has too many typos, errors, missing information, and completely inaccurate information for it to be recommended one hundred percent.

LEGO guides in the past have always been set up with a main walkthrough for the story that contains information on finding all of the collectibles, even on freeplay. In this manner, everything about the main campaign is all in one place, so if you miss something in the story, you can easily find it as you run through again. Also, if you get stuck in free play, you see the story walkthrough hints to remind you how to get through a certain area once more. The LEGO Marvel Super Heroes strategy guide breaks these strategies up. The story is in one section, and the free play is in another. The strategy guide could have been so much more concise if it was all bunched together. Plus, it would have prevented additional page flipping as I had to remind myself what random thing I needed to build/trigger that I wasn’t seeing this time around.

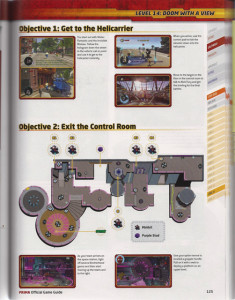
LEGO Marvel Strategy Guide

Missing A5…

In regards to finding these collectibles, the maps provided are almost more important than the information on how to get a mini-kit or rescue Stan Lee. A few maps had collectibles swapped from their actual locations, and one map left off one mini-kit location completely. It wouldn’t have been as big of a deal if this particular mini-kit didn’t require players to destroy a certain number of items in the level in order to unlock the mini-kit. The locations of each of these breakable items were not listed in the written portion, so the maps have to be reliable for these. At least in this one situation, the breakable items were easy to find, but that’s still no excuse.

Then sadly, there is all of the inaccurate information. Some of the stud requirements for achieving True Believer status were completely wrong (sometimes by 10,000 studs), the Achievement/Trophy list has Trophies that do not exist and is missing Trophies that do exist, and there were a large number of typos in the walkthroughs and even in the design of the guide itself (two level 12s).

When it comes to hunting down those gold bricks, character tokens, red bricks, and wayward Stan Lees in Peril in the hubs, the LEGO Marvel Super Heroes strategy guide is spot on. Thank God it is too, because I do not have the patience to hunt down all 200 of the missions you need to unlock everything else. Plus, Stan Lee moves constantly. You save him in one area, he gets in trouble somewhere else. The strategy guide paints a nice path of where Stan Lee will go next. The missions in the hubs are crafted in the same way; you must complete a particular one to unlock another. With the strategy guide, I was able to plot out exactly where I was going to go with both the missions and Stan Lee so I could get through it in the most efficient manner possible.

The back half of the strategy guide is for the handheld version of the game, which is a completely different game in both format and gameplay. Each level is built upon a set of challenges, some of which you can do the first time through and some are better saved for free play. The strategy guide provided fantastic tips for beating each challenge, and it pretty much saved my Vita from being tossed across the room. The handheld version is definitely not as intuitive as the console, and I never would have gotten past the second level without it.

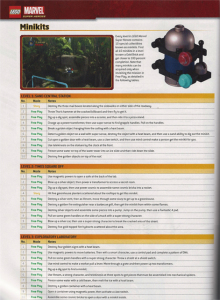
LEGO Marvel Strategy Guide

This is the only checklist I didn’t mark up.

The best part(s) of the strategy guide by far are the checklists. The checklists provide the best way to track exactly which gold bricks you have unlocked in the hubs, which Stan Lees have been saved, which character tokens you have found, etc., etc., etc. I normally hate writing in books, but you better believe I used my pen to mark off the gold bricks I found with each hub excursion.

The LEGO Marvel Super Heroes strategy guide is a mixed bag, and I really tossed and turned over what rating to give it. The inaccurate information disappoints me greatly, but it’s not enough to completely mar everything else the strategy guide does really well. Just be prepared to use the code inside to unlock the e-guide from Prima Games so you can get a bit more accurate info when needed.

SGR Rating: 3.5/5

Authors: Michael Knight and Nick von Esmarch
Publisher: Prima Games
Editions Available: Paperback
Acquired via Publisher
Filed Under: Strategy Guide Reviews

Tomb Raider Strategy Guide Review

November 7, 2013 By Keri Honea 1 Comment

Tomb Raider Strategy Guide ReviewI’ve had both the game and the strategy guide for Tomb Raider for awhile, but I was scared to try the game for a number of reasons. One, I was nervous it would have as much platforming as the Tomb Raider games of old, and two, I was pregnant when the game released, so I was strictly warned to avoid the game during that time since pregnancy makes me have a very sensitive stomach to violence. When the Extra Life marathon came up, I put Tomb Raider up on the poll of games to play, and it got a resounding majority of the votes. I am so glad that I finally played the game (even more glad that I didn’t play while pregnant), and I am thrilled I had the Tomb Raider strategy guide available to help me through this game. Even though my goal was to burn through the game and not explore every nook and cranny to its fullest, the Tomb Raider strategy guide was invaluable at helping me get through several sequences, especially when I got lost in a few areas.

When I first looked at the strategy guide while getting ready to play, I was honestly nervous that the strategy guide would frustrate me more than help me. The guide is really focused on walking players through getting everything the first time–challenges, collectibles, and optional tomb raiding. I have typically found that when strategy guides are constructed in a way to lead you through getting collectibles while playing through the story, it’s easy to get lost in what the guide tells you what to do if you are not collectible hunting. For example, the guide may tell you to journey down this one path that’s really out of the way and then guide you back to the main path via a shortcut. If you don’t go down that collectible path and you need help finding the main path, the strategy guide will only confuse you and not help. The Tomb Raider strategy guide was not like this at all.

It was incredibly easy to both instantly find where I was in the written walkthrough and then interpret the guide’s instructions to help get me on the right track. It didn’t matter if I was hunting that collectible or completing that particular challenge or not. I could still find where I needed to go in the middle of all the completionist info.

And thank God it was easy to look up help, because I got turned around a lot as I ventured forth with the determination to grind through the game as quickly as I could.

The strategy guide also helped me get through combat situations that got me stumped nine times out of ten. Of course, I usually wanted to smack myself with the guide after learning how to, as it was usually something simple and very easy. Shoot a fire arrow into the gas, kill everyone instantly before they can call for help. Oh, silly me.

Not to mention, a couple of the puzzles had me absolutely stumped at what to do. Since the guide was so helpful with the puzzles, I know I’m going to heavily rely on it to help me when I go back and complete all of the optional tombs.

And yes, I want to go back to the game at one point and actually hunt around for the collectibles, challenges, and the optional tombs. And yes, the Tomb Raider strategy guide will be at my side the entire time.

This may be really late in the game, but I still can’t recommend the Tomb Raider strategy guide enough. It’s the perfect companion for both the completionists and those who want to burn through the game. It’s not often you find a strategy guide that is good at doing both in the main walkthrough. It’s so good, in fact, I’m not sure how much I’ll use the appendices when I go collectible hunting.

SGR Rating: 5/5

Authors: Michael Owen and Kenny Sims
Publisher: BradyGames
Editions available: Paperback and Collector’s Edition
Acquired via Publisher

Filed Under: Strategy Guide Reviews

Grand Theft Auto V Strategy Guide Review

October 29, 2013 By Blake Grundman 2 Comments

Grand Theft Auto V strategy guide reviewOpen world games have to be a nightmare for any strategy guide writer to even approach. The depth and breadth of these titles are daunting enough to the player, so lord help the poor souls that have to break down, analyze, and then write about each and every detail of the title’s universe. It probably goes without saying that this task that is certainly not for the faint of heart. With all of that in mind, recently Rockstar Games released the most recent installment in the Grand Theft Auto franchise and BradyGames won the lottery of being able to author and publish the official Grand Theft Auto V strategy guide. Are they up to the task of tackling the massive world of Los Santos or will this tome fall victim to the very variety that has been a staple of the series?

As alluded to previously, GTA V is gob-smackingly gigantic. There are so many experiences to take part in that it would seem nigh impossible to capture it all in a single, concise document. Like most guides of this type, it is best to start at the beginning, detailing the main playable characters. Instead of focusing on any sort of backstory, this section is instead focused on the raw stats of each person, along with their strengths and weaknesses. This is sadly devoid of anything to help place them in context to the rest of the game itself, but that’s why you play the campaign, right? Well that and causing mass mayhem, but more on that later. Following this less than personable introduction to the title, is a laundry list of weapons at the player’s disposal and their associated stats and upgrade costs.

A nice touch included in the introduction is a detailed breakdown of the franchise’s trademark “stars” wanted system. Everything from how to acquire notoriety to observations of what will be pursuing the character are broken down here explicitly. Even more helpful is a section that explains how to actually lower or straight up get rid of stars. Knowing these key strategies will be crucial to progressing in the main campaign. Before venturing into the meat of the title, the last step is to look over all of the vehicles available for use. As one might assume, a game that has vehicle theft in the title features plenty of motorized contraptions of land, sea and air. However it is worth noting that in this section (on pg. 48-49 to be exact) there is actually a typo the reverses the braking and acceleration label on all of the stats charts. Unfortunately it doesn’t swap the corresponding data as well, which could potentially lead to quite a bit of confusion. So take everything found in this section with a grain of salt.

Moving onto the actual campaign walkthrough, the guide goes to great lengths to spell out all of the beats of a mission before it actually begins. While this isn’t necessarily venturing into spoiler territory, there might come a time where some could find the objective breakdown a bit much in the foreshadowing department. Despite this minor hint as to what is coming, each step of the way is dissected in a manner that will adequately prepare the player for what is coming, as well as informing what is needed in order to clear the mission with a gold medal.

If there were a minor nit-pick to the breakdowns it might be that there are plenty of cases where providing any sort of guidance feels like an afterthought, especially if the objective was painfully straightforward. That said, there were plenty of times where minor things such as what not to do in order to insta-fail a mission are not spelled out clearly enough. Nothing is more deflating than failing an objective when a step-by-step walkthrough is splayed out in your lap. Despite mission objectives slightly over-sharing, it feels like the text itself goes out of its way to not give away any of the deep underlying story.

Accompanying the main path of Grand Theft Auto V, there is a bevy of optional missions that are at the player’s fingertips. In fact, some may argue that these diversions prove to be some of the most fun that the title has to offer. The “Strangers and Freaks” section is broken up by contact, and each of their available missions are laid out in chronological order, as they would become available in the campaign’s progression. Each mini-mission is led off with the character that can activate said objective, what needs to be completed in order to unlock it, and a map location signifying where the interaction begins. Though once again minor, it tends to be fairly difficult to discern where a specific point is on the map, due to how zoomed in certain pushpins appear in picture form. This is not the case for every mission, but there are certainly more than a few that will be easier to locate using the game’s mapping system than what is provided in the text. Plus, it once again remains true that the depth of the actual walkthrough itself could leave a little something to be desired. It is one thing to say what is going to happen, it is another thing entirely to explain why it should be done a certain way. Sadly there is far more of the former than the latter.

Alongside the contract missions are randomly generated events that occur organically, while the player is strolling the streets of Los Santos. Under most circumstances these tend to happen in general areas, not in a single specific location. The guide lists out all of these individual encounters and provides a very general level of assistance with how to address the situation. For example, someone is in the process of hijacking a bike. Plow into the person driving the bike with an SUV. Return the bike to its rightful owner. Sure that might be generalizing things a bit, but when objectives are this cut and dry there is no need to elaborate much further than what would be considered to be common sense. In that respect, the information provided proves to more than substantial enough.

The last batch of missions that are given their own sections are the “Hobbies and Pastimes.” Yes, there is actually MORE to GTA V than stealing cars and raising all hell. Why not spend time running drugs, assassinating public figures, collecting bail bond jumpers, skydiving, or even hunting? This is just a taste of the immense number of insanely varied experiences that the poor authors had to try and conceptualize for the reader. Somewhere in between trying to explain an in-game triathlon and a how to play an entire round of golf, it is hard not to feel sorry for the writer. Fortunately this is one of the areas where they do their best work informing the player of how to get the most out of the game. It is hard not to get a chuckle out of turning the page from detailed descriptions of how to past shooting range challenges, to the next page explaining in golf how to execute a proper punch shot from the fringe and the proper context in which it should be used. If there were ever a guide that kept things interesting, this would most certainly be it.

Everything doesn’t fit within the confines of these past for sections falls into a final miscellaneous collection, which wraps up the book. The finer points of picking up “ladies of ill repute,” getting the most out of private dances, and (totally not a joke) sexting, lead off this hodgepodge of ridiculousness that could only be featured within the confines of a Rockstar title. Add in countless collectables scattered throughout the map, special flight stunt missions, and purchasable properties, and this flushes out almost everything that Los Santos has to offer. One area of potential concern are the collectable maps. These call-outs have numbers that correspond to a more detailed image showing a more specific location and description. Though I was not able to find any specific cases of incorrect labeling, it would be very easy for this to occur and there have been a couple of reported cases of this online for this guide. So once again, proceed with caution when using these images and if something doesn’t look right, it probably isn’t.

As vastly comprehensive as this guide ends up being, it was disconcerting to see not even a mention of Grand Theft Auto V’s extremely ambitious online multiplayer. For obvious reasons, namely that this component of the game is STILL broken as of the date of this review, it probably was best left uncovered in the book. However, the lack of any mention whatsoever seems a bit disconcerting. This would be akin to requesting the history of a used vehicle and the dealership just throwing out the page that mentioned it was once washed away in a flood. This is a major component of a AAA release that as far as the reader is concerned doesn’t even exist.

If there was one thing that this work does amazing well, it is cramming an insane amount of content on one page. Every square inch of the parchment is loaded with either commentary or screenshots, both of which are laid out beautifully and uniformly. The flow reading from mission to mission is extremely logical and easy to follow, which is more than can be said for the guide of Rockstar’s previous release, Max Payne. Thankfully more thought seems to have been put into design this time around, and the result is a far more visually appealing experience.

Aside from the somewhat understandable absence of any sort of online coverage and a misprint or two, BradyGames’ glimpse into Los Santos is about as fully fleshed out as could be expected, given the game’s absurd scope. There are certainly areas where walkthroughs could have used a bit more meticulous, but when there are this many missions, it would be easy to start sounding overly repetitive and risk losing the reader’s interest. Fortunately there is more than enough covered within the guide’s stout 440 pages to help prolong many a criminal’s life and keep them far off of the straight and narrow. What else could an aspiring felon ever ask for?

SGR Rating: 4/5

Author: Tim Bogenn and Rick Barba
Publisher: BradyGames
Editions available: Paperback and Collector’s Edition
Acquired via Publisher

Filed Under: Strategy Guide Reviews

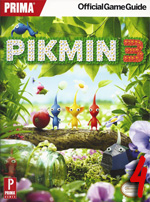
Pikmin 3 Strategy Guide Review

October 15, 2013 By Chris Nitz 5 Comments

Pikmin 3 strategy guide reviewWell, I finally cracked and went and bought a Wii U. The combination of Zelda themed system, free game, and Pikmin 3 helped to solidify this decision. I can honestly say that I am enjoying the system and I am glad I held off for just a bit on the purchase. Also, yes, Pikmin 3 is so much fun!

For those that might not remember, Pikmin is a game where the player is stranded on a strange world and they must use cute little creatures called Pikmin to tackle various tasks in order to get off the planet. The game is a mix of third-person action and strategy. Thankfully, Prima is here to help players get off this colorful world in as little time as possible with their Pikmin 3 strategy guide.

As this is the first time I have touched a Pikmin game in a few years, I spent a few moments familiarizing myself with it in the How to Play section. The author was kind enough to include controller breakdowns for the Wii U GamePad and Pro controller as well as the Wii Remote and Nunchuk. Anyone needing a slight refresher on how the game operates, this is a good starting point.

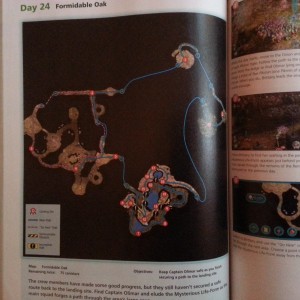
Old school GPS!

Old school GPS!

From there, the strategy guide jumps into the lengthy walkthrough portion. In here, there is a breakdown of each area by day. Tips on how to handle specific tasks, puzzles, or enemies are bountiful. Each new day starts with a map that shows the optimal path and stopping points to make the most efficient use of time. The day then ends with a checklist of tasks that hopefully players were able to finish off.

One of the best parts of this section is the detailed info on boss fights. While the bosses may not be overly complicated, the breakdown of the battle helped keep me from crying over seeing the tragedy that consists of Pikmin ghosts floating into the sky. In all honesty, this is one of the better boss battle step-by-step breakdowns I have read in some time.

From here, it is off to the Area Breakdown portion. This is a good compliment to the walkthrough as this contains key item locations and what is necessary to acquire them. Anyone running low on juice or just looking for a specific character, this is the place to come. Those that want to find all the data files will need to jump one more section, but it’s nothing too terrible as all the fruit locations are gone and only the files are highlighted. I think these two sections could have easily been combined, but neither of them are terribly long or complicated to quickly find help in.

The Art is way OP!

The Art is way OP!

Filling the next two sections is all kinds of goodies on the various characters scattered about as well as items and obstacles. If there is an enemy that is causing trouble, there is a good chance some battle plans can be made while reading up on their behavior here. These two areas are great for research, but I did not heavily rely on them.

Now, those who beat the game, or just want a diversion, the Missions provide a decent challenge. In this chapter, the author gives readers a fair amount of tactics on how to best achieve platinum status on every mission. I spent a few minutes reading the recommended tactics and looking over the map. While this did not yield a perfect run every time, it did make things quite a bit easier.

The last two items the guide covers are the Bingo Battles and a big checklist of things to accomplish in the game. The Bingo Battles are just a collection of maps of each stage while the checklist gives readers an aid to helping them keep completes objectives under control.

I want to take a moment to just compliment Prima on the art work they included on this guide. Instead of the usual game art assets, Prima used plastic models and terrain to setup scenes throughout the guide. This is something that caught me off guard, but I thoroughly appreciated. I found more than once being sucked into the pictures and just staring at it for a good amount of time. It might seem like a small touch, but one that made me appreciate the guide that much more.

Is this Apple Maps or something?

Is this Apple Maps or something?

The single factor that starts to take away from the Pikmin 3 strategy guide is when it comes to navigation through its bountiful pages, especially the walkthrough portion. You see, this section is broken down by days, which makes sense at first, but it quickly becomes a nightmare the deeper into the game one goes. As the goals start to become harder to obtain, I found myself flipping back and forth between Walkthrough, Area Breakdown, and to a lesser extent, Characters, rather frequently. Thankfully I did this before jumping into each day, but it did add some time as I looked at what needed to be done, study the map, read up on new enemies, memorize fruit locations, and hope that I did not forget anything at the same time. Yup, it sucks when the cat tips the book off the couch at night and your bookmark slips out and you have to spend some time trying to figure out where you were in the guide as your days no longer match up due to having to take an extra day to finish up the prior’s activities.

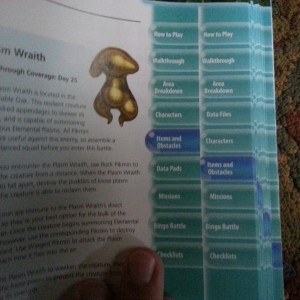
Easing the navigation is a tabbed reference system on the right side of the book. I found this to be immensely helpful as I was constantly flipping through the book. There is one small issue with this tabbed system in that the first 187 pages, it reads: Characters/Items and Obstacles/Data Pads. Yet, on page 189 that suddenly changes to Data Files/Characters/Items and Obstacles. Yes, that did cause some confusion at first and why it changes is beyond me.

Despite the massive amount of thumbing from section to section during my time in Pikmin 3, this is a rock solid strategy guide for anyone trying to get through this strange new world in as little time as possible, and without starving to death. The boss battle info and artwork in this guide are damn near worth the entry fee alone. Oh Pikmin, why must you be so friggin cute!

SGR Rating 4/5

Author: Nick von Esmarch
Publisher: Prima Games
Editions Available: Paperback
Acquired via Publisher
Filed Under: Strategy Guide Reviews

  • « Previous Page
  • 1
  • …
  • 16
  • 17
  • 18
  • 19
  • 20
  • …
  • 44
  • Next Page »

Follow us!

Subscribe!

Upcoming Strategy Guides

 Nothing here. Come back later. 😢

Latest Strategy Guide Reviews

The Walkthrough by Doug Walsh Review

Red Dead Redemption 2 Strategy Guide Review

Mega Man 11 Strategy Guide Review

God of War Strategy Guide Review

Far Cry 5 Strategy Guide Review

Friends of SGR

  • BradyGames
  • Dan Birlew – Guide Writer
  • Doug Walsh – Guide Writer
  • Future Press
  • Game Enthus
  • GameWires.com
  • Piggyback
  • Press the Buttons
  • Prima Games
  • Racing Games

Top Posts & Pages

  • Unboxing the Epic Mickey Collector's Edition Strategy Guide

Copyright © 2025 · Web crafted by Warkhammer


Loading Comments...