• Home
  • About Us
  • Podcast
  • Strategy Guide Wit
  • Contact

Strategy Guide Reviews

A Strategy Guide for your Strategy Guides

  • Reviews
    • Strategy Guide Reviews
    • Video Game Reviews
    • Mini-Reviews
  • Features
    • Interviews
  • News
  • Unboxing Strategy Guides
  • Columns
    • Gaming Diary
    • Corner of Randomness
  • Videos

LittleBigPlanet: Karting Strategy Strategy Guide Review

January 22, 2013 By Chris Nitz Leave a Comment

LittleBigPlanet Karting strategy guide reviewI am a big fan of kart racing games. Ever since Mario Kart first dropped on the SNES, my enjoyment of these games has spanned over eight consoles and covered everything from Crash Bandicoot to Diddy Kong. Now I get to take my favorite SackBoy for a romp in a kart through cardboard courses and collect stickers along the way, all thanks to LittleBigPlanet: Karting. It is sooooo much fun!

Prima also seems to like the world of imagination and racing because they pumped out a LittleBigPlanet: Karting strategy guide for us wannabe Mario Andretti racers. One would expect that cracking open the guide would immediately lead to the basics of how to control that amazing Bento Box, but this is not the case. Instead, we find concept art for stages, characters, and stickers. While this caught me by surprise, I loved it as it warmed me up the whimsical world I was about to partake. Don’t worry, the basics of braking, prize bubbles, and drifting come right after this, but take a moment to enjoy the art assets that the developers work hard at producing.

Better than GPS

Better than GPS

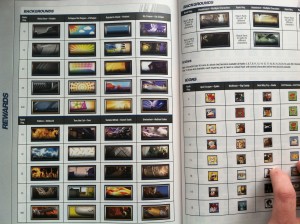
After the basics, it is time to dive into the story mode. The authors breakdown each new event type, how many prize bubbles are scattered about the track, and list all the rewards earned for that stage. This is where the detailed maps of every race come in handy as they show where one may find all the prize bubbles along with things such as launch points, jet packs, weaponators, and such. Concluding each race, they go into detail on what to watch out for during the event, how to obtain some of the harder to find items, and general tips on how to defeat the opponents. While this might be a racing game, I found that studying each event before I jumped into it in the game very helpful and led to fewer missed items and a lot less retries.

Scattered amongst the story section are the challenge races that unlock as the game progresses. Take some time to read these as they offer great advice on how to tackle each challenge, as these are no joke. For example, the first one that unlocks is a drifting course where the only way to unlock all the loot is to score 60,000+ points. The guide breaks down the course and offers up that it is best to use the first drifting boost instead of building it up to the maximum, as it takes far too long to snag that big burst of speed. Completing these challenges still ultimately comes down to player skill, but the advice offered here is invaluable.

LBP_Karting_Guide_Review_2

Excel, eat your heart out!

The last few pages go to the creation mode and end with the trophy list. Anyone who spent time in LittleBigPlanet 1 or 2 will immediately feel at home and so the creation section is more of a refresher on popit use as well as explaining the details behind the unique items available to track building. Newbies to this whole world building process will want to spend some time reading the pages here as they do offer up a bit more info than what the game does. There is good stuff here for all players, and master designers will find themselves coming back to this section during their building process.

There are a few potholes to all this, however. I found the guide took some time to sift through to find the current race I was on or the challenge mode I was tackling at the time. I also found a few prize bubbles I could not snag and the strategy guide said nothing about how to obtain them. These are far and few between, so they don’t necessarily constitute a deal breaker.

For a game that does not immediately feel like a strategy guide is necessary, I found myself using this a lot. Sure, there are a few points that I wish contained more detail on how to grab this or that, but overall this is fairly thorough and useful. Anyone that wants to have every sticker and kart customization piece available to them, the LittleBigPlanet: Karting strategy guide is your Bible!

SGR Rating 4/5

Author: Dean Leng and Ronald Gaffud
Publisher: Prima Games
Editions Available: Paperback
Acquired via Publisher

Filed Under: Strategy Guide Reviews

Far Cry 3 Strategy Guide Review

January 17, 2013 By Blake Grundman Leave a Comment

FC3-ratingIn this day and age it is legitimately rare for a AAA game to catch critics off guard. Probably the biggest exception to that rule in 2012 was Ubisoft’s late-November release, Far Cry 3. Not only did the game’s runaway success come completely out of left field, but many sites ended up considering it as a potential Game of the Year. Does Prima’s official guide live up to the same high standards, or does this open world shooter provide too many opportunities for details to slip through the editorial cracks?

First-person shooters tend to be extremely straightforward and provide a rigidly scripted experience for players. For this reason the idea of a guide for a game like Call of Duty is borderline laughable. All players really need to know for this brand of shooter is the continuous progression of, “see bad dude, shoot at bad dude, turn bad dude into fleshy meat blanket, follow blood trail to next pack of bad dudes.” Far Cry 3, in a refreshing vacation from the norm, exists on the polar opposite end of this spectrum. The game features a completely open world and mission structure that leave virtually all decisions in the hands of the player. For this reason, a game guide could prove to be an indispensable way to make the most of each session in the title’s massive sandbox of destruction.

Cracking the cover unleashes a bevy of developer access special features, which demonstrates how close Prima and Ubisoft worked in the production of the guide. Those that are fascinated by the development process will be in for a treat. Included are exclusive pieces concept art, straight from the team at Ubisoft Montreal. Along with a beautiful full two page spread for each of the game’s core characters, complete with fully page portrait, is a neat feature on how the studio came about the model design of the core villain, Vaas. Though most of the information in the descriptions could be gleaned through simply playing through the campaign, it is nice to read through these sections to get a good idea as to how each person fits into the overall universe of Far Cry 3. Plus, to put it bluntly, most of the portraits are a feast for the eye. Wrapping up the “Behind the Scenes” section is a collection of concept art highlighting different aspects of the tropical sandbox’s design. Accompanying the lush visuals are quotes from several key members of the development team, further explaining the images and how they fit into the game’s all-encompassing design.

Once the far too brief peek behind the curtain comes to a close, the introduction continues into the usual nitty-gritty basics of game mechanics such as different attack techniques, methods for reconnaissance, self-healing and a litany of other topics central to the success of a player. Following the predictable approach, this section is followed by breakdowns of each weapon’s stats. Just be aware that this contains details for both the freely available and unlockable firearms, as well as the criteria for accessing the aforementioned locked artillery. After the firepower is well in hand, the hunting of wild game, powering up abilities though the skill tree and the various forms vehicular navigation are all covered in sufficient enough detail to set a player’s mind at ease.

With all of the formalities out of the way, the guide wastes no time jumping into the campaign walkthrough. Early on it is noted that each of Far Cry 3’s thirty-nine story missions are open to being completed in many different ways, but the text tends to lean more towards a more patient, stealthy approach. Under most circumstances the sneaky method mentioned in each mission write-up not only provides the player with a good way to start each section, but along with it, the reasoning WHY it is the best way to go about accomplishing an objective. The additional narrative helps support the author’s logic, and also helps teach players the best way to handle similar scenarios. Also, pay close attention to the many “TIP,” “CAUTION,” and “NOTE” call-out sections, because oftentimes these share information that might not necessarily be pertinent to the specific mission, but may help save time down the road.

There are a couple of specific elements that the entire campaign walkthrough does exceptionally well. For one, the reader isn’t ever at a loss for in-game screenshots illustrating the specific points being discussed in the text. No need for image hunting here, because the layout is extremely effective in assuring the reader never has to look any further than the text margin. Tying up the up the layout with a neat little bow is the use of larger, most likely developer provided art assets, to fill what might have otherwise be unoccupied white space. Secondly, the body of commentary finds a way to strike a fantastic balance between effectively explaining how the mission fits into the context of the entire plot, while not allowing it to muddy the instructional portion of each set piece.

Along with the straightforward storyline comes a collection of additional missions that can be completed at just about any point during a playthrough of Far Cry 3. The individual missions are organized by their objective type, which include side story missions, scoring challenges, wild game hunts, and assassinations, just to name a few. Each quest is broken down in the most straightforward manner possible, many consisting of only a paragraph or two, along with what the payout or unlockable is upon completion. Most times this is really all that is necessary in order to steer the reader in the right direction.

As is usually the case with single player focused games of this nature, the multiplayer section is practically non-existent. After a brief description of each playable character in the co-op mode, key multiplayer concepts are tentatively delved into. Features such as leveling, airdrops and the flash drives awarded post-match are all afforded a couple of paragraphs, mostly consisting of restating the obvious. The last piece of the multiplayer breakdown is spelling out the objectives of the four match types. For some reason there are no specific multiplayer maps discussed. Perhaps maps are overlooked due to the map editor that ships with the game, but regardless, the complete lack of any sort of commentary or acknowledgement of the obvious absence seems odd.

Fortunately the disappointment of the previous four pages (yes, multiplayer is only four pages long) is short lived, thanks to the massively comprehensive outpost and radio tower segment. Every single one of the game’s thirty four outposts are analyzed concisely, showing both its location on the world map, as well as sharing valuable information as to the best methods of infiltration. Additional overhead shots of the area can further help players indulge their inner Paton, even planning out their own ambitious scheme of attack. It is worth noting that squeezing two outposts per page works well for a layout most of the time. However, when a given description is overly brief there tends to be rather large sections of the page left unutilized. The radio tower section unfortunately continues using this arrangement to breakdown most of the sprawling map’s eighteen key communication locations. Much like the outposts, these points are called out on a world map, along with a location screenshot and brief commentary on the most effective approach to scaling the tower. Though the design of these cumulative pieces tend to leave quite a bit of wasted space on the page, what is contained will be more than enough to set a player well on their way towards map navigation supremacy.

And what would a thorough guide be without a collectables section to round out the book? Each of the one hundred and twenty relics are numbered on the world map, which in turn ties into their number listing in the text. To go along with a textual description of each hiding place is a screenshot to provide players with additional context of where to look in regards to all of the foliage draped surroundings. Additionally, there are twenty letters from deceased military personnel scattered throughout. These are given the same detailed treatment of the previously mentioned relics.

Writing and designing a guide for an enormous world like Far Cry 3’s must assuredly be an exhaustively time-consuming task. Fortunately the author was more than up to it. Aside from the occasional lapse in page design, the book manages to provide extremely relevant guidance to the reader, without overwhelming them with too much information. Despite being slanted towards the stealth approach, much of the direction provided is useful to any gameplay methodology. Even when considering the blatantly transparent multiplayer portion, the quality of everything else more than helps it recover brilliantly. Those looking to venture into the tropical wilds of Far Cry 3 should definitely make sure to have this tome in their pack.

SGR Rating: 4.5/5

Author: Thomas Hindmarch
Publisher: Prima Games
Editions available: Paperback
Acquired via Publisher

Filed Under: Strategy Guide Reviews

PlayStation All-Stars: Battle Royale Strategy Guide Review

December 20, 2012 By Chris Nitz 3 Comments

PlayStation All-Stars Battle Royale strategy guide reviewI sure have reviewed a mess of fighting games this year, and I am ending it with a brand new entry into the genre. PlayStation All-Stars: Battle Royale is an ambitious game in that it combines some of my favorite PlayStation icons, throws them into an arena where only one may survive, and then lets me fight it out ala Smash Bros style. Boy was I glad to have Prima‘s PlayStation All-Stars: Battle Royale strategy guide by my side for this jaunt into unfamiliar territory.

Like all good fighting game strategy guides, Prima started with a look at the game mechanics. Now what threw me for a loop is the fact that this is the first guide to include an actual Vita button scheme breakdown. I would also normally recommend that veterans skim this portion of the guide while novices invest some time reading every detail. However, with this being a totally new game, I found it to be extremely useful. It made walking into the arena that much more bearable as I was not futzing around trying to learn how this fighter worked, how the UI presented info, or how combo strings worked. So spend some time here, as there is a good amount of info that will aid any brawler.

Level breakdowns…OMG!

After readers wrap their head around how a ring-out works or how the nudge mechanics alter your movement, it is time to pick that favorite character or three and read up on their techniques, strengths, and weaknesses. The authors do a nice job of going into great detail for each playable character in this game. What I enjoyed is that it is not all charts and move listings, but rather some text allowing readers to figure out how to incorporate a particular move or combo into their fighting toolbox. Seriously, spending some time studying this portion while utilizing the training room made life so much easier.

Now we get to what is probably my favorite section of this guide: the levels chapter. This caught me by surprise, as I have not had a chance to see something like this in other fighting game guides. Things like how a stage changes over the course of battle, trouble spots, Easter eggs, and strategies all get their moment in the sun here. It not only helps players learn the battlegrounds, but it also shows how much effort went into making fun and unique arenas.

From there it is onto the extra pieces that bring this game together, starting with the various items for use. This includes a small detailed section on what an item does, its game of origin, and some stats on why one may want to use an LR-3 Railgun over a Leech Beam.

Following items is a small portion dedicated to getting people through the arcade mode. I found this rather thorough in how to handle each fight, while not being overly preachy. I did rely on the characters portion a bit as well to help me finish this mode with ease.

Completionists will undoubtedly spend a bit of time in the combat trials area. The writers break down what needs to be accomplished in order to succeed in obtaining every rank and bonus. The description is also a key to handling the various trials, but these are no joke so be prepared to get frustrated as no amount of reading can prepare one for the skills necessary.

The last pages contain all the rewards, goals, and trophies. Anyone looking at how to obtain a Fat Princess icon or Sly Cooper wallpaper will find these areas invaluable. I do admit, looking through this again, I want to go back and try to score a few trophies and eye candy items. Completion junkies, this is your bread and butter.

So much eye candy to collect!

I guess the downside to this strategy guide lies in the character breakdown section, and honestly this is just a minor nitpick. Each character ends with a nice chunk on advanced strategies. I found these more as a starting point on how this fighter differs from others and some basic techniques I need to nail down before jumping online. As any fighting veteran knows, duking it out online requires a completely new skill-set versus playing AI opponents. In addition, as Sony introduces game balances, these strategies may shift and change throughout the life of this game. Again, this is not the fault of Prima but rather the nature of the beast.

While I have my issues with how PlayStation All-Stars: Battle Royale plays and behaves, this is one of the best fighting strategy guides I have reviewed. The stage section and goodies portions make it worthwhile alone. I must also say, I played the Vita version of the game and this guide required almost no translation to provide its full benefits. This is the missing manual for the game.

SGR Rating 4/5

Author: Josh Richardson, David Brothers, Sam Bishop
Publisher: Prima Games
Editions Available: Paperback
Acquired via Publisher

Filed Under: Strategy Guide Features, Strategy Guide Reviews

Assassin’s Creed III Strategy Guide Review

December 11, 2012 By Keri Honea Leave a Comment

Assassin's Creed III strategy guide review
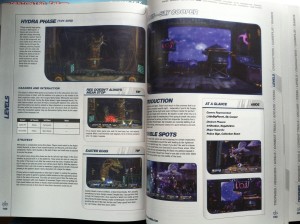
Assassin’s Creed III has been one of this year’s most highly anticipated games, and it’s also been one of my most highly anticipated strategy guides. After how well Piggyback bounced from the Assassin’s Creed II strategy guide to the Assassin’s Creed: Brotherhood strategy guide, my expectations were high. The Assassin’s Creed III strategy guide better be on par with Brotherhood, or words would roll in anger. When I learned that the side questing world of AC3 was the largest it’s ever been in AC games, the bar rose even higher. I shouldn’t have worried; the Assassin’s Creed III strategy guide provided everything it needed to, and then went above and beyond what was called for. What’s more, I never could have gotten nearly as far as I did with the game thanks to all of its glorious bugs without the guide holding my hand and constantly letting me know it was going to be okay. Otherwise, the game would have suffered a terminal case of defenestration.

I rarely look in the beginning of strategy guides, where all of the information about how to play is held, as I fully expect the game to teach me as I go. Usually this is the case, but as I recently lamented, sometimes it is not. With AC3, the game did teach, but sometimes the tutorial prompts flashed too quickly, so I wasn’t able to see what buttons or combinations of buttons I needed to press. For example, early on, I missed what I needed to press to prompt Haytham to reload his rifle. Since I could only kill these enemies with a gun, I couldn’t drop my useless weapon and go stabbity-stabbity. I literally pressed every button before I paused the game and checked to see what the strategy guide said. I’ve never been so thankful before for the existence of this how-to-play section, as I quite literally couldn’t have completed this sequence without some reference. It was easy to find, which was perhaps the most important aspect next to having accurate information (which it did).

Assassin's Creed III strategy guide

It’s hard to get lost with this level of detail.

For someone who hates stealth as much as me, the walkthroughs greatly helped me maneuver all areas the first time and with little difficulty. As shown in the scan on the right, the screenshots are large and depict the recommended path for 100% synchronization clearly. Obtaining 100% synchronization (including the optional objectives) takes more skill than a strategy guide can provide, but each time I actually attempted to complete all of the optional objectives, I was able to with ease.

More often than not, the strategy guide’s walkthroughs showed me escape routes I never considered. For instance, using the page on the right, when Haytham has to escape the British fort without being seen and return to Kaniehti:io, the guide suggests that Haytham take a swim. I wouldn’t have thought of that initially for two reasons: 1) the last time I made Haytham take a dip, he died upon impact and 2) it seemed like it would cause an instant desynchronization. Also, it was so foggy, it was hard to see that there was water below instead of a rocky death.

Assassin's Creed III strategy guide

Only excuse to not find every collectible now is laziness.

Unlike previous Assassin’s Creed games, AC3’s main storyline is rather short. The quantity of side quests grossly makes up for the story’s brevity, however. In fact, I’d say that less than one quarter of the strategy guide is the main walkthrough. The side questing takes up at least one full quarter of the book. Most of the side quests are collectibles, whether it’s an actual collectible (Ben Franklin’s Almanac pages) or a collectible quest (Frontiersman Challenges). As a result, the side questing section is practically filled with maps marking locations for every possible extra quest Connor can complete while in an area.

The large maps with actual collectible markers include screenshots of where the wayward collectible is hiding. For all of the missions, such as the Liberation missions and Naval missions, each set is treated similarly to the main walkthrough. Each mission has its set of screenshots with marked pathways and strategies for completion. It even includes tips for where Connor should be equipment-wise and story-wise for easier navigation and higher success rate.

What really makes the Assassin’s Creed III strategy guide shine are the Reference & Analysis and the Extras sections, of which the AC guides in general have been stellar. The Reference & Analysis section contains detailed appendices (and an index!) of everything you can think of to find, collect, kill, etc. in the game, which is a must for those who want to skin every animal and earn every Achievement/Trophy. The strategy guide even includes tips for how to earn every Achievement/Trophy instead of simply listing them, which earns double brownie points.

The Extras section includes a detailed analysis of the story, speculation of what happened and what is to come from Piggyback, and a detailed comparison of history vs. game story. I love this last part the most, as I love breaking down fact from fiction in historical movies as it is.

The world of Assassin’s Creed III is massive, to say the least, and I can’t imagine tackling something this big without some guidance. As someone who gets easily overwhelmed with large worlds (hence why I have yet to really play Skyrim), the Assassin’s Creed III strategy guide was the perfect compass and anchor for me. Not to mention, it also kept me sane during the buggy gameplay I encountered. If you absolutely, positively want to do everything AC3 has to offer, the Assassin’s Creed III strategy guide is the best friend you’re going to have.

SGR Rating: 5/5

Author: James Price
Publisher: Piggyback
Editions available: Paperback and Collector’s Edition
Acquired via Publisher

Filed Under: Strategy Guide Reviews

Paper Mario: Sticker Star Strategy Guide Review

December 4, 2012 By Keri Honea 1 Comment

Paper Mario Sticker Star strategy guide reviewI haven’t really played a Mario game since Super Mario Bros. 3 for the NES. I played Paper Mario: The Thousand Year Door for maybe thirty minutes once, but that hardly counts. I liked what little I played of that GameCube game, and that’s the only reason why I bothered giving Paper Mario: Sticker Star a chance. Since it had been so long since I’ve touched a Mario game, I knew I would need the Paper Mario: Sticker Star strategy guide to hold my hand, as I was sure not playing a Mario game for about twenty years (I’m going to go cry in a corner now) would be more of a hindrance than a help. Nintendo is well known for building upon each game over the franchise’s lifetime (If you don’t believe me, go look at the Legend of Zelda series), so surely there were several elements they wouldn’t teach the player because it is assumed the player is already in the know. I was absolutely right about this assumption, and if it wasn’t for the strategy guide, I would have most likely rage quit the game before finishing the first world. As for the rest of the strategy guide, it nailed everything players will have to do to prepare for each level, complete all collectible side quests, and to beat each boss the first try.  I couldn’t have asked for a more perfect strategy guide for my foray back into the world of Mario.

As I previously mentioned, the game really does not provide a tutorial in how to play. There is kind of a tutorial with the turn-based combat, how to initiate battle, how to activate the battle spinner, how to peel stickers, sort your sticker album, etc. However, the game does not teach players how to successfully perform attacks in battle. Those who are familiar with traditional JRPG turn-based battle know that all you have to do is select your attack and watch what happens. In PMSS, players have to interact with the attacks to make them more successful. For example, if you use a Jump sticker, you must continually press the jump button just before Mario lands on the enemy’s head to continue the jump attack through completion. Otherwise, Mario will only jump once and move on. With hammer attacks, players have to press the A button at just the right moment to trigger a powerful hammer swing, or the hammer will slide off the handle and Mario will only smack the Goomba with the stick. The game goes over none of this, as I believe it assumes players already know this from playing other Paper Mario games. After watching my hammer become effectively useless over and over and over, I finally resorted to reading the “How to Play” section in the strategy guide. Lo and behold, I was doing it wrong, and oh hey, look at all these other things I should be doing to help out Mario live longer in battle. To quote another Nintendo game, grumble grumble.

Paper Mario: Sticker Star strategy guide

Can’t ask for better preparation than this.

In addition to interactive turn-based play, PMSS really calls on some creative thinking to fully complete some levels, meaning finding all of the Things or opening all potential pathways. For example, to find the Bowling Trophy Thing, you first have to find a Bowling Ball Thing in one level, remember that there is a bowling alley-looking area in one world several levels back, make a Bowling Ball Sticker, release it in this area, and then go rummage back through another secret area in the level to collect the Trophy Thing. Who thinks of this? What’s more, who thinks of retraversing previously visited levels this much? I’m used to side quests triggering such additional exploration, but this requires simply just going back over the level for the heck of it.

The same creativity is pretty much required when battling bosses. Certain Thing Stickers will make Mario’s life ten times easier when fighting bosses, and sometimes it’s obvious what is needed and sometimes it’s not. For example, when Mario found the Fish Hook Thing, it was obvious that I would need this against some giant fish, which was true when battling the Giant Cheep Cheep. However, I never would have thought to bring the Baseball Bat Sticker to the boss fight against the Tower Power Pokey in Drybake Stadium. Thanks to the preparation page in the beginning of each level in the guide, I came to all levels with my Sticker Album fully stocked with everything I would possibly need.

This preparation page also gives players a heads up on all side quest items available in each level, and lets players know if these items can be found in the first visit or subsequent visits, which includes Things, Wiggler Diary Entries, Luigi Locations, bullied Toads, and HP-Up Hearts. All walkthroughs for subsequent visits for the levels are at the end of the level’s main walkthrough. There is no excuse for missing anything with this strategy guide at your side, and that includes completing the monstrous Sticker Museum side quest.

The Paper Mario: Sticker Star strategy guide was a saving grace for this Mario novice. The fact that it’s one of the most organized and efficient strategy guides I have ever come across definitely made life in the Mushroom Kingdom even easier to bear. I was hoping to come through the game as unscarred as possible, and I came out of it a completionist. I can’t give higher praise than that.

SGR Rating: 5/5

Author: Nick von Esmarch
Publisher: Prima Games
Editions Available: Paperback
Acquired via Publisher

Filed Under: Strategy Guide Reviews

  • « Previous Page
  • 1
  • …
  • 20
  • 21
  • 22
  • 23
  • 24
  • …
  • 44
  • Next Page »

Follow us!

Subscribe!

Upcoming Strategy Guides

 Nothing here. Come back later. 😢

Latest Strategy Guide Reviews

The Walkthrough by Doug Walsh Review

Red Dead Redemption 2 Strategy Guide Review

Mega Man 11 Strategy Guide Review

God of War Strategy Guide Review

Far Cry 5 Strategy Guide Review

Friends of SGR

  • BradyGames
  • Dan Birlew – Guide Writer
  • Doug Walsh – Guide Writer
  • Future Press
  • Game Enthus
  • GameWires.com
  • Piggyback
  • Press the Buttons
  • Prima Games
  • Racing Games

Top Posts & Pages

  • Final Fantasy III Strategy Guide review by FuturePress
  • Unboxing the Epic Mickey Collector's Edition Strategy Guide

Copyright © 2025 · Web crafted by Warkhammer


Loading Comments...