• Home
  • About Us
  • Podcast
  • Strategy Guide Wit
  • Contact

Strategy Guide Reviews

A Strategy Guide for your Strategy Guides

  • Reviews
    • Strategy Guide Reviews
    • Video Game Reviews
    • Mini-Reviews
  • Features
    • Interviews
  • News
  • Unboxing Strategy Guides
  • Columns
    • Gaming Diary
    • Corner of Randomness
  • Videos

Halo 4 Strategy Guide Review

November 20, 2012 By Keri Honea 1 Comment

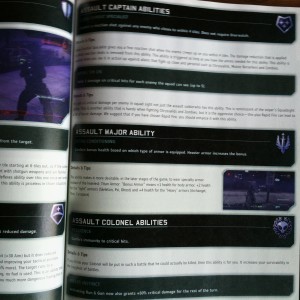
Halo 4 strategy guide reviewHalo 4 has undoubtedly been one of the most anticipated titles of 2012. A new studio took over the franchise, there’s a whole new story to delve into, and, most importantly for this site, the strategy guide duties are going back to Prima Games. Both 343 and Prima Games had a lot of expectations to live up to, to say the least. While the Halo 4 strategy guide isn’t perfect, it’s an exceptional strategy guide that is well presented, well written, and well, uh, strategized.

The Halo 4 strategy guide is put together extremely well, and it’s very obvious that the writing team put together a lot of effort into the book. They even contracted with Major League Gaming to help with constructing the multiplayer portion, and those who purchased the collector’s edition of the guide received separate stock pages of the multiplayer maps, complete with tips directly from MLG on how to dominate the maps. The multiplayer section is jam-packed with tips from four MLG players who have pretty much lived and breathed nothing but Halo multiplayer for several years. Many of the tips I never thought of, and I had a blast employing a few, even in the single-player campaign. The multiplayer portion can’t really be anything but tips, as gameplay constantly changes with the different players in each match, but the tips are invaluable, especially for people like me who don’t spend a lot of time in multiplayer, if ever.

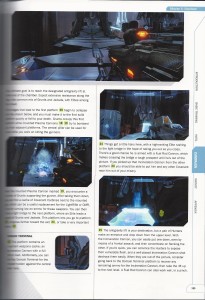
But why do you really buy a strategy guide? It’s for the single-player campaign, correct? The levels in Halo 4 were far more linear than the last couple of Halo games, where I easily found myself lost and walking in circles. As such, I didn’t rely on the strategy guide as often as I have with previous Halo games, but when I did, for the most part, the strategy guide was a life saver. The main walkthrough was broken up into eight chapters for the eight missions, and each mission was basically broken up into “Firefight” sections. At each instance of a major firefight, the guide introduced a new map, a recommended loadout for the firefight, and any pertinent strategies for playing on Legendary difficulty. The maps are marked with spots to pick up specific weapons, which I often needed when I wanted to see where I could refill ammo for a preferred weapon, such as the Binary Rifle or Incineration Cannon. The maps were also marked with numbers, which corresponded to specific locales mentioned in the written walkthrough. When you aren’t following along the strategy guide verbatim, these numbers were fantastic for quickly looking up where I was in the walkthrough.

Halo 4 strategy guide

Oh, THERE’S that Domain Terminal!

One complaint I did have with the maps was the lack of marking the locations of the Domain Terminals, the only collectible in the entire game. The Domain Terminals were highlighted in the written walkthrough, but that was the only thing that distinguished them from the rest of the guide. To locate the Domain Terminals on the map, you had to go by the corresponding number from that part of the walkthrough. The strategy guide did contain a separate appendix in the back for help finding any wayward Domain Terminals, but I’d rather have all of this information upfront in the walkthrough the first time. There were numerous instances where I missed a Domain Terminal simply because I wasn’t following the guide verbatim and they weren’t clearly marked on maps.

Another thing I was disappointed that was missing from the mission walkthroughs was tips for completing the task-specific Achievements for missions. All Achievements are listed in their own appendix in the back, but the appendix offers zero tips on how to accomplish them. In the strategy guide for Halo 3,each chapter listed any chapter-specific Achievements available in the beginning, and then the walkthrough pointed out the best place to obtain them. The Halo 4 strategy guide doesn’t offer this at all, and a few Achievements have left me scratching my head as to how to get them. For example, the “Explore the Floor” Achievement is earned after tricking a Hunter to fall to his death in Mission 6. Knowing this at the beginning of the mission would have been welcome knowledge, and it would also be nice to know the best strategy for accomplishing this. Where is the best place? How? I hate battling against Hunters with every fiber of my being, so without some hints on how to do this, I’ll never try for this Achievement.

Other than those two nit-picky complaints, I came away very satisfied with the Halo 4 strategy guide. I wouldn’t have survived some of the nasty firefights as quickly as I did without this strategy guide, and in this end. That’s all I can really ask for–can I please finish the game without wanting to flip my coffee table in rage?

SGR Rating: 4/5

Authors: Alexander Musa, David S. J. Hodgson, Raphael Van Lierop, and Major League Gaming
Publisher: Prima Games
Editions Available: Paperback and Collector’s Edition
Acquired via Publisher
Filed Under: Strategy Guide Reviews

XCOM: Enemy Unknown Strategy Guide Review

November 15, 2012 By Chris Nitz Leave a Comment

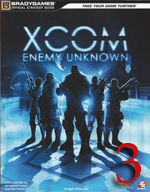
XCOM: Enemy Unknown strategy guide reviewI hate to admit this, but XCOM: Enemy Unknown never entered my radar until the day it released and I realized it was a strategy game. All that time I ignored it thinking it was a shooter. I hang my head in shame, but I also admit that this is one of the best games to release this year. Well, that is if you are into commanding marines to protect us from aliens.

As for the XCOM: Enemy Unknown strategy guide, well, it is a bit of a mixed bag. Let me start with the negatives, beginning with the fact that the cover says it includes the PC but many of the controls listed throughout the guide neglect to state the PC commands. For example, in the Basics chapter it tries to detail how to move the camera with the right control stick while zooming in and out is mapped to the L (XBOX) or L2 (PS3) buttons. Nowhere does it state that PC gamers rotate the camera with the Q and E keys or that zooming comes courtesy of the mouse scroll wheel. Yes, I know I can play the game with a controller, but I prefer a mouse and keyboard.

Wait, what do I do on the PC?

Next, readers have to endure some bad editing and sporadic information that contradicts itself. By bad editing, I mean spaces missing between words and spelling errors. For the contradictory information, there are heaps of tables detailing items from the game and then a blurb on said item and its advantages/disadvantages. These generally pull a screen capture showing some significant number, but then the blurb contradicts what the screenshot shows. So anyone studying this guide as a bit of pre-planning before tackling a mission will want to confirm what they read in the guide with what the game tells them.

Finally, we get to the beast that is XCOM itself. Those who don’t know, this is a game of randomness. Random missions, different troops for every replay, and a lot of death all play a major role in making this game entertaining while baiting players to chuck their control devices in frustration as their favorite marine dies due to a sneaky alien. This also makes it difficult to write a detailed walkthrough of the game. Therefore, anyone expecting to see complex maps or tips on how to tackle a specific instance in a particular mission is sorely at a loss here. That is just the downfall of a game such as this.

So what is good about this guide. Well, while it pretty much regurgitates in-game information, it presents it in an easy to read manner. The walkthrough may not contain every little area of the game, in fact the last mission is the only thing receiving immense details, but it does help players determine when it is best to research this item or that weapon. This is very handy for those times when debating on whether it is better to go for an upgrade to armor or progress the story and bring on tougher enemies.

While readers may not find the walkthrough overly fantastic, the Research Lab and Barracks sections are full of goodies that ease the burden of strategy. These areas make all the in-game information fast and easy to read, with the keyword being fast. I saved a fair amount of time and money on development/building, thanks to these two chapters. Even assembling my team was easier thanks to knowing the capabilities and weakness of each class. I spent the bulk of my gaming time here as I found them the most useful of the entire guide.

So that is why I love the Assault class!

The multiplayer portion is kind of a combination of the Research Lab, Barracks, and Walkthrough chapters. Summaries of how to build a squad, equipment stats, enemy details, and whatnot all come with blurbs on what makes a unit great to have in a squad or what to watch for in a particular baddie. Plenty of charts crammed full of numbers help speed up the decision-making processes compliment all this.

We finally arrive at the end of the guide, which happens to be 25-pages of art. Now I love a good art book, so this totally made me happy. If you’re not into screenshots or concept art, this will most certainly feel like wasted space. However, it is nice to see artists sketches turned into gaming assets.

At the end of the day, the XCOM: Enemy Unknown strategy guide takes the information in the game and presents it in an easier to read fashion. This is for those players that want to quickly glance down and find what they are looking for fast and effortlessly. Those players wanting some handholding through the entire game will want to stick to whatever they can find online. This is a decent guide that helps fans figure out how to tackle a game that punishes without remorse.

SGR Rating 3/5

Author: Tom Bogenn, Kenny Sims
Publisher: BradyGames
Editions Available: Paperback
Acquired via Publisher

Filed Under: Strategy Guide Reviews

Medal of Honor Warfighter Strategy Guide Review

November 14, 2012 By Keri Honea 4 Comments

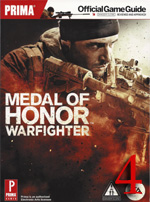
Medal of Honor Warfighter strategy guide reviewMedal of Honor Warfighter‘s single-player campaign is incredibly short, even for a first-person shooter. Not only that, but it’s linear to the point that your options for developing a creative strategy for, well, anything is pretty much stifled. While I was playing, even I started to wonder what the point of developing this strategy guide was. However, as linear and short Warfighter is, sometimes help was needed, especially if I didn’t pay attention to the characters’ chatter (which was boring, by the way). Not to mention, if it wasn’t for the guide, I would have rage quit within 30 minutes, and this is all before I even touched the multiplayer portion of the game. In other words, the Medal of Honor Warfighter strategy guide definitely served its purpose, and in addition, it presented one of the best layouts for a guide I have ever come across. Not to mention, the tips provided in the multiplayer section helped this complete newbie to FPS multiplayer develop a strategy for the maps.

Since there isn’t much to the single-player campaign when it comes to story or even length of the missions, there really isn’t a lot of writing to be had in the walkthrough portion, and it really wasn’t necessary either. Most of the text is in the beginning of each mission, which nicely lays out the mission map, the mission’s objectives, the story recap, the starting loadout, and the mission’s Achievements. I appreciated the latter listing the most, because it prevented the Achievement-hunter in me from replaying a mission to nab the Achievement I most likely could have gotten the first time had I known about it. For example, in the “Hot Pursuit” mission, there is an Achievement for driving over 90 market stalls. Had I not known about this ahead of time, I would have done my best to avoid crashing through the markets on the sidewalk. But hey, now I know there’s motivation to drive like a maniac.

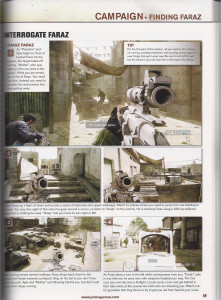
Medal of Honor Warfighter strategy guideThe actual walkthrough portion consists of a series of well documented and well placed screenshots to help guide you through the mission. I cannot emphasize enough how fantastic the layout is for the walkthroughs. The last time I saw a layout this great, this concise, this clear, and this useful was The 3rd Birthday strategy guide. Each screenshot has a clear purpose with a clear explanation, even without the text below each one, and I could see exactly where I was and needed go with a simple glance to the book. I rarely had to pause the game and flip through the pages to see what I needed to do next. Strategy guide publishers, please look at this book and The 3rd Birthday strategy guide when planning layouts for future guides. This is how a screenshot-laden strategy guide should be handled.

As most of the game focuses on multiplayer, so does the Warfighter strategy guide. The opening pages act as a primer for those who have never ventured online to a multiplayer match before. However, before you can think of dismissing it, everyone should read the Fireteam explanation in the primer, as it’s the one unique feature Warfighter has from a majority of the online shooters. The classes followed next, which went over the abilities and support actions available for each. The guide even lays out the loadout differences between the classes from each country, and it gives a brief description of the individual soldier and the class’s history within that particular country. Thanks to this, I was able to pick out a class and country that fit more of my play style without a lot of trial by fire.

One problem I’ve always had with multiplayer sections being included in strategy guides is the fact that the guides really can’t give users that much of a strategy since players fight against other players. Real people are not predictable like AI, and unless they are completely new to the experience (like me most of the time), real players are harder to kill. Getting good at multiplayer requires playing a certain map over and over so you can become familiar with it and playing it over and over so you can climb the steep learning curve of getting used to fighting against other people. It’s not unusual to take 5-10 deaths to get slightly accustomed to map and find the best points to set up a strategy. Since Warfighter requires each player to have a Fireteam partner, the learning curve takes on a whole new definition. On the one hand, it’s nice having a partner to help you out with ammo and avenging your death, but on the other hand, if you don’t know your partner, it’s hard to coordinate a plan, especially if you’re both new to the map.

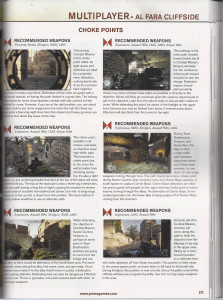
Medal of Honor Warfighter strategy guideNormally, most multiplayer strategy guides will present a map and an ideal loadout for your best chances of survival and doing well. The Warfighter strategy guide actually provides a list of all of the choke points for each map along with the recommended loadout for each choke point. As such, I was able to look at my loadout and my partner’s loadout and decipher the best place for us to hang out and fend off attackers. For someone as green as I am with multiplayer shooters, I was able to pull off more kills in my first few matches than I ever have during my brief career playing Modern Warfare 3.

Seasoned veterans to multiplayer most likely will not need this help, but even they would appreciate the maps of each area for each type of match.

Surprisingly enough, the Warfighter guide contained a few bonuses as well. The front of the book (not the back, which was unusual) contains over 20 pages of behind the scenes material, including information on each warfighter from around the world, a look at game developer Danger Close, the timeline of the Medal of Honor games, and a gorgeous collection of concept art. I didn’t keep my game, but I’m going to keep this guide for the concept art alone.

The Medal of Honor Warfighter strategy guide authors really had a limited playing field to work with for this guide, but they were able to compile a book ideal for a novice to the world of the first-person shooter, in both the campaign and multiplayer. It’s hard to recommend the guide when the game itself is so short, but if you’re in it mostly for the multiplayer, then the detailed maps alone will make it worth your purchase.

SGR Rating: 4/5

Authors: David Knight and Michael Knight
Publisher: Prima Games
Editions available: Paperback
Acquired via Publisher

Filed Under: Strategy Guide Reviews

Resident Evil 6 Strategy Guide Review

November 1, 2012 By Chris Nitz Leave a Comment

Resident Evil 6 strategy guide reviewI must admit, I had no intention of picking up Resident Evil 6 until Keri told me Dan Birlew was part of the review team on the Resident Evil 6 strategy guide. I like how Dan writes his guides, and so my excitement level to review his work once again shot up ten-fold. Sadly, the guide is more fun than the game, but that is a matter for a different day.

Like all good strategy guides, this one starts out with the basics, like a breakdown on the differences between the Xbox 360 and PS3 control schemes. From there, all the in-game combat essentials get covered in good detail with screenshots to show what players can expect when executing throws or ducking. As dang near every iteration of the Resident Evil series changes how players interact with the world, this is worth skimming over by anyone jumping into the zombie horde filled city.

Now it is time to dive headlong into the campaign, starting with the Prelude. The game itself is playable in whatever character order one feels like, so the table of contents and color-coded corners is a great help in getting to the specific portion of the guide containing the necessary info a player requires at any point in time. The walkthrough contains easy-to-read maps showing where to find ammo, health, and hidden serpent emblems. I enjoyed these maps and how they cut down my time running all over the stage in order to check every nook and cranny for herbs and ammo. There are also charts at the end of each character section showing the ranking system and what is required to earn top honors.

So an arrow to the knee will not work here?

What I enjoyed the most is how this portion reads. Sure, the authors take you from point-to-point in the mission, but it felt more as if I was reading a book than a strategy guide. Even the boss battles are full of details on beating them, covered in gooey commentary that makes for faster, and more enjoyable, reading. It maybe fluff, but it adds a nice touch to the standard go here, kill this, go there, collect that formula of so many other strategy guides.

The back of the guide is comprised of all the extra tidbits that are crammed into the game. Completionists will want to spend some time scanning over part three as it has all the info on how to obtain every dog tag, title, and Achievements. I found the Agent Hunt very handy in that it lists commands and tactics for each playable monster along with stage and goal details. As for the Mercenaries area, the maps and strategies are a nice touch. This also includes info on all the unlock conditions for characters and costumes, as well as the general guidelines for playing each mercenary.

The last pages go to the appendices. These contain lots of charts on campaign skills, agent hunt skills, and mercenary skills, various in-game items, weapons, and monsters. The weapons and monster portions are of the most notable because they specify who can carry what item and how to bring down various creatures quickly and efficiently. You know, so players can conserve precious ammo! What is particularly cool about the achievement/trophy area is that it not only lists everything to raise that gamer score a few points, but it also explains how to obtain some of the more difficult Achievements/Trophies.

Between the easy guide navigation, story-like walkthrough, and bounty of info, this is a beautiful guide. I loved that the screenshots throughout the pages were actually brighter than the game itself, thus making it easier to follow along when just glancing down to quickly read something. Dan has once again outdone himself with the Resident Evil 6 strategy guide!

SGR Rating 4/5

Author: Dan Birlew, Logan Sharp
Publisher: BradyGames
Editions Available: Collector’s Edition and Paperback
Acquired via Publisher

Filed Under: Strategy Guide Reviews

Assassin’s Creed III Strategy Guide Initial Impressions

October 30, 2012 By Keri Honea Leave a Comment

Piggyback Interactive has really stepped up their game since I was first introduced to their strategy guides, and upon first glance, their strategy guide for Assassin’s Creed IIIlooks to be on par with their Assassin’s Creed BrotherhoodandFinal Fantasy XIII-2strategy guides.

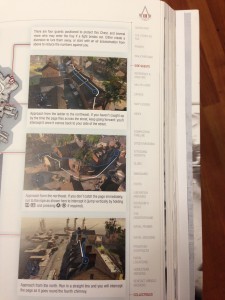
Assassin's Creed III strategy guide table of contentsThe strategy guide is organized much like itsAssassin’s Creedpredecessors, and that includes one of my favorite traditions of Piggyback Interactive: their table of contents in the sidebar. It is so easy to quickly look up anything with the ToC laid out neatly on the outside of the right page. Since Piggyback usually separates the side quests from the main campaign–and in anAssassin’s Creedgame, this is most wise–the table of contents in this manner makes it incredibly easy to flip back and forth between the main storyline and the side missions without losing your place.

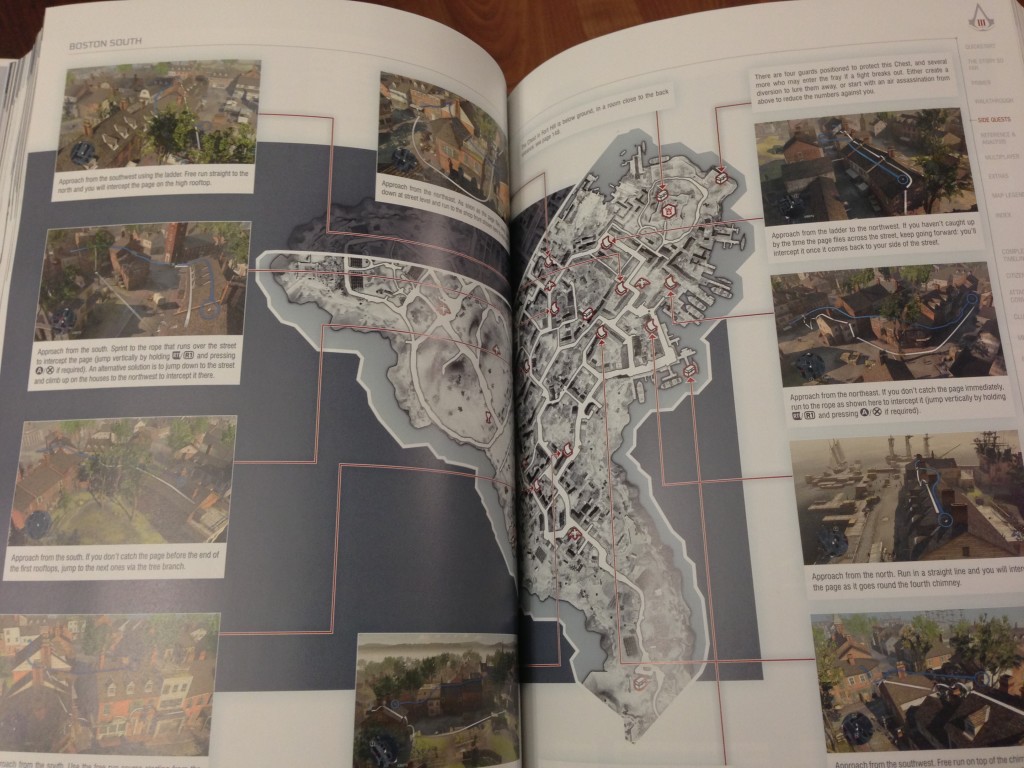
The next thing I searched for were the maps for the collectibles.Assassin’s Creedgames have always had a ridiculous number of collectibles, and I’ve never been able to find half of them without the help of the maps. Oh sure, I could spent countless hours running around the dungeons and overworld hunting each collectible down, but I have zero patience and I’m lazy, remember? Thankfully, the strategy guide includes detailed maps of each region Connor explores, complete with screenshots depicting each location for the wayward collectible. I can already feel the Trophies unlocking.

Assassin's Creed III strategy guide map

Assassin's Creed III strategy guide walkthroughEach mission in the main walkthrough is set up similarly to how it’s been done in the past. Each DNA sequence (or present day sequence) begins with an overview, includes a map of the mission (if necessary), and is broken up into paragraphs of walkthrough text accompanied by screenshots to help the player know where to go, hide, or what to look for. The side quests are set up similarly as well. The screenshots appear to be very clear and just large enough to fully depict what the player should be doing.

I can only hope that the content is as helpful as it appears, and the screenshots are both clear and useful. Obviously, I won’t know until I play, but at the outset, the prognosis is cheery.

All this guide is doing is making me want to play, both just to do so and to see how great this strategy guide really is. The UPS man needs to hurry up and get here, and then I need to find a way to blow off work for the rest of the day.

Filed Under: Initial Impressions, Strategy Guide Features

  • « Previous Page
  • 1
  • …
  • 21
  • 22
  • 23
  • 24
  • 25
  • …
  • 44
  • Next Page »

Follow us!

Subscribe!

Upcoming Strategy Guides

 Nothing here. Come back later. 😢

Latest Strategy Guide Reviews

The Walkthrough by Doug Walsh Review

Red Dead Redemption 2 Strategy Guide Review

Mega Man 11 Strategy Guide Review

God of War Strategy Guide Review

Far Cry 5 Strategy Guide Review

Friends of SGR

  • BradyGames
  • Dan Birlew – Guide Writer
  • Doug Walsh – Guide Writer
  • Future Press
  • Game Enthus
  • GameWires.com
  • Piggyback
  • Press the Buttons
  • Prima Games
  • Racing Games

Top Posts & Pages

  • Final Fantasy III Strategy Guide review by FuturePress
  • Unboxing the Epic Mickey Collector's Edition Strategy Guide

Copyright © 2025 · Web crafted by Warkhammer


Loading Comments...