• Home
  • About Us
  • Podcast
  • Strategy Guide Wit
  • Contact

Strategy Guide Reviews

A Strategy Guide for your Strategy Guides

  • Reviews
    • Strategy Guide Reviews
    • Video Game Reviews
    • Mini-Reviews
  • Features
    • Interviews
  • News
  • Unboxing Strategy Guides
  • Columns
    • Gaming Diary
    • Corner of Randomness
  • Videos

LEGO Batman 2 Strategy Guide Review (Handheld)

July 17, 2012 By Keri Honea Leave a Comment

LEGO Batman 2 handheld strategy guide review

Like most LEGO games, LEGO Batman 2 on handhelds differs from its incarnation on consoles. As such, Prima Games did create a separate strategy guide specifically for this version. However, unlike what they have done in the past, this time Prima did not bundle the two strategy guides into one book; instead, their handheld strategy guide was sold as online only. Fortunately, if you bought the print book, you received a code for this guide for free. If you bought the book whilst only owning the handheld game, then it’s not so fortunate for you. Speaking of being unfortunate, the handheld strategy guide is hardly as accurate or thorough as the console guide. In fact, some the minikit locations differ in both the walkthroughs and the appendices, and there is no Trophy guide for the Vita version.

LEGO Batman 2 handheld strategy guide

Correct for Final Battle

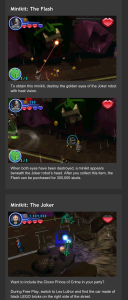
The online guide is a conglomeration of both the console online guide and the handheld guide, and it appears as though there was no cross-checking in certain portions to make sure the console advice hadn’t bled into the handheld side. If they had truly separated the online guide into console and handheld sections, this would have most likely been avoided. Instead, the walkthroughs are kind of a mess; in the midst of the walkthroughs, handheld walkthroughs are interlaced with notations that they are for the handhelds, not the consoles, so you see repetitive content that breaks up the flow, as depicted in the image on the right. As a result, this guide is best left for looking up collectibles and not much else.

That said, however, depending on where you look within the guide, the collectible locations/prerequisites aren’t accurate. Sometimes it’s accurate within the walkthrough, as the walkthroughs do point out differences between the console and handheld collectible locales. However, sometimes these differences are not pointed out, so it’s the appendices that are accurate. It causes quite a bit of confusion and frustration, something that could have easily been avoided if

  • the handheld and console guides were separated out into their own distinct guides; and
  • someone had double-checked for handheld/console confusion.
LEGO Batman 2 handheld strategy guide

Incorrect for Final Battle

In addition, the Trophy tips provided in this walkthrough are for the consoles only. The guide either didn’t take into account that the Vita Trophies are different or the team just forgot to add the section all-together. Considering that I have no idea whether I’m not getting a couple of the Trophies due to either not doing it right or a game glitch (LEGO games are infamous for these), I would have personally loved some Trophy tips.

At the very least, the story-mode for the handhelds is exactly the same as the console–albeit some of the abilities and costumes vary–so the walkthroughs do guide you very well as to what you need to do to progress. As anyone who has played LEGO games in the past knows, it’s not always obvious what you’re supposed to do next, but when you figure it out, you want to smack yourself for not seeing it earlier. The guide helps you smack yourself sooner (I call it the “Portal Effect”). This portion of the guide is practically its only savior.

But yes, there is another saving factor to the online guide! The handheld version of the game features a “mission mode” that is virtually little more than a survival session. Players have to survive so many rounds of onslaughts of enemies, and each round features a different character the player must control. So once you get used to a character, it’s time to learn a new one on the fly. Players start off with a gold trophy, but if you do so often, you drop down to a silver trophy. Die some more, and it’s bronze for you. The only reasons why it’s even worth playing this mode are for unlocking new characters and for the gold PSN Trophy you can earn from getting gold trophies in all missions. It’s just as much of a beating as it sounds, and fortunately, the handheld version of the LEGO Batman 2 strategy guide has survival tips for each round. For platinum Trophy hunters, these tips can help you avoid a great number of headaches–not to mention tedium.

All in all, it’s extremely disappointing that this handheld LEGO Batman 2 strategy guide was not included in the print guide at all, as Prima Games has done in past LEGO games. If it was in print, we’d most likely see more quality assurance with all of these problems listed above. Considering how great their print guide for the consoles has been so far, it’s an absolute shame this one isn’t as up to snuff.
SGR Rating: 2.5/5

Filed Under: Strategy Guide Reviews

Game of Thrones Strategy Guide Review

July 9, 2012 By Keri Honea 7 Comments

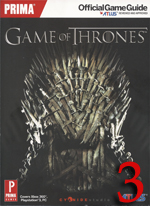
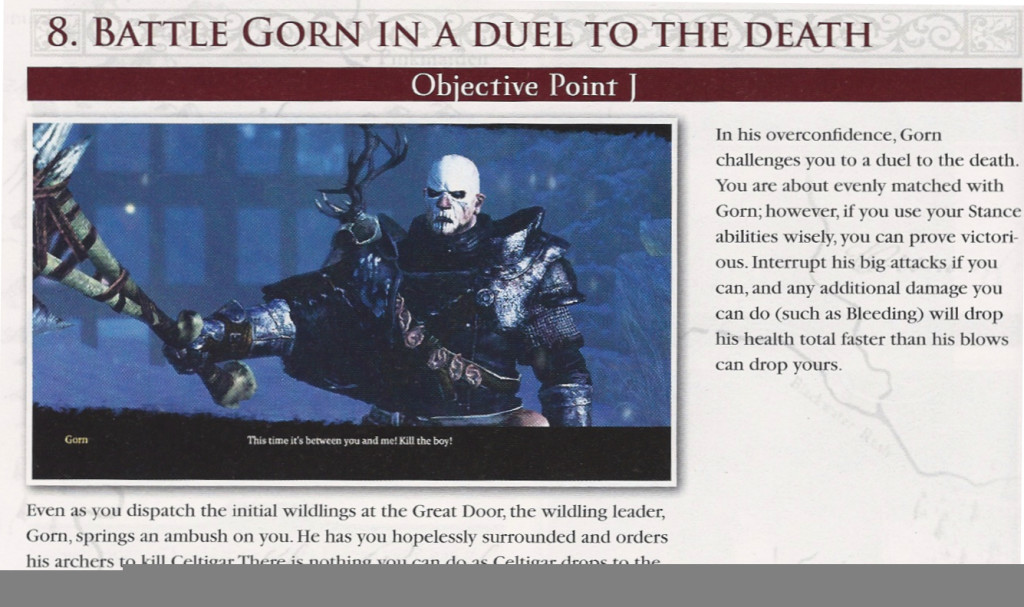
Game of Thrones strategy guide reviewThe Game of Thrones books may be as long-winded as Stephen King, and the game seems to match it evenly, but fortunately, the Game of Thrones strategy guide cuts to the chase. In fact, this guide reminds me a lot of the strategy guide for The Witcher 2, both in its layout and its efficiency. And thank God for that. You really don’t want to sit through these cut scenes more than once, trust me, and this guide will really help you avoid repeat viewings (in case you aren’t aware, you can’t skip through cut scenes…AT ALL).

I greatly appreciated the extra assistance the strategy guide provided when it came to making decisions for leveling up. Characters level up very similarly to what you see in Dragon Age or Kingdoms of Amalur. However, at least in those two games, you are very aware of what you are, whether you are a warrior, a mage, a rogue, etc. In GoT, classes are named from titles in the books, such as sellsword and water dancer. Even if you have read the books–like I have–it’s not immediately obvious how you should be leveling up your character, especially if you have taken a breather in between gaming sessions. The strategy guide helps alleviate this confusion by giving suggestions of abilities each class should focus on in order to be more effective. I typically play similar classes in every RPG I play, but even I wasn’t sure if my Landed Knight was more of a warrior or a brute. The difference? One has skills with a sword and shield whereas the other prefers two-handed weapons. The skills offered and needed for these types of combat vary greatly, and once you choose a skill, there’s no going back.

I only wish that the guide had implemented these suggestions throughout the walkthrough. For instance, before big boss fights or large encounters, offer suggestions on what skills your character should have at this point in time. However, on the flip side of the coin, the guide never recommends class-specific abilities during your battles, so in that regard, making such skill suggestions seems unnecessary. At the same time, the strategies for the boss battles come across as very generic and provide little beyond “don’t die.” Instead, it explains the boss’s tactics and makes suggestions how best to use Mors’ warg abilities and Alester’s R’hollor priest abilities. Everything else is left up to the player to determine.

Game of Thrones strategy guide

You can get in fights with virtually anyone at any time, whether you’re investigating, looking for a fight, or just wandering around a village. Sometimes this is a good idea, and sometimes it’s horrendous. The strategy guide was always quick to point out where I should go first before picking a fight with a particular group of disgruntled peasants. If you didn’t want to fight, and it’s possible to avoid it with words, you are always given a heads up beforehand. I absolutely hated the combat system in GoT, so I was all for talking my way out of confrontations. (If you’ve played the game, you know which character I absolutely hated working with. He died a lot.)

Like any good RPG, Game of Thrones is inundated with sidequests. Like any good RPG strategy guide, the Game of Thrones strategy guide keeps the sidequest walkthroughs separate from the main walkthrough. All sidequests are noted when they can be triggered and where/what it takes to trigger them, but all details of the sidequests are kept in a separate section, away from the main walkthrough. It helps alleviate the potential clutter, which is always greatly appreciated, especially if you have little desire in completing all of them or even any of them. For instance, one of the first sidequests you can unlock involves a statue hunting fetch quest, which sounds just as fun as it really is. If you want to skip it, you can easily do so because that sidequest walkthrough isn’t smack dab in the middle of your main walkthrough, forcing you to read ahead and find which page you now need.

The guide’s largest fault is its spoilers. The plot of the game is very succinctly laid out for you, so if you glance ahead either to look up something in particular or inadvertently, chances are great that you will see a plot spoiler. The strategy guide even goes as far as detailing each possible ending down to what is said and includes screenshots. On the one hand, some users may appreciate this so they can make the most well-informed choice possible toward the end, but this is downright overkill. By the end of the game, I felt like I didn’t need to have played at all; why bother discovering the story for yourself when you can read it line for line, whether you mean to or not?

The Game of Thrones strategy guide is definitely a great tourist guide for those looking to survive at any length of time in the treacherous world of Westeros. That said, all users must be prepared for little guidance when it comes to boss battles and prepared to avert eyes to avoid spoilers as much as possible.

SGR Rating: 3/5

Author: Michael Searle
Publisher: Prima Games
Editions Available: Paperback
Acquired via Publisher

Filed Under: Strategy Guide Reviews

Ghost Recon Future Soldier Strategy Guide Review

July 3, 2012 By Nicholas Michetti Leave a Comment

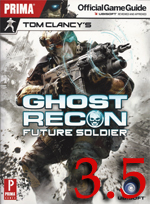
Ghost Recon Future Soldier Strategy Guide reviewGhost Recon Future Soldier is a different kind of game than some might used to be playing, featuring components of squad shooters, tactical shooters, and stealth action games. Gamers who are new to this blend of gameplay–especially those new to the Ghost Recon franchise–may find playing through GRFS a bit daunting at first. Luckily, for those gamers, Prima has created a pretty extensive strategy guide for the game that should be able to help them take down their heavily armed opposition. While not without a few trouble spots, gamers should be able to use this guide to find exactly whatever it is that they need to get through the game.

Prima’s GRFS guide excels in giving many great general and specific gameplay tips for the tactical squad shooter. Players might not initially realize what options they have to spot enemies, or how efficient their teammates are at taking orders and subsequently taking down enemy soldiers. The guide is also mostly spot-on at enemy counts and helping players to arrange “sync shots” to take down groups of soldiers. Even some of the most difficult missions in the game, including ones where there are no alerts allowed, are made at least a fair bit easier by the guide laying out what’s coming and what players can expect as they progress through the mission. The game’s tactical challenges are spelled out with the criteria to meet and fairly good advice as well–I was able to accomplish a few of them because of the guide’s suggestions.

However, every once in a great number of pages, the guide includes some puzzling advice. Not necessarily wrong advice per se, but advice that seemed a bit difficult to pull off or not the easiest way to proceed. For instance:

  • In the mission “Noble Tempest,” the guide advises that players take out four mercenaries playing soccer before taking out some other guards in the area, when an alert can be avoided with a careful series of sync shots used prior to taking out the soccer players.
  • The latter half of “Noble Tempest” has an alternate ending with a chopper battle that isn’t mentioned.
  • In “Gallant Thief,” the advice for taking out the guards stealthily before rescuing the prisoner was generally too vague. Plus, by being careful and patient (the process takes a while and possibly multiple restarts), a player can opt to forgo stealth and use a weapon to take out a number of guards in the area, freeing up the lift needed to evacuate the prisoner from the presence of guards nearly completely. The guide does mention that an SMG could be used in the area, though.
  • Finally, in “Shattered Mountain,” the guide advises to leave the guards standing behind the barn area in favor of going after a high value target first, when the guards can be carefully taken down with sync shots prior to engaging the target. If the player has taken out the guards behind the barn, then takes out the high value target and accidentally triggers an alert, they only have to deal with a select few enemies inside the barn.

Other than those instances, though, the guide’s advice for the single player campaign is mostly very useful and quite accurate.

The guide’s advice for multiplayer is overall very general and will be helpful to beginners, but won’t help with any specific trouble spots. The guide calls out noteworthy areas and marks all of the places on the maps in which objectives appear, which are very useful inclusions (especially the objectives locations), but does not really recommend any course of action for what to do when on offense or defense and encountering heavy resistance in a particular area. As for Guerrilla Mode, I was only able to test the infiltration run of each map, as the mode is built for four players and does not include a way to go through the mode with four random players–players can only play online with other friends who have the game. I only found one problem of note with one of the initial infiltration runs (the “Mansion” map), as the guide advises players to take out a soldier who spends plenty of time facing the player. By taking out the guards in a different order (taking out a patrol guard who stops next to a car, then taking out a guard patrolling the mansion’s front, then taking out the facing guard by coming up from behind him by vaulting from cover and finally the other two), the process was much easier, albeit lengthier.

The official GRFS game guide is a mostly accurate guide with a few trouble spots. Gamers who need the guide shouldn’t let the trouble spots mentioned bother them, as they are the rare few exceptions to an otherwise very useful guide that gives players plenty of important details about their enemies and their locations. The single-player campaign’s missions have some really tough spots to get through–which may be even tougher on higher difficulties–and in those instances, the guide really does offer some very good advice on how to get through as easily as possible. The multiplayer advice not going deeper is unfortunate, but again, having the locations of objectives alone provides a fairly decent advantage at times. Prima’s Official Game Guide for Ghost Recon Future Soldier may not be flawless, but it has more than enough vital information to warrant a purchase by anyone who thinks that they’d need it.

SGR Rating: 3.5/5

Authors: David Knight, Off Base Productions
Publisher: Prima Games
Editions Available: Paperback
Acquired via Publisher

Filed Under: Strategy Guide Reviews

Prototype 2 Strategy Guide Review

June 22, 2012 By Keri Honea Leave a Comment

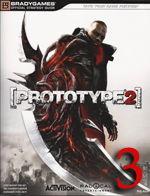
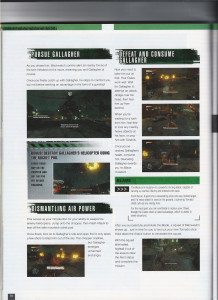
Prototype 2 strategy guide reviewSince Prototype 2 itself reminded me so much of inFamous in virtually every aspect, I thought that its corresponding strategy guide would be just as similar in terms of setup and layout. Unfortunately, the guide was nearly as disappointing as the game. As a whole, the Prototype 2 strategy guide felt very minimal to the point of being half-assed and more like a script for the game than anything else. This is definitely not one of BradyGames’ best work.

The overall layout of the guide is about what I would expect, and I have no problem with either the layout or the design. In fact, these are the guide’s best features. The layout and organization of the guide are nearly perfect. All information was exactly where I hoped it would be, so there was no second-guessing the location of content. As a result, if I needed to look up a side mission, a collectible, or a power upgrade, I could do so in a snap with minimal flipping.

The collectibles maps are some of the best I have ever seen. The game didn’t have that many collectibles in comparison to other games, but they were treated as though there were hundreds. Each region of New York Zero had its own map on its own page. This allowed the maps to be large enough to easily decipher the location of each collectible. Each map had its own legend, even though each collectible symbol was the same throughout. It shows a bit more care and effort when guide authors and designers don’t make any assumptions as to when you’ve accessed similar information.

And that’s where the guide’s greatness ends. Sadly, the walkthrough content was incredibly lacking. Instead of consistently giving strategies for defeating this mini-boss or that encounter, it often read more like a script of what was happening in the game. This isn’t to say that it never gave strategies, only that  it was very inconsistent in when it did. When it did, the strategies were often great. When it didn’t, well, better figure out your own way to get through the area, as the guide will simply tell you to “defeat all enemies.” Literally. It also says that doing so will trigger a cut scene. Then it summarizes the cut scene. I could just read this guide to find out exactly what happens in the story. Tsk, tsk.

The game is fairly simple and straight-forward, so I understand why there are no in-depth discussions. That said, there’s no excuse for at least listing suggested powers or power upgrades one should have before attempting a certain main story mission. For instance, about halfway through the game, there is a fairly difficult chase sequence Heller has to master. If you don’t have his locomotion powers upgraded, especially his speed, air dashing, and gliding powers, you’re in for lots and lots of failure. All of these upgrades should have been suggested at the start of the mission.

Prototype 2 strategy guideAnd while we’re already on the topic of this particular mission, allow me to divulge my frustration even further. None of the chase missions, whether they are story or side missions, include a map with the required route. For many people, part of the fun in chase scenes is the trial and error, but after five or ten times, it’s no longer amusing. A map showing me where this character was going to eventually run to would have removed a lot of the guesswork. As you can see from the scanned page to the right, the guide merely says, “Once you finally catch up with Gallagher, he stops to confront you.” It sounds like you just have to catch up with him at any point in time, right? Nope. I glided right on top of this jerk’s head, and he continued to run. It wasn’t until I reached a certain point in his escape route that I caught him. (As mentioned in the previous paragraph, I was only able to do so after aborting the mission and upgrading certain powers first, something that I should have been advised of from the get-go.) None of the chases or races have mapped routes, which could have also eased up on the frustration.

The game isn’t that fun by this point as it is, so adding guide frustration on top of it really doesn’t help matters much.

Hardly anyone will pick up the game in the first place, but for those few who do, don’t bother with the guide. It’s great for finding collectibles and answering quick little questions, but if you’re looking for real help and real strategies, it would be better to look online.

SGR Rating: 3/5

Author: Phillip Marcus
Publisher: BradyGames
Editions available: Paperback
Acquired via Publisher

Filed Under: Strategy Guide Reviews

Diablo III Strategy Guide Review

June 21, 2012 By Blake Grundman Leave a Comment

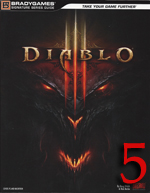
Diablo III strategy guide reviewWhen setting out to review a game with the depth and breadth of a Diablo III, the authors have to be approaching the task with a hole in the pit of their stomach the size of the Grand Canyon. Not only is this the highly anticipated sequel to one of the most successful–and still widely played–PC games of all time, but it also contains a level of complexity that is unparalleled amongst its peers. Oh, and let’s not so quickly forget that the game has been in development hell (no pun intended) for over a decade. Suffice to say that BradyGames had their work cut out for themselves with their Diablo III strategy guide.

By virtue of Diablo III randomly generating everything from level layouts to enemy positions to loot drops, it is amazing that the guide is as comprehensive as it is. Their key seemed to be setting aside the unknowns and focusing on what will always remain the same, namely, the different character (hero) classes, the numerous enemy types, and the seemingly never ending well that is Blizzard’s loot chest. From there, the authors continued to drill down until they hit pay dirt in a big way.

The book starts out by breaking down all of the game’s core mechanics in a level of detail that would leave even a Diablo virgin (God help your poor soul) feeling like a Rhodes Scholar. Among the key elements detailed are leveling, choosing what loot to gather vs. discard, managing and picking effective party members, and online coop play. There is even a specific section dedicated to ancillary party members, their specific perks, and what skills they will learn as players level. And here is the scary part: this section only represents roughly about 3% of the overall text.

Next up is the absurdly deep analysis of each of the five hero classes. Each hero is split up into sections discussing the character’s specific weaponry, armor, and skills. Further exemplifying the insanity of depth in the guide, every skill, both actively employed by the player and unconsciously applied to modify status effects, are given the utmost attention. Details passed along are things like levels unlocked, tactics that can be applied to its use, runes that will have an additional effect when equipped, and the five additional permutations to the skill that can be unlocked and applied throughout the leveling process. Everything is present to help players make the best possible decision with their characters, plus a little bit of added clairvoyance as to what can be expected as the game progresses.

What follows this up is the actual walkthrough of every one of the campaign’s thirty-one quests. Each mission is broken up into its individual objectives, with vague details about what can be expected intermixed throughout the text. It seems as if these sections are specifically worded to avoid being a specific “point A to point B” walkthrough. As a reminder, the maps, enemy positioning, and loot containers are randomly generated, so the only specifics that are passed along are new enemies that may be encountered, the steps in between objectives, and basic strategies for accomplishing each quest’s few scripted encounters. Be sure not to forget to pay special attention to the bonus objectives that are spelled out, because the additional loot drops and experience net could pay off down the road.

One thing that the guide does exceptionally well is calling out boss encounters and providing players with the best approaches to slaying the usually overpowered adversary. The enemy’s expected hit-point count, XP level, and attacks are spelled out explicitly, along with their special traits and resistances. This is one of the rare areas where specific strategy and tactics are provided to the player, which can in turn prove to be tremendously helpful.

After digging through four acts worth of campaign direction, players are most likely curious about how they can apply their specific skills and items acquired throughout. For this reason, it only makes sense that the next area breaks down the different artisans and crafting options at the player’s disposal. Though you can go through the entirety of the game using only dropped loot, sometimes it is good to know what other options are available and when these elements can be upgraded.

Did you know that all of those goofy generated item names like “Chilling Bow of Infinity,” actually mean something extremely specific under the hood? Despite sounding like complete gibberish to most, the next section breaks down every item, as well as its specific pre- and post-fixes, to paint the complex picture of what is nothing more than glorified spreadsheet math. For those with the propensity to dig into these agonizingly complex details, looking for the perfect piece of loot, there will be more than enough to sink your teeth into. Along with spelling out the specific item modifiers, each base weapon is examined, pointing out its required level for use, damage per second, and other min-maxing data that moisten the loins of gamers that work as accountants during the daylight hours. Lastly, all armors and legendary drops are examined, following the trend of providing more than enough numerical stats to make a hardcore fan’s heart skip a beat. Don’t get us wrong, having more data at our disposal is not a bad thing, it’s just an overwhelming amount of information to tackle when it’s staring back at you from the page.

The final major section of the guide is dedicated to the uncountable number of foes that can, and will, be encountered through the expansive campaign. Each and every named adversary is looked at, in alphabetical order, sharing critical information such as likely locations where they can be encountered, their levels and hit point counts, damage that can be administered, and special moves, all seperated by difficulty level. Once again, if you are a person that loves to pour over statistics, you will have years’ worth of digging at your fingertips.

While looking through the ridiculous amount of information contained in the book, despite it being downright impressive, it was hard to shake a single lingering worry: What if the first update turns all of this data on its head? The game has already seen three updates, one of which is supposed to address the balance and difficulty. It will be interesting to see if these figures still hold true six months, hell, even six weeks from now! But this is a risk that you have to be willing to take when investing in the medium of print.

Regardless of whether the statistics are still valid down the road, this is still a solid companion to anyone who would be considered to be a hardcore Diablo fan. The use of art scattered throughout is exceptional, the layout is streamlined and well thought out, and the written text reads like a well informed textbook. Simply put, this is a must-own for everyone who has eagerly started a second playthrough of the game or collectors who strive to expand their knowledge of the universe. There is more than enough to satisfy everyone, so get out there and raise some hell!

SGR Rating: 5/5

Authors: Doug Walsh and Rick Barba
Publisher: BradyGames
Editions available: Paperback and Collector’s Edition
Acquired via Publisher

Filed Under: Strategy Guide Reviews

  • « Previous Page
  • 1
  • …
  • 24
  • 25
  • 26
  • 27
  • 28
  • …
  • 44
  • Next Page »

Follow us!

Subscribe!

Upcoming Strategy Guides

 Nothing here. Come back later. 😢

Latest Strategy Guide Reviews

The Walkthrough by Doug Walsh Review

Red Dead Redemption 2 Strategy Guide Review

Mega Man 11 Strategy Guide Review

God of War Strategy Guide Review

Far Cry 5 Strategy Guide Review

Friends of SGR

  • BradyGames
  • Dan Birlew – Guide Writer
  • Doug Walsh – Guide Writer
  • Future Press
  • Game Enthus
  • GameWires.com
  • Piggyback
  • Press the Buttons
  • Prima Games
  • Racing Games

Top Posts & Pages

  • Final Fantasy III Strategy Guide review by FuturePress

Copyright © 2025 · Web crafted by Warkhammer


Loading Comments...