• Home
  • About Us
  • Podcast
  • Strategy Guide Wit
  • Contact

Strategy Guide Reviews

A Strategy Guide for your Strategy Guides

  • Reviews
    • Strategy Guide Reviews
    • Video Game Reviews
    • Mini-Reviews
  • Features
    • Interviews
  • News
  • Unboxing Strategy Guides
  • Columns
    • Gaming Diary
    • Corner of Randomness
  • Videos

Portal 2 Strategy Guide Review

May 25, 2011 By Keri Honea Leave a Comment

Portal 2 Strategy Guide ReviewPart of the fun of playing games in the Portal franchise is trying to figure out all of these insane puzzles yourself, as it really is VERY rewarding to do so. At times that reward feels like you’re an idiot for making things really hard on yourself, but it’s still immensely satisfying no matter what the aftertaste is. However, patience runs thin for many of us, so for those puzzles that do make you pull your hair out because you have no idea where to go or how to get to a certain point, Future Press’s Portal 2 Strategy Guide is your life line for keeping you away from Cave Johnson’s insanity.

One thing I really appreciated were the warnings/suggestions at the beginning of the single-player and co-op chapters, where it strongly urged players to only use the guide when they were stuck. I can’t recall any guide saying that, not even the original Portal strategy guide. Granted, the reason why people buy a strategy guide is for assistance, but it’s nice that the writers asked users to try to work out the puzzles on your own, because really, you won’t get the beauty of the game without trying on your own.

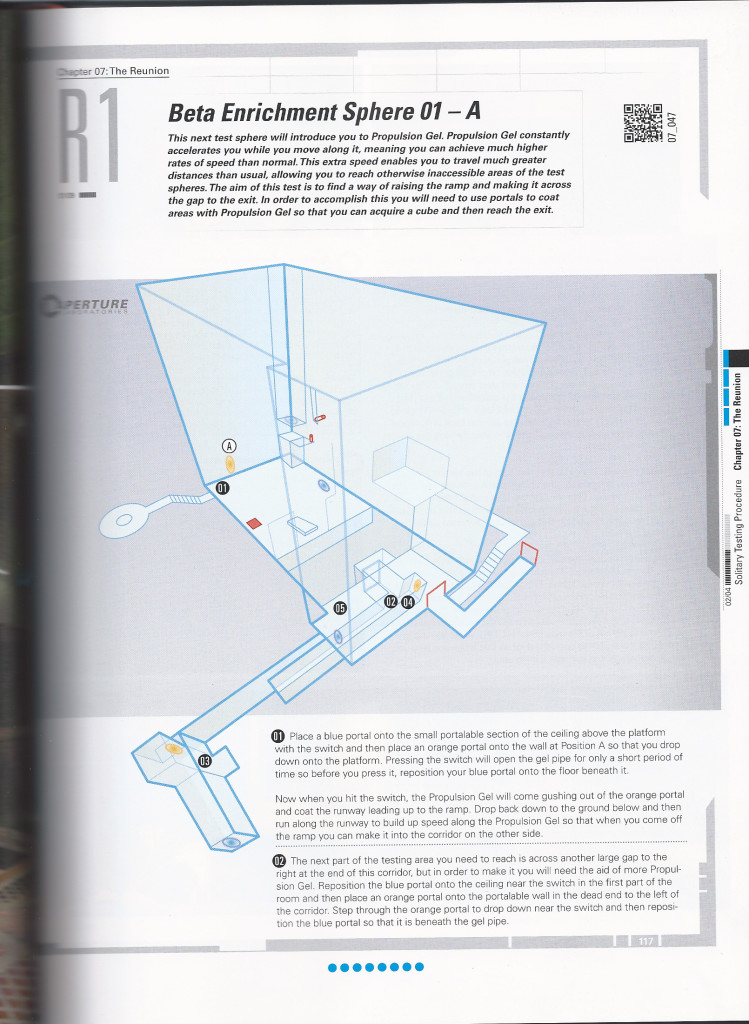
Thankfully, the rest of the Portal 2 strategy guide is great and doesn’t hide behind this suggestion to mask any deficiencies. The guide is divided by campaign, chapter, and then chamber. The start of every chamber has a clear map–multiple maps if the level has multiple areas–with marked orange and blue portal placements. Each placement is numbered to correspond with the numbered paragraphs in the walkthrough. So if you just look at the guide whenever you have a quick question, it’s extremely easy to find what you need within seconds.

Portal 2 Strategy Guide Maps

And if you just don’t understand how to implement their advice, you can use the little QR codes at the top of every chamber. Register your strategy guide online at Future Press, and then you can type in the QR code and watch a short clip of how to solve the puzzle. Just be prepared to perform a hefty face palm after you watch the videos.

Portal 2 Strategy Guide page layoutIn addition to the maps, the strategy guide does include various screenshots with the walkthroughs to help point out where you should place your gels or your portals. The maps do a fairly great job of depicting portal, light bridge, and funnel placements, but they don’t show where to place the gels. I find this to be a good thing, because otherwise the maps would be a mess of blue and orange. Instead, the screenshots depict a mess of blue and orange, but at least there, it’s easier to decipher and that’s what you’re going to be seeing anyway.

Within the walkthrough paragraphs, there are also callout boxes–marked with a nifty Aperture Science logo–for speed tips, hidden Achievements/Trophies, warnings, etc. I most likely wouldn’t have racked up half of the random Achievements without these callout boxes, because I never would have thought to head to certain areas or do certain completely random things. I was too busy laughing at all of the dialogue or trying to figure out how to make a jump without dying.

Of course, in true Future Press fashion, there is more to the guide than help with the single-player and co-op campaigns. There is an artwork section, explanations of the Portal universe, interviews with the devs in the Collector’s Edition, AND a speed run guide for the first Portal game. I personally didn’t try out the speed runs because as I stated earlier, I didn’t enjoy the first game. However, I did watch the movie clips, and I can attest that these guys definitely know what they are doing. I watched most of them with my lower jaw in my lap.

However, my personal favorite feature of the Collector’s Edition guide is the two woven bookmarks included: one is orange and one is blue.

To make a long story short, the Portal 2 strategy guide is flawless and offers everything anyone could want to get the most out of both Portal games and the Portal universe.

SGR Rating: 5/5

Authors and Publisher: Future Press
Editions Available: Paperback and Collector’s Edition
Acquired via Publisher
Filed Under: Strategy Guide Collector's Editions, Strategy Guide Reviews

LEGO Star Wars III: The Clone Wars Strategy Guide Review

May 18, 2011 By Keri Honea Leave a Comment

LEGO Star Wars III The Clone Wars Strategy Guide ReviewWhen it comes to LEGO games, everyone knows that it’s not very difficult to get through each level. When you’re stuck, you just break enough stuff until the solution appears. One can burn through any of the games in less than 10 hours with that method. However, everyone also knows that the main point to the LEGO games is to complete them to 100%, which means obtaining all the studs for “True ____” status, finding all the pieces to whatever you’re supposed to build, snagging gold bricks, and locating (and buying!) all of the red bricks. Here is where one may need the guide, because oftentimes, it’s just not that obvious where you can find all of these delightful collectibles. It is this standard that the strategy guide for LEGO Star Wars III: The Clone Wars has been held against, and the guide fulfills this monumental task very well.

The opening page for each mission starts with maps that pinpoint locations of the various Minikits, locations of items needed to reveal a Minikit, and locations of the highly coveted purple studs. While these maps are quite important, the most useful portion of the opening pages is the chart that lists all of the Minikits in every mission, where they can be found, and if they can be obtained in Story Mode or Freeplay. Just below the chart is the stud requirement for the True Jedi status. For the DS guide portion–yes, they are two separate games–the stud requirements for both Story Mode and Freeplay are listed.

LEGO Star Wars III The Clone Wars Strategy GuideUnfortunately though, it is with these charts and maps that the guide lost half a point in the rating. In a few places, the True Jedi requirements were incorrect. For example, the Epilogue is listed as having a 20,000 stud requirement, when in reality, it’s 250,000 studs. In addition, the map to the right is supposed to mark 10 rocks the player has to break in order to summon a Minikit. There is no number 10 on the map; however, I have to wonder if this is the fault of the guide writers or the game, because after roaming every inch of the area, I couldn’t find this 10th rock. As LEGO games are known for their glitches, it’s possible that this rock doesn’t exist.

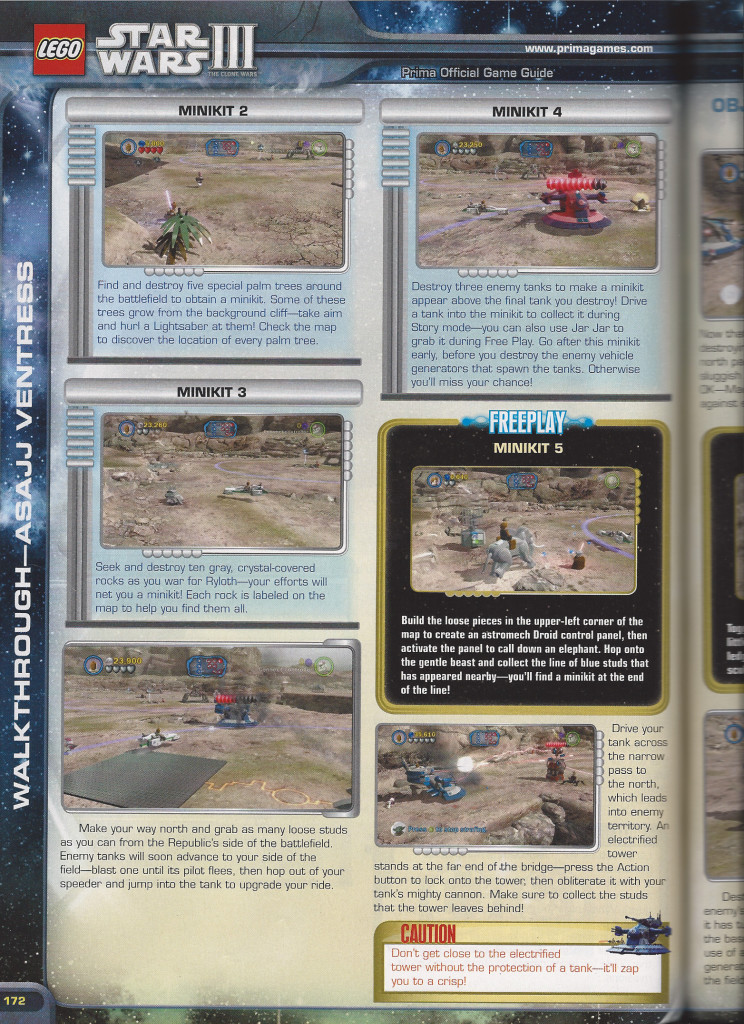
Everything else in the guide, though, is flawless. The page layout makes it very easy to follow along with the story sequence, locate Minikits, and locate Red Bricks. With each callout for the Minikits, it’s clearly labeled as whether the Minikits can be found in the Story or in Freeplay so you won’t have to waste your time trying to search for them in areas you won’t be able to reach. If you need to purchase a certain character to obtain the Minikit, the player is forewarned. There are also separate callouts on the page for words of caution, notes, and tips for obtaining True Jedi status.

To make things even easier to find, there are colored tabs on the right pages (as shown to the right) to mark exactly where each mission is in the guide, for both console and DS versions of the game.

LEGO Star Wars III The Clone Wars Strategy Guide

The console version of LEGO Star Wars III: The Clone Wars has an extensive Hub world, and I know I never would have found the second Hub that opens up more missions without this guide. Why? Because I never once would have thought about flying a ship OUT of the Hub world. I was surprised to even find that the Hub world was mentioned at all in the guide; that’s how much I wouldn’t have thought about exploring outside of the Hub. Everything in the Hub is obvious enough, right? Apparently not in this game.

So despite the minor flaws mentioned above, I cannot recommend this guide enough. For anyone who wants to complete the game 100%, the LEGO Star Wars III: Clone Wars strategy guide is practically a necessity.

SGR Rating: 4.5/5

Authors: Stephen Stratton and Nick von Esmarch
Publishers: Primagames
Editions Available: Paperback
Acquired by Publisher


Filed Under: Strategy Guide Reviews

The 3rd Birthday Strategy Guide Review

May 9, 2011 By Keri Honea 2 Comments

The 3rd Birthday Strategy Guide ReviewThe 3rd Birthday definitely isn’t your typical RPG from Square Enix. It’s fairly straight forward, there are difficulty settings, and your main character has a gun instead of a sword (it’s not even a gun sword!). It’s also short, which was evident to me as soon as the guide arrived on my doorstep. I’ve never, NEVER seen a Square Enix RPG strategy guide so thin.

However, beyond this appearance of simplicity, The 3rd Birthday actually has a lot of hidden gems for players to unlock–from secret endings to powerful armor–and the guide covers all of these flawlessly.

I honestly finished the game weeks ago, but I’ve had the hardest time sitting down to write a review for the guide because it was perfect. All I want to say is just that: it’s perfect. Perfect design, perfect advice, perfect organization. It’s really hard to elaborate on that, hence why it has taken me so long to write more than five words about it.

Every guide should follow The 3rd Birthday strategy guide’s structure. The first page of each mission has maps of the areas Aya will explore, all clearly marked with items, enemies, and exits. Each map is labeled as “Area #”, and then consequently in the walkthrough, each section marks which area Aya is in. It’s plainly easy to find exactly where you are at any given time. Also on this front page are a list of the mission’s Feats, which are sort of like the game’s Trophies–if the PSP had any Trophy support. The Feats are also mentioned again when the best time (or only time) Aya can accomplish them, and they are placed in clear, callout boxes so there is no risk of missing them.

A Page from the 3rd Birthday strategy guideAll of the screenshots are clear, concise, and all serve a purpose. Large screenshots usually depict what Aya should be looking for or what direction she should be heading. For boss fights, they show her most optimal position for survival as well. Smaller screenshots are used to show sequences of actions, such as how to achieve a certain Feat or how to survive a sticky situation.

Put in simpler terms: I never had trouble quickly finding where I was in the game and guide and how to do what I needed to do.

The appendices relist all of the Feats and how to obtain them, and all of the hidden gems one would never expect this game to have. The 3rd Birthday is so short so that players will play it again and again, thereby unlocking additional weapons, costumes for Aya, and even secret endings and hidden scenes. When you finish the game the first time, you receive a new costume for Aya, so you become instantly aware that there may be others, but that’s the only unlockable that is obvious. I never would had fathomed most of the others.

As this is a Square Enix game, and it has a plethora of what Square Enix does best–cut scenes–there is an extensive amount of art in the strategy guide as well. Where so many guides try to combine art with the walkthroughs, The 3rd Birthday strategy guide handles its art as all guides should: outside of the walkthroughs. The front pages have plenty of art, and of course the back has some art samples, the pages with the walkthroughs are art-free aside from the screenshots. This is how it should be done, as now the writing and the screenshots don’t appear to take second fiddle to artwork.

So yes, I find The 3rd Birthday strategy guide to be perfect. None of the strategies led me astray, it was very easy to access and find information, and it still found a place for all of that gorgeous Square Enix artwork any fan of the developer would expect a guide to have.

SGR Rating: 5/5

Author: Michael Owen
Publishers: BradyGames
Editions Available: Paperback
Acquired by Publisher

Filed Under: Strategy Guide Reviews

Mass Effect 2 Strategy Guide Review

April 26, 2011 By Keri Honea 2 Comments

Mass Effect 2 Strategy Guide ReviewThe first Mass Effect strategy guide was also published by Prima Games, and since that one did so well, I had very high hopes for this one. The fact that Catherine Browne was the author of this guide only made me more excited. However, this guide ended up being a giant disappointment for me–as my big build-up should have already suggested.

A lot of what the guide has is great. It incorporated the same layout from the first guide, so everything is very easy to see at a glance, and the images are unobtrusive, significant, and won’t require users to squint. It’s also great that it makes little notes of who Shepard can romance (depending on gender) as well as how one can go about doing it. For example, romancing Jacob takes a lot of subtlety and gentle prying for him to come out of his shell. For Jack, you have to gain her loyalty and either side with her in her “disagreement” with Miranda or diffuse the argument with charm/intimidation. In addition, as someone who imported Shepard from the first game, I really enjoyed the little callout references to things that happened in the original, such as the explanation for why Wreav or Wrex might be the krogan leader.

However, despite all these design elements and the mostly accurate walkthrough, the guide is missing a lot of vital information. These omissions will cause problems and confusion for those who 1) want to snag all of the Achievements/Trophies and/or 2) imported their characters from the original Mass Effect.

The first omission that surprised me was a side mission Shepard can take on Illium. Shepard runs into Giana Parsini from Noveria Internal Affairs, a character only those who have played the first game will remember. She approaches Shepard and asks for help busting a weapons thief. It’s possible that this is a mission a player can only get with an imported game, but that’s really not an excuse for it to not even be mentioned in the side missions section of the guide. Since this was so small, I dismissed it.

But then, I reached the start of the endgame.

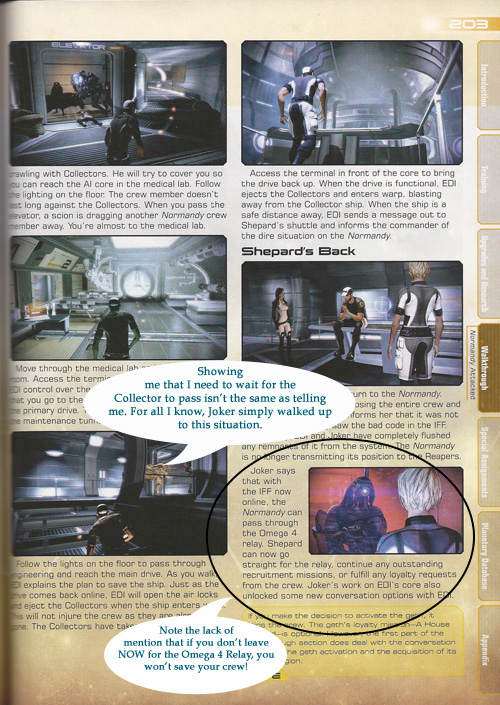
From the time I had to play as Joker until the end credits, I was finding holes in the guide. For the scene that you have to play as Joker, it really offers no guidance other than walk the path. However, at one point, if that’s all you do, Joker meets a nasty end. The guide showed a screenshot of what you should do at this point, but there were no captions or mentions in the paragraphs as to what the screenshot even meant. For all I knew, it was just a screenshot of Joker walking down the hallway. At the very end of this venture, when Shepard has a choice to go after the Normandy crew or continue sidequesting, the guide discusses all of these options, but never once says that if you don’t go after your crew immediately, they all die except for Dr. Chakwas.

Mass Effect 2 Strategy GuideThis isn’t the only time that users aren’t given proper warnings for who might die in Shepard’s crew. The guide does mention that if the ship isn’t upgraded properly, a crewmate will die in the ensuing crash, but that’s pretty much where the advice stops. In the Mass Effect 2 endgame, Shepard has to make choices of who is to perform a certain task, who will accompany Shepard, and who will lead a separate party. Shepard has to make these choices three times, and depending on who the Commander chooses, crewmembers will live or die. During this entire section, no suggestions are proffered. I would understand if the writer didn’t want to give too much away at this point, BUT, these suggestions should at the very least go with the Achievements/Trophies appendix, since this is where the “No One Left Behind” Achievement is described.

As a result with my playthrough, Mordin died at the very, very end and I had zero clue why. I stayed up another hour longer to read the guide from cover to cover, to make sure I hadn’t missed anything. No explanation. I ended up going to IGN Guides, and they explained exactly who Shepard had to pick for these tasks in order to keep everyone alive. When I replayed the ending with their suggestions–the only thing I didn’t do correctly was who to send with the Normandy crew survivors back to the ship–everyone survived. While it is possible that the guide writer picked the correct crewmembers instantly, surely the “No One Left Behind”Achievement would clue in the writing team that it’s possible for teammates to die.

This experience absolutely enraged me. Of all the information this guide should have had, every scenario of the endgame should most definitely have been included. If I had paid for this guide, I would be even more livid, which is perhaps the biggest disappointment to me.

I can only recommend this guide if you are a huge Mass Effect fan, just because the gorgeous cover and artwork within make it worth it. Otherwise though, save your money and stick with IGN for help with this one.

SGR Rating: 3/5

Author: Catherine Browne
Publishers: Prima Games
Editions Available: Paperback and Collector’s Edition
Acquired by Publisher

Filed Under: Strategy Guide Collector's Editions, Strategy Guide Reviews

Dissidia Duodecim Strategy Guide Review

April 21, 2011 By Keri Honea 1 Comment

Dissidia Duodecim Strategy Guide ReviewFinal Fantasy Dissidia Duodecim is an unusual fighting game in of itself, in that it’s a weird RPG/fighting hybrid. Instead of just climbing through the ranks via numerous battles in a 2D arena, these fighters have actual RPGing to do. There’s an overworld to explore, game boards (think checkers) to traverse and pick your fights, potions to collect, Limit Breaks to achieve, weapons and accessories to buy, and experience to be gained. Instead of teaching yourself button combos, you learn different abilities as your characters level up, just like one would in an actual Final Fantasy game. So in the end, the guide has two jobs: offer strategies for each character you battle and inform you how to max out your character.

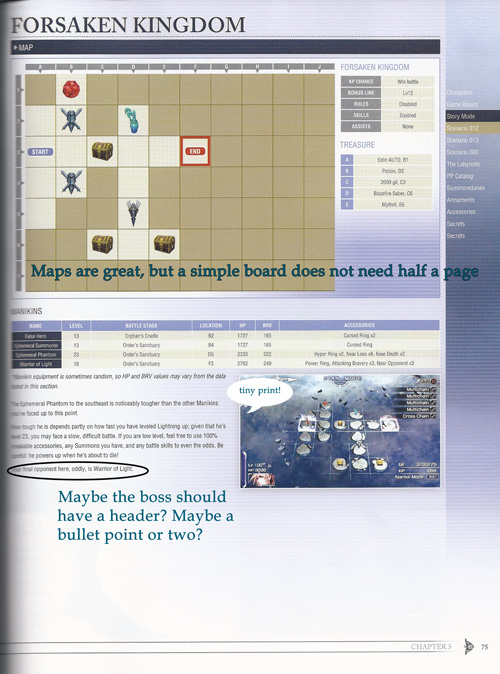
Even though this strategy guide really does its best to fill both of these positions, its overall page layout detracts from finding any of this information efficiently.

By the time I received the guide, I had already gotten through about the halfway point of Scenario 012 and was ground instantly to a halt. I thought I would have to level grind to get further, but I also hoped that the guide would offer some strategies I hadn’t thought of, such as certain accessories or tips as to what the manikins and boss would do in battle. At the very least, it would have a suggestion for what level I needed to be. Most of these assumptions and/or hopes were wrong.

For starters, no level suggestions are ever given. If you look at the screenshots provided, the guide writers had their characters at level 100 for each level in the main story. I suppose that if I cared to level up my characters all the way up to level 100 I could soar through the levels as well, but I just wanted to minimalize my way through, even if it meant working hard. Sure beats the method of level grinding in this game. So when I saw the lack of suggestions for levels, I was enraged. After I calmed down, I took note of the chart that listed the enemies with their levels, and took those numbers as level suggestions. These are the same numbers you can easily find by scanning your game board, but by having the list in front of you, you can see what levels you should be thinking of before you even enter the board.

It was at that point that I realized what was really bothering me: while each page depicting each board holds a lot of information, the layout of the page hinders one from finding what they are looking for efficiently (save for the map of the board).

Dissidia Duodecim Strategy Guide Page

In addition, since the print of the text is so tiny, it forces the user to pick up the book and read instead of finding what they want at a glance. For a fighting game, that can be a little annoying for the user, unless the user is only using the guide when he or she fails a particular battle.

Other than this layout issue, the guide is packed full of all the information you never thought one little game would ever have. There are the usual charts of armor, items, accessories, and summons, just as one would expect. There is also a full PP Catalog (not unlike the fat volume JCPenney would send to your parents and grandparents) that lists everything one can possibly buy with PP and how much it costs. There is also a full listing of all the game’s Accomplishments–not that anyone really cares, I mean, unless they’re official Trophies, I doubt many will really try to get them all, but that’s my rambling two cents.

The most impressive appendix to me is the list of all the Moogle mail you can receive over the Mognet. The sender, letter contents, your reward for receiving the letter, and how you get the letter are all carefully explained. This is not for 20 or so letters; this includes hundreds of seemingly insignificant letters that consists of branching letters and chain mail. If the writers didn’t get this info directly from the developers, then God bless them for finding each one.

Despite all of this information, the guide completely lacks one feature that was advertised on the back cover:

Discover the best ways to power level your heroes, advance their abilities, and earn items.

I read this guide cover to cover, and I found no such information. As one who hates level grinding, I would have loved to have found these tidbits. Not sure if this was an oversight on the back cover design or if something got omitted post print, but it was still a huge disappointment.

All in all, for those who really want to get all of the RPGing out of Final Fantasy Dissidia Duodecim as humanly possible, then this guide will not disappoint. If you’re looking to just burn through the game, then the strategy guide will offer you little assistance. All of it is helpful, but not as meaningful for your purposes.

SGR Rating: 4/5

Authors: Phillip Marcus and Elizabeth Ellis
Publishers: BradyGames
Editions Available: Paperback
Acquired by Publisher


Filed Under: Strategy Guide Reviews

  • « Previous Page
  • 1
  • …
  • 33
  • 34
  • 35
  • 36
  • 37
  • …
  • 44
  • Next Page »

Follow us!

Subscribe!

Upcoming Strategy Guides

 Nothing here. Come back later. 😢

Latest Strategy Guide Reviews

The Walkthrough by Doug Walsh Review

Red Dead Redemption 2 Strategy Guide Review

Mega Man 11 Strategy Guide Review

God of War Strategy Guide Review

Far Cry 5 Strategy Guide Review

Friends of SGR

  • BradyGames
  • Dan Birlew – Guide Writer
  • Doug Walsh – Guide Writer
  • Future Press
  • Game Enthus
  • GameWires.com
  • Piggyback
  • Press the Buttons
  • Prima Games
  • Racing Games

Top Posts & Pages

  • Prima Games and BradyGames Officially Merge
  • Final Fantasy III Strategy Guide review by FuturePress

Copyright © 2025 · Web crafted by Warkhammer


Loading Comments...