• Home
  • About Us
  • Podcast
  • Strategy Guide Wit
  • Contact

Strategy Guide Reviews

A Strategy Guide for your Strategy Guides

  • Reviews
    • Strategy Guide Reviews
    • Video Game Reviews
    • Mini-Reviews
  • Features
    • Interviews
  • News
  • Unboxing Strategy Guides
  • Columns
    • Gaming Diary
    • Corner of Randomness
  • Videos

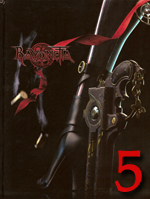
Bayonetta Strategy Guide Review

June 27, 2010 By Keri Honea 6 Comments

Bayonetta Strategy Guide by Future Press Strategy Guide Review Policy:

My goal for these strategy guide reviews is not to discuss whether one needs the guide to complete the game. Every gamer has different strengths and skills, and one may need every bit of a guide, another may need to look up information for quick assistance once, and another may laugh at the idea of ever using a guide, even the online freebies. My goal is to determine whether the guide is 1) helpful in the first place, 2) does it encompass gamers who need hand-holding as well as those who need a quick reference and 3) how much information does it really have.

Review:

The strategy guide for [amazon-product text=”Bayonetta” type=”text”]B001YI0Z2U[/amazon-product] was released quite a bit after the game’s release in January 2010, due to SEGA and Platinum Games’ high expectations for its content. My first thought when I heard this was, “Why?” but after seeing first hand all of the game’s collectibles, medals, abilities and unlockables, this game obviously required a great deal of playing time. Inside the front cover of the guide, the authors acknowledge that they spent over 6,000 playable hours perfecting this guide. That’s some serious dedication. But of course, I’m a skeptic, so I had to know how much that time really paid off.

The answer is indubitably. I honestly do not believe there is another way of discovering everything Bayonetta has to offer without this guide or without spending 6,000 hours playing it yourself.

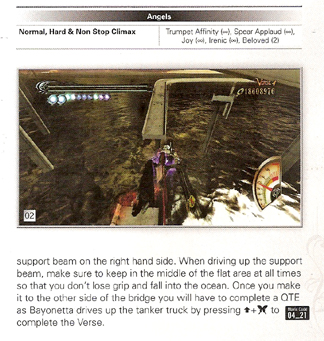
Bayonetta Stategy Guide FuturePress movie codes

See the movie code? Thank you FuturePress!

The walkthroughs [amazon-product region=”uk” text=”Bayonetta Strategy Guide” type=”text”]3869930039[/amazon-product] are divided up into three sections: the Scenario Guide, the Pure Platinum Guide, and the Angels Guide. The first section is a general walkthrough of the game; it points out all collectibles in all difficulties and points the player in the general direction of what to do next. No real, in-depth strategies are offered here. For those, there is the Pure Platinum section, which provides the most efficient strategies throughout the game for the player to earn those coveted Pure Platinum medals for every verse. If you need extra help to see how these strategies can be done, FuturePress provides movie codes for each strategy (see image to the right) for FuturePress registrants to view. The last section, the Angels Guide, offers in-depth strategies for the various Angels Bayonetta will encounter, including all bosses. These last strategies are so in-depth that for the bosses there are two sections: a general overview section of the boss’s attacks (prep) and a strategy section (for actually attacking).

So as you can see, no stone is left unturned, and the guide is sectioned off to accommodate a variety of players and player styles. However, this asset is also a bit of a detriment. Since not everything is in one place, players who may need additional assistance or who want to use the Pure Platinum section and find all the collectibles will have to flip back and forth through the guide often. It becomes a hassle over time, especially switching between the walkthroughs and Angel strategies for the boss fights. But this is a minor annoyance, and in no way detracts from the usefulness of the guide.

As an extra bonus, the back of the guide is packed full of the game’s secret battles, costume unlockables, the Angel Slayer challenge tips, Speed Run challenge (defeat the game in 3 hours), Easter eggs, concept art, interviews with the developers, and a concordance of all the angelic and demonic references. I don’t think I’ve ever come across a guide with this much bonus information. I could easily spend a Sunday afternoon just reading the back section to learn all there is to know about Bayonetta and her world.

Simply put, Bayonetta is a game about finding everything and seeing what happens next, despite what the overall story and gameplay leads you to believe. If you want to chalk up your Pure Platinum medals and chapter awards, not to mention find out what happens when you collect all 101 of the Umbran Tears of Blood, this guide will get you there and it may be the only way to get there without pulling your hair out or overheating your console. This is exactly what every guide should be, and Future Press has raised the bar yet again when it comes to the standards of strategy guide quality.

The Bayonetta Strategy Guide by FuturePress rightfully earns its 5/5.
Filed Under: Strategy Guide Reviews

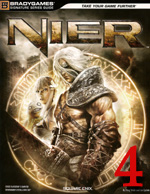
NIER Strategy Guide review by Doug Walsh and Joe Epstein

May 22, 2010 By Keri Honea Leave a Comment

NIER Strategy Guide by Bradygames Strategy Guide Review Policy:

My goal for these strategy guide reviews is not to discuss whether one needs the guide to complete the game. Every gamer has different strengths and skills, and one may need every bit of a guide, another may need to look up information for quick assistance once, and another may laugh at the idea of ever using a guide, even the online freebies. My goal is to determine whether the guide is 1) helpful in the first place, 2) does it encompass gamers who need hand-holding as well as those who need a quick reference and 3) how much information does it really have.

Review:

NIER is pretty much a game about killing things, something Nier himself says numerous times. It’s mindless hack-and-slash most of the time; so much so that level grinding is not required. Doing as many sidequests as possible helps your stats for sure and gives you rather nice weapons, but Nier will get extremely powerful (or as the guide says, fiendishly powerful) on his own. As such, the guide doesn’t have that much to offer in terms of walkthroughs – which is fine because no one will really need them – so the authors, Doug Walsh and Joe Epstein, structured the guide to help players get the most Achievements/Trophies as possible. A large handful of the Achievements are focused on defeating the end bosses within a specific time limit, and one Achievement is strictly for beating the entire game in less than 15 hours. In other words, Walsh and Epstein focused on producing the quickest strategies possible.

For example, the sidequests slowly unlock throughout the game, and several unlock at times when you really can’t do anything about them at the moment because either the location hasn’t opened up or the person you need to talk to isn’t available at the time. The guide’s sidequest section is quick to point out when is the best time to take on each sidequest so Nier can do it immediately and not waste time. If he’s asked to go pick up some crystal, the guide will tell you not to travel to that person to activate the sidequest until Nier has access to the markets in Facade, where he can buy crystal instead of trying to hopefully gather it somewhere in the field.

There are also giant appendices in the back of the guide that provide stats, tips, and the fastest methods to become a fishing master or grow a green thumb. I did not try to grow the legendary Lunar Tear or cross-pollinate to create pink moonflower seeds, but I am sure if I followed the guide’s steps and tricks to speed up time, I would have had little difficulty (I still would have thought the process was a complete waste of time, but that’s a story for another day).

However, I did have a few difficulties with the guide, which is why it received a 4 instead of a perfect 5.

The first one was with a map of the Junk Heap in Part Two. The elevator was marked incorrectly on the guide map, and I was backtracking all over the place trying to find it. I became convinced that I was trapped in this section, because obviously, there was no way out. The one good that came of it was all the experience I received from smashing robots and all of the items I collected (I found enough broken antennas to build my own city). An inaccurately marked map is a rookie mistake, and it never should have happened, no matter that it didn’t get me killed or eternally lost.

I also had issues with two of the sidequests, and both were in Part Two. The quest “Contract for a Contractor” required Nier to pick up a few items that could only be found in the B2 level of the Junk Heap, but the guide never once said that Nier couldn’t reach that area until a certain point of the game when he acquires access to that floor. Yet again, I was running all over the place, trying to figure out where this mystery elevator was that could take me to B2. The second quest, “The Pride of  a Lover” needed some fluorite from the Barren Temple in the desert. The guide told me exactly where to go to find it and even provided a screenshot of the location, but after combing the room for far longer than I should have, it became apparent that the fluorite doesn’t appear in the same place in the Temple each time you play. I found it on a completely different floor than the guide suggested. I really can’t fault the writers for this, because they would not have known or even thought to have check that the fluorite was always there.

The fact that all these problems stem from Part 2 makes me think that the writers or even the publisher got a little rushed toward the end. Even though these problems did not ruin my experience with the guide or the game, it is the little things that keep the NIER Strategy Guide from perfection.

Filed Under: Strategy Guide Reviews

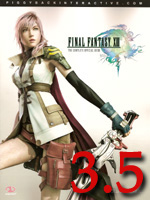
Final Fantasy XIII Strategy Guide review

April 27, 2010 By Keri Honea 234 Comments

Strategy Guide Review Policy:

My goal for these strategy guide reviews is not to discuss whether one needs the guide to complete the game. Every gamer has different strengths and skills, and one may need every bit of a guide, another may need to look up information for quick assistance once, and another may laugh at the idea of ever using a guide, even the online freebies. My goal is to determine whether the guide is 1) helpful in the first place, 2) does it encompass gamers who need hand-holding as well as those who need a quick reference and 3) how much information does it really have.

Review:

I can’t lie. This guide was really, really, REALLY hard for me to review. It does so many things well, and yet, when one would need it most, it utterly fails.

I mentioned a few weeks ago that the guide wasn’t fully informative when it came to the Chapter 9 boss, and that I’m certain (with verification from other friends) that defeating the boss with this strategy is downright impossible. Unfortunately, this wasn’t the only time the guide delivered a seemingly impossible strategy for fighting a boss. On the flipside, the other strategies worked flawlessly. Hence the quandary.

The other major issue I had was the guide’s party recommendations. With the Mark Missions, the guide simply suggests what roles are needed to successfully complete the mission. So in many ways, players can pick and choose which characters work best for them, not unlike they would in Final Fantasy III. The guide should have taken the same approach throughout the main quest. For the first 30 hours or so, players have no choice when it comes to their party as the characters are all divvied up. But when everyone is together, the guide strongly urges players to use a party consisting of Lightning, Fang, and Hope, and well, Hope just does not work very well. He’s not a great healer, his HP is incredibly low, and he moves so darn slowly. The guide suggests this party formation so that players have access to all different roles, and that’s all very good in theory but it doesn’t work well. The times one needs a Synergist role is so rare that it’s unnecessary to keep Hope in at all times. Not only that, but players could also simply apply a Fortisol or Aegisol before battle and it will do the same trick (and much faster as well).  Maybe some players like working with Hope, and that’s fine, but the guide should have kept the same formula with the Mark Missions and not have “forced” a party selection on the player. This is also part of the problem I had with some of the boss fights I mentioned above. Once I changed out my characters to better suit my style of play, the guide hasn’t been all that useful to me for boss fights, and sadly enough, I’m doing much better and killing off bosses in one go.

Despite these setbacks, the guide does several other things really, really well. For instance, the maps are FLAWLESS. All treasure spheres are accounted for, all hidden doorways are marked, and all cut scenes are neatly designated. These maps are quite possibly some of the best maps I have ever come across in my guide-using days. In addition, the tips it provides for fattening up your Gil wallet, upgrading and dismantling weapons, and—everyone’s favorite RPG topic—level grinding, somewhat balances out the guide’s shortcomings. And as mentioned above, the strategies for enemies and most of the strategies for bosses were spot on.

It’s just unfortunate that the bosses it misses are the biggest, most important bosses in the game. It’s equally as unfortunate than none of the strategies provided will guarantee the player to earn a 5-star rating in battles and missions. The guide opted to make sure the player stays safe over annihilating the enemy as quickly and stylishly as possible, so for the most part, if you want those 5-stars, you’re on your own.

Perhaps now you see why I struggled with the final rating of 3.5/5 for PrimaGames and Piggyback Interactive’s Final Fantasy XIII Strategy Guide. It’s definitely above average, but it doesn’t wholly excel either.

Filed Under: Strategy Guide Reviews

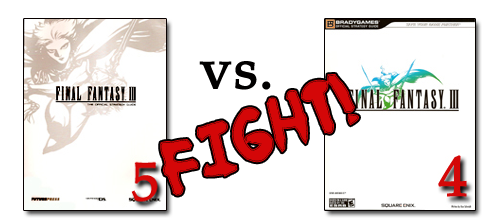
Final Fantasy III Strategy Guides: FuturePress v. BradyGames

April 21, 2010 By Keri Honea Leave a Comment

Final Fantasy III strategy guides - FuturePress vs. BradyGamesAs much as I would love to see two books actually fight, we’ll have to use our imaginations and carry the fight with my words. Why my words? Because I’m the one writing this.

Obviously, I scored one guide higher than the other, so it’s quite obvious which one wins this fight. *coughFUTUREPRESScough* But allow me to delve into why you should consider FuturePress’s guide over the BradyGames guide, even though the latter is very good.

Sidequests

Both guides include walkthroughs for the various sidequests, so that wasn’t the issue. However, the FP guide has all of the sidequests interspersed throughout the main quest walkthrough, so there’s no real chance of the player missing a sidequest. BG’s guide has all of the sidequests in the back, so not only is there a possibility of missing a quest, but there’s the added aggravation of constantly flipping back and forth between the main walkthroughs and the side walkthroughs. Since so many areas require additional leveling up outside of what you can achieve by burning through the main quest, it makes more sense to intermingle the sidequests so players can level grind with a sidequest instead of well, level grinding.

Job Guidance

As I said in my review, BG’s guide takes a very hands off approach in guiding the player, especially when it comes to job choices. The game is set up so players can customize their party to how they prefer to fight, so that’s all well and good, but there are rarely suggestions for what one should do with certain jobs when fighting bosses or navigating a dungeon. The FP guide lists every available job at the beginning of the area and suggestions for how to use that job to its fullest. The writers still didn’t tell you how to play, but they at least told you what you were dealing with and what abilities or items your character should have.

The Extras

In the back of FP’s guide, right before the bestiary and countless item lists, is a section dedicated to hints and tips. It provides damage calculations, how to cause 9999 damage at level 99 every time, and how to get the most out of the NPCs. It also contains walkthroughs for the Mognet sidequests, which are only available if you have a friend also playing the game on his or her DS. BG’s guide does touch on the Mognet, albeit not in great detail. It also does not offer additional tips outside of the end-game job information in the beginning.

In the end, it really all depends on what the user personally wants from a guide. If they want the bare essentials, then BradyGames has the guide for them. The completionists though, will be far happier with the guide from FuturePress.

Filed Under: Strategy Guide Reviews

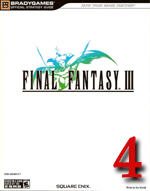
Final Fantasy III Strategy Guide review by BradyGames

April 15, 2010 By Keri Honea Leave a Comment

Strategy Guide Review Policy:

My goal for these strategy guide reviews is not to discuss whether one needs the guide to complete the game. Every gamer has different strengths and skills, and one may need every bit of a guide, another may need to look up information for quick assistance once, and another may laugh at the idea of ever using a guide, even the online freebies. My goal is to determine whether the guide is 1) helpful in the first place, 2) does it encompass gamers who need hand-holding as well as those who need a quick reference and 3) how much information does it really have.

Review:

BradyGames’ Final Fantasy III Strategy Guide reminds me quite a bit of their strategy guide for Final Fantasy VII: short, sweet, and to the point. There is no fluff. There are no spoilers. There is no messing around. As a result, the guide feels a bit like an afterthought for the game, which makes it not geared toward the end of the gaming spectrum that needs a little hand-holding.

Now it has everything a decent guide for a JRPG needs. It has detailed information in the beginning about the characters (in this instance, the jobs), fabulous maps, in-depth item information, and information on sidequests. And if you want a bare bones guide with pretty much just this information, then this guide is definitely for you. This is not to say that it has terrible walkthroughs; it’s just that the walkthroughs are scant and provide very little detail other than where to walk next. There is only one tip in the entire guide for a suggested level before entering an area. That’s it. The rest you’ll have to deduce on your own.

That’s pretty much the theme of the guide: here’s some information, now go figure it out a bit on your own. For example, there is no other advice about job selection aside from what is found in the beginning of the guide. This section is useful in that it offers advice on the usability of a job near the end of the game, but it would be nice to have at least some job tips about bosses throughout the game. It offers job suggestions for a couple of bosses, but that’s about it. At least it mentions what weaknesses each boss has, if any.

However, with this hands-off approach, the guide really lets the player experience the game how he or she wants to. Since the jobs are so diverse, players can find which jobs personally fit their playing style the best and go from there. Since this guide makes very few job suggestions, it boosts this unique feature of the game.

Another aspect that was slightly annoying was the placement of the sidequest walkthroughs. All of these “extra” walkthroughs are placed in the back of the guide, and there are no mentions of when any of these sidequests become available. If you’re interested in sidequests, you’ll have to flip back to find out when the quests open up and where and then forth again to return to the story. It’s true that not everyone wants to do the sidequests, but if they’re all going to be stuck in the back, at least make a mention of when a sidequest is available when it opens in the story.

And that’s pretty much all the guide has. There are no extras at all in terms of artwork, gameplay advice, or even the Mognet outside of the sidequests. It’s quite possibly one of the most simplistic guides I’ve ever found (in the current generation of consoles, anyway), but at least it does everything it set out to do well. It’s for this reason that it earns a 4/5.

Filed Under: Strategy Guide Reviews

  • « Previous Page
  • 1
  • …
  • 37
  • 38
  • 39
  • 40
  • 41
  • …
  • 44
  • Next Page »

Follow us!

Subscribe!

Upcoming Strategy Guides

 Nothing here. Come back later. 😢

Latest Strategy Guide Reviews

The Walkthrough by Doug Walsh Review

Red Dead Redemption 2 Strategy Guide Review

Mega Man 11 Strategy Guide Review

God of War Strategy Guide Review

Far Cry 5 Strategy Guide Review

Friends of SGR

  • BradyGames
  • Dan Birlew – Guide Writer
  • Doug Walsh – Guide Writer
  • Future Press
  • Game Enthus
  • GameWires.com
  • Piggyback
  • Press the Buttons
  • Prima Games
  • Racing Games

Top Posts & Pages

  • Prima Games and BradyGames Officially Merge
  • Final Fantasy III Strategy Guide review by FuturePress

Copyright © 2025 · Web crafted by Warkhammer


Loading Comments...