• Home
  • About Us
  • Podcast
  • Strategy Guide Wit
  • Contact

Strategy Guide Reviews

A Strategy Guide for your Strategy Guides

  • Reviews
    • Strategy Guide Reviews
    • Video Game Reviews
    • Mini-Reviews
  • Features
    • Interviews
  • News
  • Unboxing Strategy Guides
  • Columns
    • Gaming Diary
    • Corner of Randomness
  • Videos

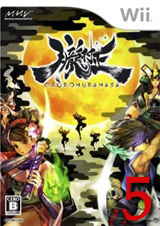
Muramasa: The Demon Blade Strategy Guide Review

November 11, 2009 By Keri Honea Leave a Comment

Strategy Guide Review Policy:

My goal for these strategy guide reviews is not to discuss whether one needs the guide to complete the game. Every gamer has different strengths and skills, and one may need every bit of a guide, another may need to look up information for quick assistance once, and another may laugh at the idea of ever using a guide, even the online freebies. My goal is to determine whether the guide is 1) helpful in the first place, 2) does it encompass gamers who need hand-holding as well as those who need a quick reference and 3) how much information does it really have.

Review:

The guide is as short as the game (it takes about 10-12 hours to finish with both characters), so this review will follow suit. The guide is also as brightly and beautifully colored as the game (this review will, unfortunately, not follow suit), making it appear as more of an artbook than a strategy guide. Along with the beautiful artwork are explanations of the roots of the Japanese demonology that spawned all of the ideas for the enemies found in the game, which makes for a nice folklore and culture lesson.

Once you get back the art and history, the actual strategy guide begins. The gameplay is a bit repetitive, so the guide doesn’t exactly offer much in terms of a walkthrough. Instead, it focuses on the maps for each level, and offers a written description of the points the player should try to find, such as hidden hot springs, restaurants, and locales of traveling merchants.

The guide really shines in the boss strategies. It advises what the character’s level should be, what minimum-level swords the character should have in his/her possession, and then goes into the various attacks the boss will bring to the table, which is great for learning ahead of time what sword-breaking attacks to avoid. Similar-styled strategies are also provided for each enemy lair.

The back appendices have everything one would expect—item, accessory, food, swords (huge forging tree), and books—but also provides more detailed information about the enemy lairs as well as tips for accessories and better swordplay.

The one complaint I have about the book (okay, there are two because it has several typos) is the spoiler section in the back. It’s great that it explains how to achieve all three of each character’s endings, but it really wasn’t necessary to go into detail about each ending. At least it was kept in the very back.

Since the game is so minimalist in so many ways, this guide could have taken a minimalist approach, and instead, it did its best to beef up the information so that no stone would be left unturned. Combine this with its stellar organization and splashes of color and gorgeous artwork, and the end result is an excellent guide. Muramasa The Demon Blade Strategy Guide gets a 5/5.
Filed Under: Strategy Guide Reviews

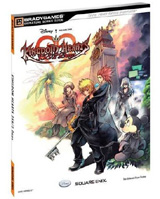
Kingdom Hearts 358/2 Days Strategy Guide Review

November 4, 2009 By Keri Honea Leave a Comment

Strategy Guide Review Policy:

My goal for these strategy guide reviews is not to discuss whether one needs the guide to complete the game. Every gamer has different strengths and skills, and one may need every bit of a guide, another may need to look up information for quick assistance once, and another may laugh at the idea of ever using a guide, even the online freebies. My goal is to determine whether the guide is 1) helpful in the first place, 2) does it encompass gamers who need hand-holding as well as those who need a quick reference and 3) how much information does it really have.

Review:

The game Kingdom Hearts 358/2 Days—which is not pronounced how any normal person would ever think—is divided up into 92 missions and 85 challenges. And ever so kindly, the guide is organized similarly. In the beefy walkthrough section, each mission and corresponding challenges are presented on the same page, so there’s only one place to look up the appropriate mission number for either feature. The game was not set up in the same way, so it was nice that the guide did not follow suit.

Since this game has so many similarities to Chain of Memories, I was initially worried that this guide would only be as good as that guide. That guide was helpful in card preparation for entering certain doors and for boss prep, but nothing else. Fortunately, this guide provides a wealth of information for both the missions and the boss prep. For example, it tells exactly how to achieve the 100% Mission Completion bonus for every mission, even if it means having to come back later when Roxas gets better abilities. It also suggests what panels to equip for each mission, which saves time from entering a mission unprepared, dying quickly, and forcing Roxas to start over.

The boss strategies provided are some of the best that I’ve come across in guides. It explains the boss’s abilities, combat techniques, and offers very specific strategies. One of the most detailed examples is the strategy for fighting the Infernal Engine in Mission 50.

Although running up and attacking the mouth is somewhat successful, this leaves Roxas extremely vulnerable to counterattack. Instead, stay away from the Infernal Engine and use Air Slides and Dodge Rolls to avoid missile attacks lobbed by the three Heartless dancing on its top. By remaining at medium range, you’ll incite the infernal engine into opening its mouth and firing its cannon. Block these shots with the right timing to send them flying up to the top, taking out one of the Heartless with each shot.

Without the Heartless on its top, the Infernal Engine may spit out a large crate. The crate soon breaks, spilling out several Soldiers. During this time, it is okay to attack the Infernal Engine directly. Lock on to the boss and attack its mouth, letting the Soldiers get cut apart in your back swings.

Also as equally detailed are the maps for each mission. They are so detailed in fact that I was initially confused by them at first, which I wouldn’t have been if I had simply read the handy map explanation at the start of the walkthrough. The maps accurately depict where every badge, mission gem (mission mode only), boss, item of interest, and Heartless can be found. This was most helpful in the Halloween Town missions, where all of the Heartless hide in random objects.

As expected with physical, book strategy guides, or really all Kingdom Hearts guides for that matter, this guide has massive information about all of the characters’ stats, weapons and abilities and all of the panels Roxas can obtain. Players can easily find out how to get any panel in the game, whether its from a mission, the Moogle shop, panel synthesis or from redeeming Challenge Sigils or Mission Crowns. In addition, the guide offers plenty of tips about panel selection and how to boost panel effects and abilities.

To sum up, this guide provides extensive mission explanations, boss strategies, character analyses, maps, and panel charts. In other words, it has everything a great guide needs. I really could find no faults with this guide, and believe me, that was difficult considering I didn’t like the game at all.

The Kingdom Hearts 358/2 Days Strategy Guide gets a 5/5.

Filed Under: Strategy Guide Reviews

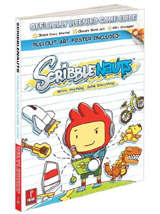
Scribblenauts Strategy Guide Review

October 9, 2009 By Keri Honea Leave a Comment

Scribblenauts Strategy GuideThe goal of writing these strategy guide reviews is not to discuss whether one needs the guide to complete the game. Every gamer has different strengths and skills, and one may need every bit of a guide, another may need to look up information for quick assistance once, and another may laugh at the idea of ever using a guide, even the online freebies. My goal is to review whether the guide is 1) helpful in the first place, 2) does it encompass gamers who need hand-holding as well as those who need a quick reference and 3) how much information does it really have.

The Scribblenauts Official Game Guide is not like other guides as the game is unlike most other games. There are no maps or character biographies, just walkthroughs for the Puzzle and Action levels. However, it has some unique concepts, so without further adieu, onto the review.

Game Basics

This is the only section of the guide that resembles other guides. All of the basics of gameplay are covered, which is a bit short since the game is pretty much controlled by only the stylus. However, this section also covered the various categories of the objects that Maxwell can summon, such as weapons, ropes, flight accessories, swim gear, etc. and the various categories of object interactions. The latter is the most important as sometimes it isn’t obvious what the objects can be used for. For example, it may be obvious to summon a dinosaur to attack a lion, but it may not be as obvious that Maxwell can also ride said dinosaur.

This section also lists all the possible rewards a player can earn while solving the puzzles and provides 21 tips for successful gameplay. Personally, I wish I had read these 21 tips before I played half of the game. It would have made some frustration slightly less.

Puzzle Walkthroughs

The walkthroughs are divided up into the 10 worlds with the puzzle levels listed before the action levels, which makes quick searches for the right puzzle quite easy to do. For each puzzle, the walkthrough details what Maxwell needs to do, which is extremely helpful for the not-so-obvious action levels. To the side of the explanation is a list of word ideas to use to help Maxwell snag the starite. It’s not a complete list, just suggestions, and extra spaces are even included for players to fill in their own successful ideas. Some of the walkthroughs even include a crazy solution idea, such as summoning a black hole to do the dirty work or turning enemies into frogs.

The only gripe about the walkthroughs is that not all of the word solutions writer Catherine Browne offers will work due to the unpredictability and random actions of the NPCs, especially if they all have to be kept alive to snag the starite. They have a nasty tendency to suddenly hurl themselves over the edge of cliffs or run toward ferocious animals that somehow got free of the cage you built to contain them. So the word solutions offered are really more of word guidelines for players to follow in solving the level initially and in challenge mode.

Bonuses

The guide provides an extensive Word List, but it’s not a complete lexicon of the game, which makes one wonder why bother including it at all. Hardly any of the words in the list are not already listed in the word solutions in the walkthroughs. Browne explains that all of the words in the list are those that she knows will solve puzzles, leaving out all of the zany words that the development team included just for a chuckle. Again, one has to wonder why include the list at all if none of the words are different than what is found in the walkthroughs.

Although that is a rather weak bonus, the guide includes a few other goodies, including advice from the 5th Cell development team for the game’s level editor, an interview with the 5th Cell team, a concept art gallery, an adorable tear-out poster, and space for players to make their own notes about the game. While all of these are great little bonuses, none are really an incentive to rush out and buy the guide for the bonuses alone.

Now if the word list was complete, that would be a different story.

Rating

The Scribblenauts Official Game Guide is a little weak in the bonus department, but it does what it set out to do: provide helpful information to solve Maxwell’s various puzzles in an easy to find format. Therefore, the guide gets a 4/5.

Filed Under: Strategy Guide Reviews

Dissidia Final Fantasy Strategy Guide Review

September 30, 2009 By Keri Honea 1 Comment

I honestly had no idea what to expect from this guide, as I have never bought or thought of buying a strategy guide for a fighting game. I mean, don’t you develop your own strategy for fighting? Develop your own character preferences and styles? So when I picked up this monstrosity of a guide at my local Gamestop, I was shocked by its girth.

After I tried a couple of story levels of the game, I began to see why there is a guide. The combat style is unlike anything I’ve ever played before and am likely to ever play again. Not to mention, there is an ungodly number of unlockables in this game, and it’s nice to have something in print that lists them all. And it’s really for that latter reason that a guide is needed at all. After all, as I previously mentioned, the fun of playing a fighting game is to come up with your own fighting style.

That said, here’s the review.

Review:

Maps
Maps in a fighting game? Oh hell to the yes.

Each level, no matter the part of the campaign mode, is set up like a board game. Enemy pieces and items are scattered across the board, and players have to move their character piece to engage in battles or open chests. Each move the character makes detracts from the given number of Destiny Points (DP), and the final number of DP gets tallied into the final score once the level is completed. Obviously the goal is to complete the level with as many DP as possible, and in addition to including a map of each board with all hidden items and bosses, the guide has a map of the board with a plotted route for the most efficient DP use. However, it also has to be noted that since many hidden enemies and items only appear after the first run-through of the level, most of the DP efficiency routes are only applicable for later run-throughs.

Walkthroughs:

The maps pretty much take care of all walkthrough questions, but the walkthroughs still provide a vast amount of information. For example, each enemy piece is charted out with all individual stats. Each treasure chest has a chart of its contents for each time the level is played, and if a treasure or enemy only appears after an initial run-through, this information will also be listed. But wait, there are two more tables to each level: the awards list for remaining DP for each run-through and the awards for each star rating from level completion.

In other words, players will know every possible award, number, and requirement for every possible outcome when playing each level of the campaign.

Another nicety of the guide is that it doesn’t assume the order the Destiny Odyssey chapters are played. Each chapter has a different difficulty level, and players have the option to play any chapter they want in any order. The guide takes this into account, so at the beginning of each Destiny Odyssey chapter, it assumes that this is the first chapter the player has looked at. It means there is a lot of repeated information, but it also means that players don’t have to flip through other chapters looking for basic information about how the Destiny Odyssey chapters play out.

The only complaint I have about the walkthroughs is that it gives one sentence, if it offers any advice at all, on strategies for defeating the bosses. But as Dissidia is a fighting game, it’s kind of expected for players to get stronger on their own and figure out their own strategies for fighting, no matter if it’s a boss or not.

Appendices

Dissidia may be a fighting game, but it’s still a Final Fantasy game at heart, which means it has all the core features of a RPG, including leveling up, abilities, equipment, accessories, aaaaaand summons. And as one would expect from a complete Final Fantasy guide, all of these goodies, the PP catalog, and countless upgrades and bonus items are all listed in the back along with what it takes to get them. You honestly have to see the fat lot of knowledge in the appendices to believe it. It’s amazing both in what the developers packed into the game and how much detail the writers gave to it.

Bonuses

Writers Joe Epstein and Casey Loe included plenty of game tips in the Game Basics section, including how to activate EX mode to your advantage, recovering bravery quickly, and enhance each attack. But they didn’t stop there. After the plethora of appendices, they included a Secrets & Cheats section in the back, which has information on unlocking the secret epilogue, tips for leveling up quickly, secret passwords for friend cards, how to hack the Mognet, and how to solve all the Moogle quizzes and mysteries.

If all that isn’t enough, there’s also a giant, tear out poster that lists all 151 game accomplishments and all 300+ player icons.

Rating

I don’t think I need to say any further about how much this guide blew me away. Nothing is left out, from the campaign mode to the Duel Colosseum to all the unlockables and awards, and yes, even combat strategies. This contains every piece of information any player could want, and it can all be found as easily as completing the Destiny Odyssey Prologue.

This guide receives and earns a 5/5.

Filed Under: Strategy Guide Reviews

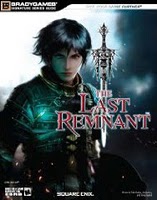
The Last Remnant Strategy Guide

September 21, 2009 By Keri Honea Leave a Comment

The Last Remnant Strategy GuideA strategy guide’s quality hinges on the quality of its maps, walkthroughs and appendices, all of which are crucial for a complete and truly helpful guide. Some people will need a guide to hold their hands throughout the entire game, whereas others need a guide for simply looking up information quickly, such as where to obtain a certain ability. A guide of good quality must be able to do both to appease the wide range of gamers.

But for the maps and some missing enemies, this guide would have been close to perfect. Unfortunately, the missing enemies and even mini-bosses not listed in the guide were so heinous and frequent that I started slapping down post-it notes on each page I found additional enemies or mini-bosses. My guide nearly doubled in size due to the number of post-its.

Maps:

In general, the maps are very well done. Each story mission begins with a map of the area Rush will explore, and if the area has multiple floors or multiple sections, the maps are divided up accordingly (on the same page). Even each sidequest has its own map.

The only complaint I had with the maps was the lack of plotting out harvest points. They designated everything else, including chests, transporters, mini-bosses (sometimes!), special items, special doors, etc., but none of the harvest points are listed. What Mr. Diggs will find in the harvest points changes each time, so I didn’t expect the guide writers to point that out, but the harvest points themselves were stationary with every area visit, so it made little sense to not include them on the maps.

Walkthroughs:

One thing I can definitely say about the walkthroughs, for both the story and side missions, is that they will keep Rush and his party well prepared. The guide always lets users know what shape their party needs to be in before tackling any mission, whether they should wait until they can command 4 unions or if a couple of small unions is more than enough. It will also make suggests of arts units need to learn or how to delegate the leaders throughout the unions. I was always able to at least eke by if I formed my own unions, but when I used the writers’ suggestions, my party had ZERO problems.

I am not sure if I have ever played a game with so many sidequests before. Every region is jam-packed with them, and as the story progresses, each region piles on a few more. Most of the sidequests are easy to find by just visiting the local pub, but some take prodding of other NPCs or will only activate if Rush hires specific leaders from the Guild. For those who cannot rest without uncovering every sidequest, this guide will never let you down. At the beginning of each story mission, just before the maps, the guide lists all the sidequests that are available. If players want to do them, they can occasionally find how to trigger them in the story walkthrough, but most often than not, they will have to flip to the back section and find out how there. It’s no big deal, because players will have to use the information back there anyway to complete the sidequest.

When it comes to offering strategies to defeat bosses and enemies, for the most part, the guide is excellent. It often does not provide a detailed strategy against bosses, but instead tells of the bosses’ weaknesses and prepares players for any special attacks.

However, as mentioned above, the guide was notorious for flat out not mentioning the presence of certain enemies and mini-bosses. Sometimes, this was not a big deal, but several times I found a mini-boss or an ungodly difficult enemy that I was not prepared for. They weren’t plotted on the maps or even mentioned in the list of enemies to be found. It happened so often that I began to wonder if perhaps the enemies change each time, which could be the case. Although, each time I died, those enemies were still there, ready and waiting for me to come flub up another time.

Appendices:

I’m not familiar with the other writers, but Joe Epstein is a season JRPG writer so I shall assume the others have at least some experience, and it shows with the appendices. They detail every battle formation, item, piece of equipment (including customizations!), component, shops, captured monsters and what each monster can split into. In addition, there is a highly detailed recipe chart for all item creation.

What I really like in the appendices is the enemy gallery. Usually guides slap enemies into a typical appendix/chart with their image, attributes, and weaknesses. This guide doesn’t list attributes and weaknesses (with the battle system, that would be a waste of space), but it did turn the enemy and boss appendix into an art gallery. Each enemy and boss has a screen shot of it in the game and a sample of hand-drawn concept art. I’ve never seen anything like it in a guide before, and it’s stunning.

Guide Organization:

This was flawless. Introductory material in the front, story missions, side missions (all organized by location and order of appearance), and appendices. I never had any trouble finding any piece of information I could want, whether it was what components I needed to customize a weapon or how in the world am I supposed to complete this sidequest.

Rating:

The missing enemies does keep the guide from being a solid 5/5, but fortunately for it, the rest of the guide keeps it from falling any further.

The Last Remnant Official Strategy Guide earns a 4/5.

Filed Under: Strategy Guide Reviews

  • « Previous Page
  • 1
  • …
  • 40
  • 41
  • 42
  • 43
  • 44
  • Next Page »

Follow us!

Subscribe!

Upcoming Strategy Guides

 Nothing here. Come back later. 😢

Latest Strategy Guide Reviews

The Walkthrough by Doug Walsh Review

Red Dead Redemption 2 Strategy Guide Review

Mega Man 11 Strategy Guide Review

God of War Strategy Guide Review

Far Cry 5 Strategy Guide Review

Friends of SGR

  • BradyGames
  • Dan Birlew – Guide Writer
  • Doug Walsh – Guide Writer
  • Future Press
  • Game Enthus
  • GameWires.com
  • Piggyback
  • Press the Buttons
  • Prima Games
  • Racing Games

Top Posts & Pages

  • In Pursuit of Platinum: Ain't Gonna Happen With Horizon Zero Dawn
  • The Walkthrough by Doug Walsh Review
  • In Pursuit of Platinum - Assassin's Creed Odyssey
  • What I've Been Playing - I'm Never Leaving Greece
  • Red Dead Redemption 2 Strategy Guide Review

Copyright © 2025 · Web crafted by Warkhammer


Loading Comments...