• Home
  • About Us
  • Podcast
  • Strategy Guide Wit
  • Contact

Strategy Guide Reviews

A Strategy Guide for your Strategy Guides

  • Reviews
    • Strategy Guide Reviews
    • Video Game Reviews
    • Mini-Reviews
  • Features
    • Interviews
  • News
  • Unboxing Strategy Guides
  • Columns
    • Gaming Diary
    • Corner of Randomness
  • Videos

inFamous Strategy Guide Review

August 21, 2009 By Keri Honea Leave a Comment

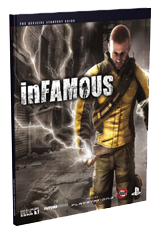
inFamous Strategy GuideA strategy guide’s quality hinges on the quality of its maps, walkthroughs and appendices, all of which are crucial for a complete and truly helpful guide. Some people will need a guide to hold their hands throughout the entire game, whereas others need a guide for simply looking up information quickly, such as where to obtain a certain ability. A guide of good quality must be able to do both to appease the wide range of gamers.

I admit I did find some faults with the inFamous Official Strategy Guide, but I’m not entirely sure they are due to the guide as they are a result of my lack of experience when it comes to platform games. Originally when I was writing up my outline of pros and cons, I was sure these problems would seal this guide at no higher than a 4/5. When I finished making my list, I was so dead wrong. Every great thing the guide offers greatly outweighs any little deficiency I found. In fact, I would kill for all guides to contain this much information.

Maps:
I cannot rave enough about the number of maps within the guide. There are individual maps of each island that plot out the story missions and medical clinics, individual island maps plotting the side missions (including the good and evil), individual island maps of the dead drops, individual island maps of all the blast shards, AND a giant tear-out map of all three islands with every blast shard (I used this map as my bookmark). If that wasn’t enough for you, for every side mission that requires some traveling, the walkthrough contains a little map of the route.

No player has any excuse for not finding all of the dead drops, blast shards, and side missions with just these maps. For that reason alone, the guide is worth every penny, since you can’t get maps like these on GameFAQs.

Walkthroughs:
Before I get into the story missions, I have to say that all of the walkthroughs for the side missions are spot on. If you read those ahead of time, there will be no surprises as what to expect.

The same can be said for the walkthroughs of the story missions, except that on occasion–particularly during periods of heavy platforming, such as in the Warren–I had to look up help on GameFAQs to figure out where to go next. The guide, for the most part, would just say work your way towards the top or head towards the blue blip on your radar, and for those with little experience in platforming games, sometimes it is not that obvious where to leap or climb. I will say that for the places where it was really not obvious, the guide did give more direction for what to look for or where to jump.

If I had to count on my fingers how often this happened to me, I think it happened all of twice. Both times were in really frustrating situations for me, so I’m quite certain that is why I think they are worse than they really are.

When it came to the Bosses, I could find no problems. The guide claimed that the boss strategies provided within the walkthroughs were only brief synopses what to do, and there were more detailed strategies within the Opponents chapter. I personally found these “brief” strategies flawless. So much so, that I never died once when fighting the bosses. I know I couldn’t have done that without the guide’s help when fighting Alden and Kessler (Sasha is debatable).

Appendices:
The guide didn’t really have appendices in the traditional sense, because there really wasn’t much for Cole to collect and he didn’t build things or buy new armor. So in place of where the appendices would be are the maps for the dead drops and blast shards, and what could be considered as “appendix” information is all in the front, before the walkthroughs. This information includes highly detailed explanations of all of Cole’s powers, his opponents (and bosses), the stunts he can perform, and all the trophies players can obtain.

Guide Organization:
Since inFamous has both story missions and a plethora of side missions (like so many current games do), the guide walkthroughs were divided up between the story and the side missions. In addition, the side missions were further divided by island and karma. For example, the first set of missions are all on the Neon, and they are listed starting with the neutral missions, then the good, then the evil. Each mission is numbered corresponding to the numbers on the side missions maps. This made it incredibly easy to find information on any mission or where to find particular missions (especially those pesky good missions that disappear as you get close!).

Basically, when I needed to find something, I rarely had to go to the table of contents for help. It was incredibly easily to find anything just by flipping through the pages.

Extras:
Aside from the giant tear-up map/bookmark, the guide also contained 19 pages of the comic book-style art from the inFamous cut-scenes. It is so rare that guides include actual art from the game, so if you’re a fan of artbooks, this bonus will also make the purchase more than worth it.

A cautionary word, though: do not look through the art gallery too closely before finishing the game, because there are a few heavy spoilers within.

Rating:
The inFamous Official Strategy Guide did so many things well, that the few minor irritations were easily forgotten. For the sheer fact that this guide contains so many maps alone is reason enough to recommend its purchase. The walkthroughs seem almost like an extra layer of cake that is great to have, but doesn’t feel necessary. When you consider the bonus art gallery within, it’s a no-brainer. This guide gets a 5/5 from me.
Filed Under: Strategy Guide Reviews

Crisis Core Strategy Guide Review

August 16, 2009 By Keri Honea 487 Comments

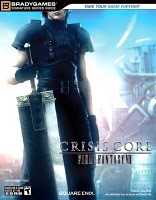
Crisis Core Strategy GuideA strategy guide’s quality hinges on the quality of its maps, walkthroughs and appendices, all of which are crucial for a complete and truly helpful guide. Some people will need a guide to hold their hands throughout the entire game, whereas others need a guide for simply looking up information quickly, such as where to obtain a certain ability. A guide of good quality must be able to do both to appease the wide range of gamers.

Crisis Core is an usual game in that it is divided up between Zack’s relatively short story and his 300 missions in SOLDIER. Players can play the missions whenever they like, and they have no bearing on the story whatsoever. The guide, written by Doug Walsh and published by BradyGames, is similarly arranged, with one section for the story and one section for the missions, but this review will not be divided up in a similar manner.

Maps:
Every guide should have as many area maps as this one. Each story chapter begins with a map of the area–with every item and e-mail Zack can obtain–and each mission has its own individual map with similar markings. While it is nice to be able to use the maps to quickly find the items, the best part of them is the markings of the mission bosses. Even though there are only about four or five mission regions, the bosses are never in the same place and are often not where one would expect them to be. This is essential for those who want to quickly get in and get out.

Walkthroughs:
Even though Zack’s story is only ten chapters, there are plenty of sidequests for him to partake in, such as joining fan clubs, unlocking missions, and uncovering the seven wonders of Nibelheim. The guide will make sure the player misses NONE of these things. I myself only missed one fan club joining–the Zack Fair fan club, no less–because I glossed over the tip to talk to the receptionist. Once you miss that window, it’s closed forever in typical Final Fantasy fashion.

For those wondering, yes it gives detailed strategy for all boss fights and alerts players ahead of time of all the enemies and their stats Zack will encounter.

The walkthroughs for the missions, are about as helpful. They offer good advice for the bosses, give a heads up on lurking enemies and warn players how to properly prepare Zack before undertaking a particular mission. If a mission has Magic Pots, it will alert players to their presence as well as what materia they require to be appeased.

However, after a certain point, it becomes very apparent that the writer had a certain affinity towards one materia (Costly Punch) and recommends it use throughout the rest of the missions. The problem with this is that at the point Costly Punch is first recommended, players can only obtain the materia through fusion and that’s only if a certain mission was completed. For those who do not obtain Costly Punch, you will have to create your own strategies throughout most of the missions, which negates the purpose of the guide a bit.

Appendices:
Here is another area where the guide really shines. It contains appendices of all materia, items, accessories, shops and enemies, which not only lists all of them but also details where to find them. Each appendix is colored differently and everything is categorized and listed alphabetically for easy look-up. Need to find exactly where to pick up the Brutal accessory? Want to know which missions the Magic Pots are lurking? The answer is a quick flip of the pages away.

It also includes a large, foldout chart to help with materia fusion, but I found it to be very confusing for the most part, and thankfully for me, I was not the only one. It does a decent job at explaining base materia for fusion, but it gets tricky when it delves into the materia ranks and classes. Occasionally I could use it to successfully fuse the materia I wished, but most of the time it was a case of trial and error. Of course, there is always the possibility that it’s a simple matter of not having the correct materia to fuse with. The more I think about it, the more I think that’s true.

Extras:
I never count on a guide to include extras, but it is oh so nice when they do. This guide includes a gorgeous art gallery of concept art for the game and Walsh’s “23 Wishes,” which are tips for successful gameplay as well as references to the original Final Fantasy VII game that can be found throughout Crisis Core.

Final Word:
Walsh’s love of the Costly Punch materia does not detract much from the overall high quality of the guide. It’s suitable for every type of gamer who may want a guide, and the maps and the extras definitely make it worth every penny.

It gets a 4/5 from me. Damn Costly Punch. (That’s a cool name for drink…)

Filed Under: Strategy Guide Reviews

Tales of Symphonia Dawn of the New World Strategy Guide Review

June 18, 2009 By Keri Honea Leave a Comment

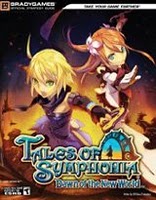
This strategy guide for the Tales of Symphonia sequel was kind of set to fail from the beginning due to the style of the game. The game is overly repetitive and doesn’t need much guidance in terms of fighting enemies and bosses. Most of the strategies for bosses were relatively the same. Keep Marta safe and in the back for healing. Send Emil in for slashing and blocking. Look out for so-and-so attack. Be ready to pass out Apple Gels for healing and keep a few Life Bottles on hand. I hate to say it, but I could have figured that out on my own, because that’s how most hack ‘n slash games go. But thanks anyway.

I did find the guide useful with all of the puzzles in the dungeons. I’m not a fan of insane dungeon-puzzles, especially ones that aren’t that obvious what to do next. There were many puzzles that I figured out on my own. There were also just as many where I was scratching my head in confusion, and when I found out what to do next, I wasn’t sure if I should feel confused or stupid for not understanding it.

The big failure of the guide was the lack of maps. It included only one map, and it was a map of the overworld. However, you didn’t need an overworld map because you couldn’t freely roam the overworld. There was no way you were going to get lost or confused about where to head next. You just had to select where you wanted to go and bam, there you went.

But the places you can freely roam, like villages and dungeons, there are zero maps.

Sadly, this would have been the one feature that would have separated it from free online content. Sure, you probably can’t find as detailed appendices of all the in-game items online, but I never gave them a glance. I couldn’t find a need for any of them.

Simply put, save your money and do not buy this guide. It doesn’t offer anything you can’t already find online.

Final Rating: 1/5

Filed Under: Strategy Guide Reviews

Phantom Hourglass Strategy Guide Review

June 10, 2009 By Keri Honea Leave a Comment

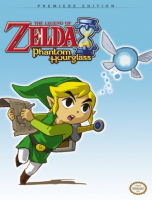
There is a new bar when it comes to strategy guides, and Prima Games’ guide for The Legend of Zelda: Phantom Hourglass is it. This guide has everything I could have ever asked for it to have, and I honestly have only one tiny nit-picking complaint about it. Other than that one minuscule complaint, everything was perfect.

For starters, it has something that I’m always griping others don’t: an abundance of maps! It has a sea chart with all of the sunken treasure spots as well as maps of each island and dungeon with their corresponding chapters. If you get lost spelunking a dungeon or exploring an island, you cannot blame it on the guide’s maps.

The organization of main quest and sidequests within the chapters is also ideal. Whenever new sidequests open up or Link obtains the ability (like finding the grappling hook, for example) to explore new areas and find additional items, the guide goes over these extraneous quests in detail as soon as Link is able to do them. For instance, going back to the grappling hook example, as soon as Link leaves the dungeon on the Isle of Frost, the guide details every new area Link can explore with the grappling hook and every new item he can find with it.

This also goes for finding islands, like the island Dee Ess, that are not part of the main quest. When Link first braves a new area of the Great Sea, the guide will tell you where to find the golden frog and what uncharted islands there are to explore before you hit that first main island for your quest.

I found most of the dungeons of the game to be straightforward, so I didn’t use the guide much there except to make sure I wasn’t missing any hidden items. However, I relied on the guide probably more than I should have (just for my gamer cred) for fighting the bosses. For some bosses, it was obvious what to do to defeat them, but for most of them it was not, at least it wasn’t to me. I knew that I had to use whatever item I found in the dungeon to defeat them, but I didn’t always understand how. The guide never let me down for a single boss, especially the final boss, whom I found to be quite difficult.

Where I found the guide most useful was for the repeated visits to the Ocean King Temple. I really wasn’t able to play the game very often, and when I did, it was for one, maybe two hours tops. So I didn’t remember every nuance of each floor in the temple, especially if I hadn’t been there for weeks, sometimes months. Without the guide, I would have been running outside to replenish my hourglass more times than I would have ever liked. Maybe I would have gotten to know the floors better if I didn’t have the guide, but I somehow doubt it. There were a couple of floors I knew I had visited several times, but every time I got to them, I felt like I had never seen them before.

And for the completionists out there, who must find EVERY heart container, every treasure map, every spirit gem, and every minute of the sands of hours, the guide will not disappoint. Not only does it walk you through where to find all of these in the main quests and the “missing link” sidequests, but there are handy appendices in the back that will tell you where to find everything you can think of.

I could gush on a few more paragraphs, but you all should get it by now; this guide rocks. But what did I find wrong with it? Well, a few times in giving directions where to run to next in dungeons, particularly that awful Temple of the Ocean King, the guide would mix up “east” and “west.” Sometimes this wasn’t a big deal and it was easy to figure out what they meant. A couple of times I got frustrated with the directions enough to disregard it entirely and found on my own what they meant. I think this happened a grand total of four or five times. Considering the number of dungeons and revisits to the Temple, this is annoying, but not really that bad.

So yes, a thousand times, yes, I would recommend this guide to anyone picking up this title. If you’re as insane of a collector as I am, then maybe look for the Collector’s edition guide, which is hardbound and has a nice leather bookmark.

Thanks for a great guide, Prima Games. I give it a 5/5.

Filed Under: Strategy Guide Reviews

Tales of Symphonia Dawn of the New World Initial Impressions

May 26, 2009 By Keri Honea Leave a Comment

So far, this guide does as many things right as it does wrong.

The dungeons all have about the same element – insane puzzle mazes – and the guide is wonderful at providing quick solutions to the puzzles that include collecting all of the treasure chests. I have saved myself at least a few hours of agonizing torture in completing these mazes. For those late to the party, I hate puzzle mazes. And I’m not talking about the Legend of Zelda style mazes. I think a more recent example of such a maze can be found in the Eastern tribe temples in Lost Odyssey. I shudder to think of those puzzles again.

While the guide includes a large overworld map, it contains no other maps. No maps of the dungeons, villages, nothing. This leaves a large black mark on the guide. Since you can’t do any overworld exploring, I’m not sure why the guide includes an overworld map at all.

Boss tactics are in great detail, although I admit I really haven’t looked at them since I haven’t found the bosses too difficult. On the flipside, there is no detail on the bosses themselves. No information on the HP or weaknesses. Sometimes it’s nice to know that a boss has over 14,000 points of HP when you’re slicing just ten points of damage a hit. Occasionally these facts are mentioned in the tactics paragraphs, but that’s just poor design. At the very least, the HP should be designated next to the boss name.

I can honestly say though that I wouldn’t be playing this game without the guide. I like the story and the dialogue cracks me up, but the dungeons drive me insane. Not particularly my idea of fun, so if I didn’t have the guide to soothe my frustration, Tales of Symphonia: Dawn of the New World would be on my Amazon seller account.

Filed Under: Initial Impressions

  • « Previous Page
  • 1
  • …
  • 41
  • 42
  • 43
  • 44
  • Next Page »

Follow us!

Subscribe!

Upcoming Strategy Guides

 Nothing here. Come back later. 😢

Latest Strategy Guide Reviews

The Walkthrough by Doug Walsh Review

Red Dead Redemption 2 Strategy Guide Review

Mega Man 11 Strategy Guide Review

God of War Strategy Guide Review

Far Cry 5 Strategy Guide Review

Friends of SGR

  • BradyGames
  • Dan Birlew – Guide Writer
  • Doug Walsh – Guide Writer
  • Future Press
  • Game Enthus
  • GameWires.com
  • Piggyback
  • Press the Buttons
  • Prima Games
  • Racing Games

Top Posts & Pages

  • In Pursuit of Platinum: Ain't Gonna Happen With Horizon Zero Dawn
  • The Walkthrough by Doug Walsh Review
  • In Pursuit of Platinum - Assassin's Creed Odyssey
  • What I've Been Playing - I'm Never Leaving Greece
  • Red Dead Redemption 2 Strategy Guide Review

Copyright © 2025 · Web crafted by Warkhammer


Loading Comments...