• Home
  • About Us
  • Podcast
  • Strategy Guide Wit
  • Contact

Strategy Guide Reviews

A Strategy Guide for your Strategy Guides

  • Reviews
    • Strategy Guide Reviews
    • Video Game Reviews
    • Mini-Reviews
  • Features
    • Interviews
  • News
  • Unboxing Strategy Guides
  • Columns
    • Gaming Diary
    • Corner of Randomness
  • Videos

Initial Impressions of Phantom Hourglass Guide

May 11, 2009 By Keri Honea Leave a Comment

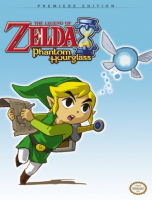
The walkthrough for this guide is so incredibly fantastic that I haven’t looked at the appendices once. I have no idea what is in the back of the book. The appendices could be horrific as far as I know. I’m hoping that they aren’t, because this guide is already a 5/5 and I don’t want to knock it down a level for crappy appendices.

Okay, okay I’ll admit it. Phantom Hourglass for the most part doesn’t need a guide — except when it comes to finding the elusive and random heart containers — so I’ve not really glanced at it that much. I also shamefully admit that without the dangling dog treat of Achievements, I’m not as eager to make sure I don’t miss anything. But after every dungeon, I do flip back through the guide to see if I have missed anything, and there have been a few times I wished I used the guide because it would have saved me a lot of trial and error and well, grief.

I have used the guide a lot when it comes to maneuvering the Temple of the Ocean King. I made it through the first time fine, but since you need to go more quickly each sequential time, I’ve used the guide to help with the shortcuts. It’s been especially helpful in this arena because I don’t get to play the game that often, so if it’s been weeks since the last time I visited the dungeon, I know I’ll forget what I’m supposed to do next.

So yes, this isn’t exactly a first impressions post for the guide since I’ve been playing for awhile, but eh, sue me. I hope to have this game finished by the end of the month, as well as the guide review!
Filed Under: Initial Impressions

Lost Odyssey Strategy Guide Review

May 6, 2009 By Keri Honea Leave a Comment

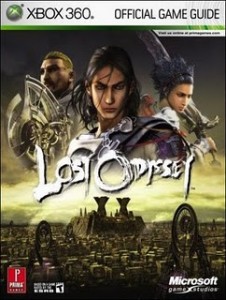
I had a real hard time reviewing this guide. For starters, I didn’t really use it much in the beginning except when I remembered that I’m supposed to be reviewing it. But when I did use it, it was very helpful during the main quest. For some reason, the guide really fizzled out near the end, especially for the sidequests. I’ve never worked with a guide so divided before, so I will do my best.

The Good

The guide has a lot of good points. In the main quest, every section of the world has very detailed maps that plot out all treasure chests, quest items, houses, etc. Even if an area has different levels (meaning that the levels have stairs or ladders to reach whole new areas), the guide has a map for each level.

The walkthroughs do more than point out where players need to send Kaim next; they also point out where Kaim can find all of his 1000 years of dreams. This fact alone makes the guide 100% recommendable. I am not sure I could have found all of them without it. Some dreams were found in some weird places that I may never have gone to, and some were found after leaving and immediately reentering a place. I know I never would have thought of that.

I admit I never looked at the boss tactics for fighting the bosses. However, I ritually read the boss prep sections. If you do the prep, you really won’t need to read their tactics suggestions. The prep lists the skills that at least the immortals should have, and it also suggests the party’s average level before attempting the boss fight. The latter was probably my favorite part of the whole guide. I loved to know whether I needed to spend extra time leveling up or not. It’s inevitable that in any RPG you’ll be doing mindless leveling up at some point, but it’s nice to know when you should do before facing a certain boss, getting your party wiped out, and losing about an hour of your life.

The appendices are also one of the guide’s strongest points. They list all of the equipment, magic spells, rings, ring components, enemies, and everything you need to know about the Backyard tournaments, including the bonus material. The appendices also detail where to find all of Tolten’s Royal Seals, the invisible chests, treasure seeking items, and Cubic Music Scores even though the walkthroughs and maps already point them out.

The Bad

But this guide is far from perfect. A few of the maps left off a few items, such as the quest for the nineteen crystal fragments in hidden temple. Count them as many times as you want on the maps, but you’ll only count eighteen.

My biggest beef with the guide was the lack of an overworld map. You spend a good amount of time sailing on the Nautilus, and many items are found at the bottom of the sea. An overworld map, just for these items, would have been helpful.

The seeds were also grossly overlooked. The guide says that there are 99 seeds available to give to the Pipots, but it doesn’t tell where all 99 are. I think it goes up to 80ish. There is also a brief mention of the seed trading with the Pipots, but it doesn’t go into detail about how to complete it.

The sidequest sections were so incomplete, I really wonder if the writers just got sick of working on the guide. Maps are offered for only a couple of quests. A few quests don’t have that detailed of a layout, but the Temple of Enlightenment really, really needed maps. And speaking of the Temple of Enlightenment, don’t rely on the guide to give you too much of a heads up on how to defeat the common enemies. No information other than their stats is given.

Final Rating

This was the hardest part for me. The good points heavily outweigh the bad, but some of the bad points were really, really bad. So, I have to divide the guide up into main quest and sidequest.

Main Quest – 5/5
Sidequests – 3/5

Filed Under: Strategy Guide Reviews

Kingdom Hearts 2 Strategy Guide Review

April 27, 2009 By Keri Honea 4 Comments

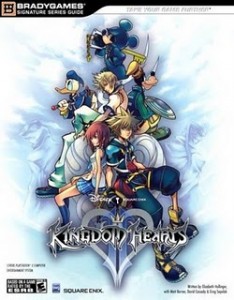
The strategy guide for Kingdom Hearts 2 will unfortunately sit and gather dust for most of the time while playing the game, and it’s both the guide’s fault and not the guide’s fault.

It’s not the guide’s fault in that the game is rather straight forward and easy to play. The worlds are far more linear than the first game, and there are no insane jumping puzzles to solve. It’s not hard to find any of the treasure chests or to figure out how to fight any of the bosses, since all of the bosses are beaten using a series of annoying quick-time events (or as the game calls them, reaction commands). So players may use the guide for the maps to hunt down that one wayward chest or the appendices for item synthesis, but the game is simple enough to not demand a further need.

However, one of the facets of the game is to complete Jiminy’s Journal, which asks players to complete everything possible in the game, from meeting all the characters to synthesizing every item in the recipe list to performing all of the mini-games with Jiminy’s requirements. I pretty much called it his S&M list throughout as I hate mini-games with a passion.

But that’s not the point. The point is that this is where the guide could have proved its usefulness. It could have offered tips to completing the mini-games and even the Underdrome tournaments instead of just summarizing the task at hand. I don’t need a summary; I can see just fine what the task is. Granted, for some of the mini-games, it’s difficult to offer tips because you either collect all of Pooh’s honeypots or you don’t. But to not even offer advice on the Underdrome tournaments? Surely the writers can suggest something, such as summoning Stitch to absorb more orbs or casting magic to speed through rounds. SOMETHING.

This is one guide I don’t recommend to anyone, no matter how dire your gameplaying skills are. You don’t need a written guide to tell you to follow the reaction commands, and it won’t help you through Jiminy’s Journal.

Final Rating: 2/5

Filed Under: Strategy Guide Reviews

The World Ends with You Guide Review

April 19, 2009 By Keri Honea Leave a Comment

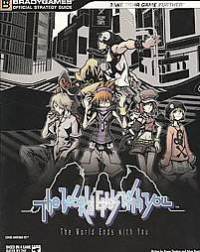
BradyGames’ strategy guide for The World Ends with You is by far the WORDIEST guide I have ever come across. And I don’t mean that it’s wordy in a helpful way, in that it says, go here, go there, do this, pull that knob, blah blah blah. Instead, it details out entire cut-scenes. You almost don’t have to play the game. Want to know what happens in the game? Just pull out the guide and read it carefully. Trust me, you won’t miss a thing, not even conversations between NPCs.

Unless you’re a great skimmer, you may have difficulty picking up in the mass of words the one piece of info you’re looking for. Fortunately, this game isn’t that difficult to figure out where you need to go. On most Days, Neku is limited to which areas he can visit, and even if one is blocked, he merely needs to tap the guarding Reaper to find out what he needs to do to break the barrier. But if you like reading lots of words, um, twice (once in the game and once in the book) then the words may be more than welcome to you. You’re a strange, strange person.

But all of that is not even the guide’s largest flaw. For those having difficulty fighting the final boss, avoid mass frustration and look online for help. The guide fails to mention one major aspect of the boss (I won’t way what here), and if a gamer (like me) stumbles upon said feature, he or she will have no idea what to do based off of the guide. Switching to Easy mode won’t save you. I tried, and I’m so glad that I failed, because then I was able to beat the boss on hard mode in the end after I found some real help.

The guide is useful for the maps, item appendices, and helping the lazy get through Reaper Reviews, but that is it. If I wasn’t a collector of these things, I would sell this guide in a heartbeat.

Final Rating: 2/5

Filed Under: Strategy Guide Reviews

Initial Impressions of Lost Odyssey Guide

April 18, 2009 By Keri Honea Leave a Comment

I have somewhat of a love/hate relationship with the Lost Odyssey strategy guide. I’ve been playing Lost Odyssey for what seems like an ungodly amount of time. My game clock says 65+ hours, but it seems like days longer than that. I’ve used the guide on and off during that time, mostly for help getting through the few maze-like dungeons (I just don’t have the patience for those) and treasure chest hunting. For the most part, the guide is helpful, but as much as it is helpful in some areas, it’s extremely unhelpful in others.

For example, most of the mini-games have few to no tips on how to complete them. For those who don’t know, I hate mini-games, so if I have to complete them for whatever reason, I need help just for the sake of my patience. This guide is just as helpful as the Kingdom Hearts 2 guide when it comes to the mini-games (meaning that it is most decidedly not). I also find the maps to be incomplete in some places. Sometimes not all of the treasure chests are marked, and they are even overlooked in the walkthrough. And it would be nice if the maps of the areas that include one-way roads with no return — such as ice slopes and mudslides — were clearly marked.

I actually have not been using the guide at all for the boss fights, so thus far, I have no commentary there. Perhaps I should give them a look-see before I hack out my final review.

Filed Under: Initial Impressions

  • « Previous Page
  • 1
  • …
  • 42
  • 43
  • 44

Follow us!

Subscribe!

Upcoming Strategy Guides

 Nothing here. Come back later. 😢

Latest Strategy Guide Reviews

The Walkthrough by Doug Walsh Review

Red Dead Redemption 2 Strategy Guide Review

Mega Man 11 Strategy Guide Review

God of War Strategy Guide Review

Far Cry 5 Strategy Guide Review

Friends of SGR

  • BradyGames
  • Dan Birlew – Guide Writer
  • Doug Walsh – Guide Writer
  • Future Press
  • Game Enthus
  • GameWires.com
  • Piggyback
  • Press the Buttons
  • Prima Games
  • Racing Games

Top Posts & Pages

  • In Pursuit of Platinum: Ain't Gonna Happen With Horizon Zero Dawn
  • The Walkthrough by Doug Walsh Review
  • In Pursuit of Platinum - Assassin's Creed Odyssey
  • What I've Been Playing - I'm Never Leaving Greece
  • Red Dead Redemption 2 Strategy Guide Review

Copyright © 2025 · Web crafted by Warkhammer


Loading Comments...