• Home
  • About Us
  • Podcast
  • Strategy Guide Wit
  • Contact

Strategy Guide Reviews

A Strategy Guide for your Strategy Guides

  • Reviews
    • Strategy Guide Reviews
    • Video Game Reviews
    • Mini-Reviews
  • Features
    • Interviews
  • News
  • Unboxing Strategy Guides
  • Columns
    • Gaming Diary
    • Corner of Randomness
  • Videos

Far Cry 5 Strategy Guide Review

April 25, 2018 By Blake Grundman 3 Comments

Two years ago, to this very day, I came to you with my first ever video strategy guide review for Far Cry Primal. As if fate as somehow trying to tell me something, today I come baring my thoughts on Far Cry 5‘s strategy guide. You gotta love it when a plan comes together.

Hopefully I’m a bit better at this than I was so many moons ago, because it appears that Prima Games has upped their Far Cry game as well. This time around is a strong improvement over their previous installment. But why not let the video speak for itself? Without further ado, let’s dive into the Far Cry 5 strategy guide review!

SGR Rating: 4.5/5

Authors: David S.J. Hodgson and Kenny Sims
Publisher: Prima Games
Editions Available: Collector’s Edition
Acquired via Purchase
Filed Under: Strategy Guide Reviews

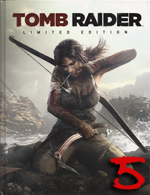
Tomb Raider Strategy Guide Review

November 7, 2013 By Keri Honea 1 Comment

Tomb Raider Strategy Guide ReviewI’ve had both the game and the strategy guide for Tomb Raider for awhile, but I was scared to try the game for a number of reasons. One, I was nervous it would have as much platforming as the Tomb Raider games of old, and two, I was pregnant when the game released, so I was strictly warned to avoid the game during that time since pregnancy makes me have a very sensitive stomach to violence. When the Extra Life marathon came up, I put Tomb Raider up on the poll of games to play, and it got a resounding majority of the votes. I am so glad that I finally played the game (even more glad that I didn’t play while pregnant), and I am thrilled I had the Tomb Raider strategy guide available to help me through this game. Even though my goal was to burn through the game and not explore every nook and cranny to its fullest, the Tomb Raider strategy guide was invaluable at helping me get through several sequences, especially when I got lost in a few areas.

When I first looked at the strategy guide while getting ready to play, I was honestly nervous that the strategy guide would frustrate me more than help me. The guide is really focused on walking players through getting everything the first time–challenges, collectibles, and optional tomb raiding. I have typically found that when strategy guides are constructed in a way to lead you through getting collectibles while playing through the story, it’s easy to get lost in what the guide tells you what to do if you are not collectible hunting. For example, the guide may tell you to journey down this one path that’s really out of the way and then guide you back to the main path via a shortcut. If you don’t go down that collectible path and you need help finding the main path, the strategy guide will only confuse you and not help. The Tomb Raider strategy guide was not like this at all.

It was incredibly easy to both instantly find where I was in the written walkthrough and then interpret the guide’s instructions to help get me on the right track. It didn’t matter if I was hunting that collectible or completing that particular challenge or not. I could still find where I needed to go in the middle of all the completionist info.

And thank God it was easy to look up help, because I got turned around a lot as I ventured forth with the determination to grind through the game as quickly as I could.

The strategy guide also helped me get through combat situations that got me stumped nine times out of ten. Of course, I usually wanted to smack myself with the guide after learning how to, as it was usually something simple and very easy. Shoot a fire arrow into the gas, kill everyone instantly before they can call for help. Oh, silly me.

Not to mention, a couple of the puzzles had me absolutely stumped at what to do. Since the guide was so helpful with the puzzles, I know I’m going to heavily rely on it to help me when I go back and complete all of the optional tombs.

And yes, I want to go back to the game at one point and actually hunt around for the collectibles, challenges, and the optional tombs. And yes, the Tomb Raider strategy guide will be at my side the entire time.

This may be really late in the game, but I still can’t recommend the Tomb Raider strategy guide enough. It’s the perfect companion for both the completionists and those who want to burn through the game. It’s not often you find a strategy guide that is good at doing both in the main walkthrough. It’s so good, in fact, I’m not sure how much I’ll use the appendices when I go collectible hunting.

SGR Rating: 5/5

Authors: Michael Owen and Kenny Sims
Publisher: BradyGames
Editions available: Paperback and Collector’s Edition
Acquired via Publisher

Filed Under: Strategy Guide Reviews

The Last of Us Strategy Guide Review

July 23, 2013 By Blake Grundman Leave a Comment

The Last of Us strategy guide reviewAs far as games go, The Last of Us was the swansong of the PlayStation 3, from the studio that had arguably created some of the best games already on the platform. It was no shock that the expectations for the title were sky-high, and justifiably so. For the first time since the dawn of this console generation Naughty Dog had gone back to the drawing board and birthed a new franchise from scratch, which is no small feat to say the very least. In a curious move, the development team veered the project from the action exploration that had been their strong suit, onto more of a traditional survival horror track. Luckily, this genre of game plays directly into the hands of strategy guide readers. Ammo sparseness and lurking clickers be damned when a player is armed with BradyGames’ newest tome, The Last of Us strategy guide. Can it help curb the tide of jugular feasting mutants, or is does it lose the fight against the game’s ever inclining difficulty curve?

It somewhat goes without saying that The Last of Us is far deeper, in terms of game mechanics, that it would initially let on. Perfect evidence of this is the guide’s massive forty page Survival Guide, used to introduce the player to all aspects of the title’s universe. Important aspects of the gameplay including things like crafting items, listening mode, different types of explosives and how to use cover effectively are all very important pieces of the puzzle that are detailed extremely effectively. Alongside these highlights are detailed rundowns of each weapon, its strengths and weaknesses, and the different perks that can be unlocked through the in-game upgrade system. And what would any introduction be without a breakdown of the assorted enemies? Lastly, this area outlines of where each faction appears, as well as provides generic commentary on how they can be effectively dispatched.

With the silly formalities out of the way, the authors rolled up their sleeves and dove headfirst into the walkthrough. Each of the game’s twelve chapters have been broken out into its own dedication section. Complete with overhead views of the map, in-game art footage, and background information not readily apparent to the player, it proves to be the perfect companion to any playthrough. Each step in the walkthrough itself is laid out brilliantly in the text and is accompanied by several thumbnail images to effectively call out other important points of interest such as collectables or upcoming set pieces that shouldn’t be missed. In another neat touch, as new characters are introduced in the story, they are given a brief breakout section where details about how they fit into the overall The Last of Us universe. Sure, it isn’t necessarily anything groundbreaking, but it is a nice touch that helps augment the cohesiveness of the campaign.

Winding hallways and same-ish looking rooms are something that have existed as tropes of game design since the medium’s creation. The Last of Us is not immune to this universal folly. Thankfully the overhead maps are at the reader’s disposal while working through the commentary. Especially in areas like the museum or winding through office buildings, knowing important upcoming landmarks, which are effectively called out in both image and textual form, greatly reduce the risk of inadvertently being turned around. Also helpful are the map’s call-outs where craftable items and ammo can be found. Later in the campaign, it is critical to pay attention to these key details, as they become increasingly scarce as the plot progresses.

Despite being an exceptionally comprehensive walkthrough, even this component is not without its own specific faults. Though every encounter may be covered to the nth degree, the placement of collectible call-outs are occasionally misplaced in the overall layout of the book. Completionists will need to either manually save frequently or read ahead in the text in order to make sure they don’t miss any items behind a cruelly placed auto-save location or the far-too-frequently-occurring door that locks behind the player. Normally this occurs when the highlighted artifact was a page or so behind the overall commentary, resulting in the need to revert to a manual save to get said item. It is suffice to say that these occurrences are irritating. The other, albeit extremely minor criticism, is the fluctuating level of detail that is invested in the strategy aspect of the explanations. Certain areas will give a checklist of steps to complete in order to conquer a tricky encounter, while others will simply call out the number of enemies that can be found wandering in a room, and send the player off blindly into the fog of battle. Yes, the latter is usually the exception to the rule, but when it does happen, it results in quite a bit of head scratching confusion and far more unnecessary carnage.

One last tip of the hat to the authors’ approach to this guide is the fact that they managed to find a way to enhance the game’s overall experience, without feeling the need to inundate the reader with unnecessary plot spoilers. If a stranger were to turn to any page of the walkthrough, other than obviously being at a loss as to the context of the action, they would have relatively little idea what is going on in the story. This is a lost art form that many strategy guide writers have lost sight of in the last couple of console generations and should be applauded.

Next up in the flow of the book is the obligatory collectibles rehash. Sure, if the reader followed the previous one hundred and fifty pages religiously this section may seem a bit redundant, but it is the formatting that makes this a valuable addition. Most collectibles are only allotted small thumbnail images in the walkthrough, so it would only make sense for these items to get much larger shots. If nothing else, these blowups are useful in finding artifacts, pendants, training manuals and comics that are difficult to locate using the aforementioned single, tiny, completely out of context freeze-frame. Another neat touch that stands as evidence of the collaboration between Naughty Dog and BradyGames on this work is a rundown of all of Ellie’s jokes that are hidden in the campaign. These interactions are certainly obscure enough that most likely the player would never encounter them on their own, so it is cute to see these moments highlighted, despite their frivolity in the big picture.

In most modern guides there is one area that falls criminally short: multiplayer. Fortunately, this doesn’t look to be the case this time around. The Last of Us’ Faction mode breakdown is complete enough to make even the greenest of players feel like a battle tested veteran…well, at least that is the case until they get their ass handed to them in a brown paper sack by the legitimate experts eagerly waiting on the other side of the lobby. Everything from clans to proper gear and loadout selection are spelled out, along with key combat techniques that would usually be learned through the ever-embarrassing trial and error process. But let’s be honest, the real stars of this twenty page segment are the multiplayer maps. Along with top-down looks at each area, there is a theoretical analysis of how the battlefields will be played. Might this change over time and patching? Most likely. But it never hurts to have a good idea what to expect, even if it ends up being slightly out of date.

Drawing the guide to a close is a brief call-out to the amount of in-game currency that can be unlocked by achieving certain tasks over the course of playing the campaign. These tags carry over to additional rounds through the game, if the player is glutton for punishment. There is also a list of all items and character skins that can be purchased by these poor delusional individuals. It isn’t exactly going out with a bang, but it will be plenty helpful to those wanting to deck Ellie out in a killer Naughty Dog T-shirt or Jak goggles.

BradyGames’ new The Last of Us strategy guide proves to be a perfect mirror of the game as a whole. It succeeds in areas that have proven to be stumbling blocks for many in the past, while itself still being an imperfect work in its own regard. The most tragic part is that issues like the problematic layout of collectible asides are most likely not the fault of the author, but rather a reflection on the editor. Minor missteps begin to compound over time, especially when the same issue pops up consistently. When these repetitive incidents result in inconveniencing the reader/player, the effect is amplified tenfold. Even with this blatant flub, the guide still manages to deliver a solid overall product that will result in a more enjoyable experience for all parties involved. “It’s dangerous to go alone! Take this.”

SGR Rating: 4/5

Author: Michael Owen and Kenny Sims
Publisher: BradyGames
Editions available: Paperback and Collector’s Edition
Acquired via Publisher

Filed Under: Strategy Guide Reviews

Gears of War: Judgment Strategy Guide Review

April 5, 2013 By Keri Honea 2 Comments

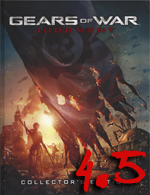
Gears of War: Judgment strategy guide reviewWhen Epic Games and People Can Fly announced that Gears of War: Judgment would implement a smart spawn system, thereby removing the possibility for players to memorize a level, I knew that the strategy guide writers for the game would have their work cut out for them. Whyile the smart spawn system wasn’t as extensive as I was led to believe, it still laid some tricky groundwork for the guide writers. Not to mention, each level would contain a Declassify mode, adding additional challenges for both players and the strategy guide writers to face. Of course, the strategy guide team at BradyGames was up for the challenge, and they knocked the Gears of War: Judgment strategy guide right out of the park. In fact, I enjoyed the strategy guide far more than I enjoyed the game itself.

In many ways, Judgment was structured similarly to past Gears of War games–large sections divided by smaller chapters. With Judgment, instead of breaking up the sections by scene, the sections are divided by who is testifying on behalf of the actions of Kilo squad. Within each bit of testimony, the section is broken up by 7-8 missions, which are more or less distinguished by scene. Each mission is extremely short by Gears standards; at the longest, they took me 10 minutes. At their shortest, especially if they were timed missions, they took less than four minutes. As such, you can see why the smart spawn system wasn’t as detailed as I had originally feared it to be; rather, what changed each time you visited the area was what enemies showed up. Don’t get me wrong, this still greatly changed my approach to getting through a level–defeating hordes of wretches is actually trickier than a team of drones and maulers. Because of this system, it was obvious that the writers played each level numerous times on the different difficulties so they could account for every possible scenario that would be thrown at the player. I would always know at the start of the mission what possible enemies could appear and where, even with the missions that had different waves of enemies.

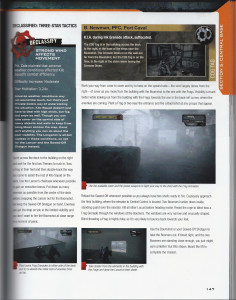
Gears of War: Judgment strategy guide

Declassify call-out box is super, super handy. Notice the call-out box for the COG tag? It will let you know if it’s feasible to snatch the tag during Declassify or not!

The point of Judgment is more of getting a three star award at the end of each mission for your performance than surviving the Locust forces, so the focus of the walkthroughs was on getting the highest ranking possible first, surviving second. It was kind of assumed that if you could get three stars, you would survive. Most importantly, the walkthrough always gave strategies for getting that three-star ranking without playing the mission as Declassified. When you turn the Declassified mode on, the stars fill far faster because the mode adds a greater level of difficulty. If you’re hunting for COG tags or you just don’t want to play Declassified right away, these strategies are crucial for filling up those stars. The fastest way to fill the stars is by earning ribbons, and the strategies are quick to tell you which ribbons are possible to obtain and the best way to earn them in rapid succession. Thanks to these tips, I was able to rack up at least two stars on every mission I played that I did not Declassify–as confusing as that probably sounds.

Since the Declassified mode added an extra set of parameters to each mission, such as adding a time limit, restricting weapons, reducing visibility, or adding more difficult enemies, the guide presented a separate call-out box with the Declassified mode details and its own strategies. I greatly appreciated this for two reasons:

  1. The strategy guide went into more detail about what the Declassified setting actually did than the game would. For example, the game, for one mission, said that Kilo had a reduced ammunition supply. The guide explained that this meant Kilo started with 30 rounds of ammunition for Lancers and there were no ammo boxes on the map.
  2. By knowing fully what I was up against beforehand, I could make an educated decision as to whether I felt like playing the level Declassified or not. I cannot stand time limits in any game, but I played a few of the Declassified missions that imposed time limits thanks to the strategy guide going over how difficult this challenge was, what the time limit was for each level of difficulty, and the level of gaming finesse you had to have to get through it. If the guide said you needed to be a master at performing head shots in quick succession, I skipped it. If the guide said you had to be fast, but by using this or this weapon, you could easily do it, I at least tried it. Believe it or not, I actually did most of the timed missions.

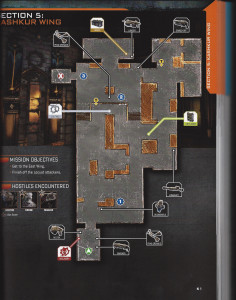
Gears of War: Judgment strategy guideAs I’ve said before, the missions are incredibly short, save for those in the Aftermath campaign, so the maps aren’t that entirely useful for the main campaign unless you’re hunting the COG tags or you REALLY REALLY REALLY need that Onyx Ammo box. That said, it didn’t stop the strategy guide team from creating some really detailed maps. I only found two flaws with all of the maps: one map was missing a COG tag marker, and another did not have the Declassify marker. At least it’s nearly impossible to miss the Declassify markers when traversing through the campaign, and I found that one wayward COG tag easily enough since all COG tags have their own call-out boxes in the walkthrough. (For the record, thanks to the strategy guide, I found all 48 COG tags in my first playthrough.)

Since Gears of War: Judgment itself is so incredibly short, and is not that difficult on a Normal setting with no Declassify modes activated, I cannot recommend the Gears of War: Judgment strategy guide if this is all you’re going to do with the game. However, if you want those COG tags (some are not easy to find, trust me) and you want those three-star ratings on harder difficulties with the Declassify mode turned on, then BradyGames’ strategy guide is your perfect companion to Kilo squad.

SGR Rating: 4.5/5

Authors: Doug Walsh, Michael Owen, Kenny Sims, Jim Morey
Publisher: BradyGames
Editions available: Collector’s Edition
Acquired via Publisher

Filed Under: Strategy Guide Reviews

XCOM: Enemy Unknown Strategy Guide Review

November 15, 2012 By Chris Nitz Leave a Comment

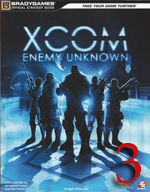
XCOM: Enemy Unknown strategy guide reviewI hate to admit this, but XCOM: Enemy Unknown never entered my radar until the day it released and I realized it was a strategy game. All that time I ignored it thinking it was a shooter. I hang my head in shame, but I also admit that this is one of the best games to release this year. Well, that is if you are into commanding marines to protect us from aliens.

As for the XCOM: Enemy Unknown strategy guide, well, it is a bit of a mixed bag. Let me start with the negatives, beginning with the fact that the cover says it includes the PC but many of the controls listed throughout the guide neglect to state the PC commands. For example, in the Basics chapter it tries to detail how to move the camera with the right control stick while zooming in and out is mapped to the L (XBOX) or L2 (PS3) buttons. Nowhere does it state that PC gamers rotate the camera with the Q and E keys or that zooming comes courtesy of the mouse scroll wheel. Yes, I know I can play the game with a controller, but I prefer a mouse and keyboard.

Wait, what do I do on the PC?

Next, readers have to endure some bad editing and sporadic information that contradicts itself. By bad editing, I mean spaces missing between words and spelling errors. For the contradictory information, there are heaps of tables detailing items from the game and then a blurb on said item and its advantages/disadvantages. These generally pull a screen capture showing some significant number, but then the blurb contradicts what the screenshot shows. So anyone studying this guide as a bit of pre-planning before tackling a mission will want to confirm what they read in the guide with what the game tells them.

Finally, we get to the beast that is XCOM itself. Those who don’t know, this is a game of randomness. Random missions, different troops for every replay, and a lot of death all play a major role in making this game entertaining while baiting players to chuck their control devices in frustration as their favorite marine dies due to a sneaky alien. This also makes it difficult to write a detailed walkthrough of the game. Therefore, anyone expecting to see complex maps or tips on how to tackle a specific instance in a particular mission is sorely at a loss here. That is just the downfall of a game such as this.

So what is good about this guide. Well, while it pretty much regurgitates in-game information, it presents it in an easy to read manner. The walkthrough may not contain every little area of the game, in fact the last mission is the only thing receiving immense details, but it does help players determine when it is best to research this item or that weapon. This is very handy for those times when debating on whether it is better to go for an upgrade to armor or progress the story and bring on tougher enemies.

While readers may not find the walkthrough overly fantastic, the Research Lab and Barracks sections are full of goodies that ease the burden of strategy. These areas make all the in-game information fast and easy to read, with the keyword being fast. I saved a fair amount of time and money on development/building, thanks to these two chapters. Even assembling my team was easier thanks to knowing the capabilities and weakness of each class. I spent the bulk of my gaming time here as I found them the most useful of the entire guide.

So that is why I love the Assault class!

The multiplayer portion is kind of a combination of the Research Lab, Barracks, and Walkthrough chapters. Summaries of how to build a squad, equipment stats, enemy details, and whatnot all come with blurbs on what makes a unit great to have in a squad or what to watch for in a particular baddie. Plenty of charts crammed full of numbers help speed up the decision-making processes compliment all this.

We finally arrive at the end of the guide, which happens to be 25-pages of art. Now I love a good art book, so this totally made me happy. If you’re not into screenshots or concept art, this will most certainly feel like wasted space. However, it is nice to see artists sketches turned into gaming assets.

At the end of the day, the XCOM: Enemy Unknown strategy guide takes the information in the game and presents it in an easier to read fashion. This is for those players that want to quickly glance down and find what they are looking for fast and effortlessly. Those players wanting some handholding through the entire game will want to stick to whatever they can find online. This is a decent guide that helps fans figure out how to tackle a game that punishes without remorse.

SGR Rating 3/5

Author: Tom Bogenn, Kenny Sims
Publisher: BradyGames
Editions Available: Paperback
Acquired via Publisher

Filed Under: Strategy Guide Reviews

Follow us!

Subscribe!

Upcoming Strategy Guides

 Nothing here. Come back later. 😢

Latest Strategy Guide Reviews

The Walkthrough by Doug Walsh Review

Red Dead Redemption 2 Strategy Guide Review

Mega Man 11 Strategy Guide Review

God of War Strategy Guide Review

Far Cry 5 Strategy Guide Review

Friends of SGR

  • BradyGames
  • Dan Birlew – Guide Writer
  • Doug Walsh – Guide Writer
  • Future Press
  • Game Enthus
  • GameWires.com
  • Piggyback
  • Press the Buttons
  • Prima Games
  • Racing Games

Top Posts & Pages

  • Prima Games and BradyGames Officially Merge
  • Final Fantasy III Strategy Guide review by FuturePress

Copyright © 2025 · Web crafted by Warkhammer


Loading Comments...