• Home
  • About Us
  • Podcast
  • Strategy Guide Wit
  • Contact

Strategy Guide Reviews

A Strategy Guide for your Strategy Guides

  • Reviews
    • Strategy Guide Reviews
    • Video Game Reviews
    • Mini-Reviews
  • Features
    • Interviews
  • News
  • Unboxing Strategy Guides
  • Columns
    • Gaming Diary
    • Corner of Randomness
  • Videos

Evolve Strategy Guide Review

March 24, 2015 By Chris Nitz Leave a Comment

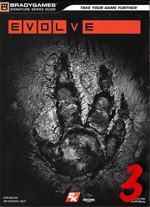
Evolve strategy guide reviewI was, and still am, excited about Evolve. The premise of four hunters taking down a giant monster totally has my interest. While I enjoy the game, sadly it’s already on the pile of “Games that Died Too Soon” thanks to a dwindling online community. Sadly, this will also be the case of the Evolve strategy guide by BradyGames.

This is a fairly easy guide to read and understand. As I was new to the game, as in I was kept away from spoilers and such, it was nice to learn how the various weapons and skills worked. This helped me form a plan as to what hunter I wanted to concentrate on and get the most unlocks for right at the start. This is true for the monsters as well as their attacks are spelled out and easy to know what monster fit my style of play. It was also handy to know what perks to pick for both sides, as those do make a big difference.

Could we get a bit more detail here. Like PRETTY PLEASE!

Could we get a bit more detail here. Like PRETTY PLEASE!

I found the Hunters and Monsters sections to be detailed enough to help me pick a favorite hunter and monster. Having the hunter combinations that utilize their loadouts against specific monsters was a nice touch. There are tips on how each character operates and what makes them tick. However, the tips are rather basic. Telling readers that a healing class should sit back from the fight and only swoop in when needed is pretty much Gaming 101 at this point. Having more advanced strategies would have made this guide a lot more useful.

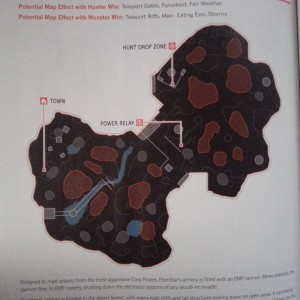
The maps are a mixed bag. I like knowing where the monster spawns in relation to where the hunters drop and the power core. The various map effect details (dependent on game mode) will help new players as they are not only fighting one another, but also the environment as well. Knowing what a man eating plant looks like will come in very handy when running away from the Goliath in hopes of living to fight another round.

While the maps are good for an overview, there isn’t much else to them. There are no prime routes marked for hunters or monsters. The lack of detail, outside of spawn and drop zone location, is very disenchanting. Having markings of where the bigger wildlife spawn points are, bird flock locations, and vantage points would have made these maps that much more useful.

Now this is full of win!

Now this is full of win!

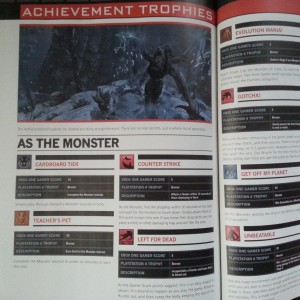
For those who want to get all the accolades, badges, and achievements will find the guide is very helpful here. Accolades and badges come in spreadsheet form and contain all the info that is needed to obtain these. The nicest part about this section is that the achievements are more than just a table with the name and point value. This guide actually details out what is necessary in order to snag every achievement available. That is not something we see in a lot of guides, and it is something I’d love to see more of.

As with any guides for a game of this nature, take all numbers and stats with a grain of salt. Patches, balance tweaks, and so on can easily render the numbers in this guide useless in one fell swoop. This guide also can’t be updated with future maps and hunter releases, and so the value of this information is rather limited to the game launch window.

Overall, the Evolve strategy guide is a great introduction to what players can expect from Evolve. I found that it was easy to read while drinking coffee or over a lunch break. I then was able to plan out what I wanted to focus on and unlock during my future Evolve play sessions. However, seasoned veterans will find this is more of a Sunday read than anything that is going to actually detail out solid strategies to make one a better hunter or monster. As is the game, pick your side and determine the value of it for yourself.

SGR Rating 3/5

Author: Michael Owen and Will Murray
Publisher: BradyGames
Editions Available: Paperback
Acquired via Publisher
Filed Under: Strategy Guide Reviews

The Last of Us: Remastered Strategy Guide Review

August 14, 2014 By Brad Hilderbrand Leave a Comment

The Last of Us: Remastered strategy guide reviewWith the rerelease of The Last of Us on the PS4, the folks at BradyGames are in an interesting position. On the one hand, the base game is fundamentally the same, so how do you create a strategy guide that players will find useful? If someone already has the guide for the PS3 version of the title, is there value in picking up the new version for The Last of Us: Remastered?  Unfortunately, just like in the post-infection landscape Joel and Ellie find themselves roaming, there are no easy answers.

The Last of Us: Remastered strategy guide starts off with some basic gameplay info and survival tips, which makes it invaluable for newcomers but less so for returning vets. The section covers important gameplay elements like scavenging parts and items for weapon upgrades and crafting, as well as a breakdown of the various enemy types and the weapons you’ll be using to stay alive. If this is your first foray outside the Quarantine Zone then this section is chock full of important intel. However, for those who have braved the infected-strewn landscape before there’s nothing really important to see here. The only thing which seasoned players might reference are the tables laying out how much it costs to upgrade the various weapons in various ways so they can easily plan which improvements they want to go for first or if they need to save up for a while to get a critical upgrade for a favored gun.

The guide then transitions into the single-player walkthrough, providing not only general navigation info, but also combat tips and collectible locations. What’s nice about the layout is that each section and set piece is given its own map and walkthrough, so you won’t have to flip back several pages in order to find critical info. What’s less impressive is that sometimes the info is ordered strangely, and missable collectibles and moments aren’t mentioned until after you’ve already passed them.

For instance, in order to get the “That’s All I’ve Got” trophy you have to listen to all of Ellie’s jokes, which only trigger in specific situations. The first of these comes as you get ready to transition from one part of a map to another, right before you climb over an obstacle. The strategy guide will tell you to go ahead and move to the next part of the map, but immediately after will mention that you need to stand in a specific, now inaccessible, area to get Ellie to tell her joke. At this point you’ve already missed your opportunity, and have to reload an earlier save (if you thought to create a manual save at a seemingly arbitrary point) or, much worse and more likely, restart the entire chapter in order to get the event to trigger. Frustratingly, this isn’t the only time in the game when something like this happens, and I found myself missing key collectibles and items because I didn’t read ahead, which you shouldn’t be expected to do in a step-by-step guide.

I also found the combat tips rather hit-or-miss, as the guide is useful when dealing with 2-3 foes, but often falls apart when facing larger groups. The guide assumes you’re favoring a stealthy strategy, which is good considering the relative scarcity of ammo. While you often get specific info on how to eliminate the first couple foes in a group, info on taking out the rest can be vague and unhelpful.

An example, early in the game Joel finds himself in an office building facing a large infected presence, including your first run-in with a very dangerous Clicker. Seeing as it’s early in the game you have little in the way of ammo and no character upgrades, and I’ve always found it to be one of the more challenging battles consider Clickers can kill you instantly if they manage to grab you. The strategy guide provides solid advice on taking out one enemy without being seen, as well as choking out a second. After that though you’re simply told to find some way to finish off the two remaining lesser infected before attacking the Clicker. The thing is, the last 3 enemies are grouped together, and it’s nearly impossible to lure one of them away without also alerting the others. Every time I played this section, even with the guide at hand, the encounter ended with me frantically sprinting around the floor trying to get enough space to reload my gun and shoot the now-alerted foes as they gave pursuit. Similar scenarios played out in other tense situations, and every time I left the fight injured, low on ammo and frustrated by a lack of specific instruction.

One upside to the single-player portion of the guide is that it includes all the DLC missions (which come packed in with the Remastered edition), so you have a full rundown of how to survive the bonus content as well. These stages get the same treatment as the primary single-player campaign, so there are plenty of maps and item callouts. Again, there are shortcomings here. Some enemy encounter strategies are frustratingly vague, and you may once again miss optional collectibles or moments because the guide doesn’t mention them until you’ve moved on.

While the single-player portion of the guide can be spotty, it shines when it comes to the multiplayer. The Factions mode provides a unique twist on traditional competitive multiplayer, and the guide does a great job explaining how it works, its objectives and the events that come up as you play. Factions can be a fairly dense mode and if you don’t understand the metagame you may find yourself winning battles but losing the war. If you’re following the guide though you should be able to cook up a solid strategy to keep your allies alive and survive long enough to “win” the mode.

Accompanying the great overall info is a full breakdown of all the maps and what strategies are most likely to be effective. It’s easily to quickly reference the guide with the map you’re about to play and then tweak your loadout into something that best suits the environment. You’re also given numerous weapon and perk combinations to fit various gameplay styles, so you should be able to find the optimal loadout for whatever class of character you prefer.

As great as The Last of Us: Remastered is, the guide can’t live up to the lofty bar the game itself has set. While the multiplayer portion is exceptionally helpful, the single-player sections are unimpressive. Also, this is a very bare-bones book, with no additional artwork, developer interviews or added content beyond walkthroughs and strategies. While you can debate the usefulness of such things in a book that is first and foremost supposed to be about helping you beat a game, considering this is a title that’s already been released once – and that a large portion of the userbase has already played – you need something more to hook people’s attention. Even some general tips on how to take a great screenshot in Photo Mode would have been worthwhile.

The Last of Us: Remastered strategy guide serves its intended purpose, but doesn’t really find a way to shine. It’s that coworker at the office who does enough to not get fired and be generally reliable, but never sticks their neck out and tries something noteworthy or unique. You may find the guide useful for a few particularly tricky encounters or nabbing all the extra loot, but it’s not one you’ll proudly display on your shelf.

SGR Rating: 3/5

Author: Michael Owen
Publisher: BradyGames
Editions available: Paperback
Acquired via publisher

Filed Under: Strategy Guide Reviews

Tomb Raider Strategy Guide Review

November 7, 2013 By Keri Honea 1 Comment

Tomb Raider Strategy Guide ReviewI’ve had both the game and the strategy guide for Tomb Raider for awhile, but I was scared to try the game for a number of reasons. One, I was nervous it would have as much platforming as the Tomb Raider games of old, and two, I was pregnant when the game released, so I was strictly warned to avoid the game during that time since pregnancy makes me have a very sensitive stomach to violence. When the Extra Life marathon came up, I put Tomb Raider up on the poll of games to play, and it got a resounding majority of the votes. I am so glad that I finally played the game (even more glad that I didn’t play while pregnant), and I am thrilled I had the Tomb Raider strategy guide available to help me through this game. Even though my goal was to burn through the game and not explore every nook and cranny to its fullest, the Tomb Raider strategy guide was invaluable at helping me get through several sequences, especially when I got lost in a few areas.

When I first looked at the strategy guide while getting ready to play, I was honestly nervous that the strategy guide would frustrate me more than help me. The guide is really focused on walking players through getting everything the first time–challenges, collectibles, and optional tomb raiding. I have typically found that when strategy guides are constructed in a way to lead you through getting collectibles while playing through the story, it’s easy to get lost in what the guide tells you what to do if you are not collectible hunting. For example, the guide may tell you to journey down this one path that’s really out of the way and then guide you back to the main path via a shortcut. If you don’t go down that collectible path and you need help finding the main path, the strategy guide will only confuse you and not help. The Tomb Raider strategy guide was not like this at all.

It was incredibly easy to both instantly find where I was in the written walkthrough and then interpret the guide’s instructions to help get me on the right track. It didn’t matter if I was hunting that collectible or completing that particular challenge or not. I could still find where I needed to go in the middle of all the completionist info.

And thank God it was easy to look up help, because I got turned around a lot as I ventured forth with the determination to grind through the game as quickly as I could.

The strategy guide also helped me get through combat situations that got me stumped nine times out of ten. Of course, I usually wanted to smack myself with the guide after learning how to, as it was usually something simple and very easy. Shoot a fire arrow into the gas, kill everyone instantly before they can call for help. Oh, silly me.

Not to mention, a couple of the puzzles had me absolutely stumped at what to do. Since the guide was so helpful with the puzzles, I know I’m going to heavily rely on it to help me when I go back and complete all of the optional tombs.

And yes, I want to go back to the game at one point and actually hunt around for the collectibles, challenges, and the optional tombs. And yes, the Tomb Raider strategy guide will be at my side the entire time.

This may be really late in the game, but I still can’t recommend the Tomb Raider strategy guide enough. It’s the perfect companion for both the completionists and those who want to burn through the game. It’s not often you find a strategy guide that is good at doing both in the main walkthrough. It’s so good, in fact, I’m not sure how much I’ll use the appendices when I go collectible hunting.

SGR Rating: 5/5

Authors: Michael Owen and Kenny Sims
Publisher: BradyGames
Editions available: Paperback and Collector’s Edition
Acquired via Publisher

Filed Under: Strategy Guide Reviews

The Last of Us Strategy Guide Review

July 23, 2013 By Blake Grundman Leave a Comment

The Last of Us strategy guide reviewAs far as games go, The Last of Us was the swansong of the PlayStation 3, from the studio that had arguably created some of the best games already on the platform. It was no shock that the expectations for the title were sky-high, and justifiably so. For the first time since the dawn of this console generation Naughty Dog had gone back to the drawing board and birthed a new franchise from scratch, which is no small feat to say the very least. In a curious move, the development team veered the project from the action exploration that had been their strong suit, onto more of a traditional survival horror track. Luckily, this genre of game plays directly into the hands of strategy guide readers. Ammo sparseness and lurking clickers be damned when a player is armed with BradyGames’ newest tome, The Last of Us strategy guide. Can it help curb the tide of jugular feasting mutants, or is does it lose the fight against the game’s ever inclining difficulty curve?

It somewhat goes without saying that The Last of Us is far deeper, in terms of game mechanics, that it would initially let on. Perfect evidence of this is the guide’s massive forty page Survival Guide, used to introduce the player to all aspects of the title’s universe. Important aspects of the gameplay including things like crafting items, listening mode, different types of explosives and how to use cover effectively are all very important pieces of the puzzle that are detailed extremely effectively. Alongside these highlights are detailed rundowns of each weapon, its strengths and weaknesses, and the different perks that can be unlocked through the in-game upgrade system. And what would any introduction be without a breakdown of the assorted enemies? Lastly, this area outlines of where each faction appears, as well as provides generic commentary on how they can be effectively dispatched.

With the silly formalities out of the way, the authors rolled up their sleeves and dove headfirst into the walkthrough. Each of the game’s twelve chapters have been broken out into its own dedication section. Complete with overhead views of the map, in-game art footage, and background information not readily apparent to the player, it proves to be the perfect companion to any playthrough. Each step in the walkthrough itself is laid out brilliantly in the text and is accompanied by several thumbnail images to effectively call out other important points of interest such as collectables or upcoming set pieces that shouldn’t be missed. In another neat touch, as new characters are introduced in the story, they are given a brief breakout section where details about how they fit into the overall The Last of Us universe. Sure, it isn’t necessarily anything groundbreaking, but it is a nice touch that helps augment the cohesiveness of the campaign.

Winding hallways and same-ish looking rooms are something that have existed as tropes of game design since the medium’s creation. The Last of Us is not immune to this universal folly. Thankfully the overhead maps are at the reader’s disposal while working through the commentary. Especially in areas like the museum or winding through office buildings, knowing important upcoming landmarks, which are effectively called out in both image and textual form, greatly reduce the risk of inadvertently being turned around. Also helpful are the map’s call-outs where craftable items and ammo can be found. Later in the campaign, it is critical to pay attention to these key details, as they become increasingly scarce as the plot progresses.

Despite being an exceptionally comprehensive walkthrough, even this component is not without its own specific faults. Though every encounter may be covered to the nth degree, the placement of collectible call-outs are occasionally misplaced in the overall layout of the book. Completionists will need to either manually save frequently or read ahead in the text in order to make sure they don’t miss any items behind a cruelly placed auto-save location or the far-too-frequently-occurring door that locks behind the player. Normally this occurs when the highlighted artifact was a page or so behind the overall commentary, resulting in the need to revert to a manual save to get said item. It is suffice to say that these occurrences are irritating. The other, albeit extremely minor criticism, is the fluctuating level of detail that is invested in the strategy aspect of the explanations. Certain areas will give a checklist of steps to complete in order to conquer a tricky encounter, while others will simply call out the number of enemies that can be found wandering in a room, and send the player off blindly into the fog of battle. Yes, the latter is usually the exception to the rule, but when it does happen, it results in quite a bit of head scratching confusion and far more unnecessary carnage.

One last tip of the hat to the authors’ approach to this guide is the fact that they managed to find a way to enhance the game’s overall experience, without feeling the need to inundate the reader with unnecessary plot spoilers. If a stranger were to turn to any page of the walkthrough, other than obviously being at a loss as to the context of the action, they would have relatively little idea what is going on in the story. This is a lost art form that many strategy guide writers have lost sight of in the last couple of console generations and should be applauded.

Next up in the flow of the book is the obligatory collectibles rehash. Sure, if the reader followed the previous one hundred and fifty pages religiously this section may seem a bit redundant, but it is the formatting that makes this a valuable addition. Most collectibles are only allotted small thumbnail images in the walkthrough, so it would only make sense for these items to get much larger shots. If nothing else, these blowups are useful in finding artifacts, pendants, training manuals and comics that are difficult to locate using the aforementioned single, tiny, completely out of context freeze-frame. Another neat touch that stands as evidence of the collaboration between Naughty Dog and BradyGames on this work is a rundown of all of Ellie’s jokes that are hidden in the campaign. These interactions are certainly obscure enough that most likely the player would never encounter them on their own, so it is cute to see these moments highlighted, despite their frivolity in the big picture.

In most modern guides there is one area that falls criminally short: multiplayer. Fortunately, this doesn’t look to be the case this time around. The Last of Us’ Faction mode breakdown is complete enough to make even the greenest of players feel like a battle tested veteran…well, at least that is the case until they get their ass handed to them in a brown paper sack by the legitimate experts eagerly waiting on the other side of the lobby. Everything from clans to proper gear and loadout selection are spelled out, along with key combat techniques that would usually be learned through the ever-embarrassing trial and error process. But let’s be honest, the real stars of this twenty page segment are the multiplayer maps. Along with top-down looks at each area, there is a theoretical analysis of how the battlefields will be played. Might this change over time and patching? Most likely. But it never hurts to have a good idea what to expect, even if it ends up being slightly out of date.

Drawing the guide to a close is a brief call-out to the amount of in-game currency that can be unlocked by achieving certain tasks over the course of playing the campaign. These tags carry over to additional rounds through the game, if the player is glutton for punishment. There is also a list of all items and character skins that can be purchased by these poor delusional individuals. It isn’t exactly going out with a bang, but it will be plenty helpful to those wanting to deck Ellie out in a killer Naughty Dog T-shirt or Jak goggles.

BradyGames’ new The Last of Us strategy guide proves to be a perfect mirror of the game as a whole. It succeeds in areas that have proven to be stumbling blocks for many in the past, while itself still being an imperfect work in its own regard. The most tragic part is that issues like the problematic layout of collectible asides are most likely not the fault of the author, but rather a reflection on the editor. Minor missteps begin to compound over time, especially when the same issue pops up consistently. When these repetitive incidents result in inconveniencing the reader/player, the effect is amplified tenfold. Even with this blatant flub, the guide still manages to deliver a solid overall product that will result in a more enjoyable experience for all parties involved. “It’s dangerous to go alone! Take this.”

SGR Rating: 4/5

Author: Michael Owen and Kenny Sims
Publisher: BradyGames
Editions available: Paperback and Collector’s Edition
Acquired via Publisher

Filed Under: Strategy Guide Reviews

Gears of War: Judgment Strategy Guide Review

April 5, 2013 By Keri Honea 2 Comments

Gears of War: Judgment strategy guide reviewWhen Epic Games and People Can Fly announced that Gears of War: Judgment would implement a smart spawn system, thereby removing the possibility for players to memorize a level, I knew that the strategy guide writers for the game would have their work cut out for them. Whyile the smart spawn system wasn’t as extensive as I was led to believe, it still laid some tricky groundwork for the guide writers. Not to mention, each level would contain a Declassify mode, adding additional challenges for both players and the strategy guide writers to face. Of course, the strategy guide team at BradyGames was up for the challenge, and they knocked the Gears of War: Judgment strategy guide right out of the park. In fact, I enjoyed the strategy guide far more than I enjoyed the game itself.

In many ways, Judgment was structured similarly to past Gears of War games–large sections divided by smaller chapters. With Judgment, instead of breaking up the sections by scene, the sections are divided by who is testifying on behalf of the actions of Kilo squad. Within each bit of testimony, the section is broken up by 7-8 missions, which are more or less distinguished by scene. Each mission is extremely short by Gears standards; at the longest, they took me 10 minutes. At their shortest, especially if they were timed missions, they took less than four minutes. As such, you can see why the smart spawn system wasn’t as detailed as I had originally feared it to be; rather, what changed each time you visited the area was what enemies showed up. Don’t get me wrong, this still greatly changed my approach to getting through a level–defeating hordes of wretches is actually trickier than a team of drones and maulers. Because of this system, it was obvious that the writers played each level numerous times on the different difficulties so they could account for every possible scenario that would be thrown at the player. I would always know at the start of the mission what possible enemies could appear and where, even with the missions that had different waves of enemies.

Gears of War: Judgment strategy guide

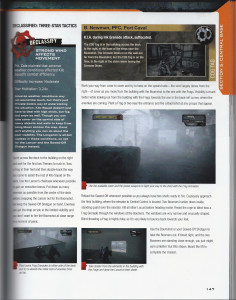
Declassify call-out box is super, super handy. Notice the call-out box for the COG tag? It will let you know if it’s feasible to snatch the tag during Declassify or not!

The point of Judgment is more of getting a three star award at the end of each mission for your performance than surviving the Locust forces, so the focus of the walkthroughs was on getting the highest ranking possible first, surviving second. It was kind of assumed that if you could get three stars, you would survive. Most importantly, the walkthrough always gave strategies for getting that three-star ranking without playing the mission as Declassified. When you turn the Declassified mode on, the stars fill far faster because the mode adds a greater level of difficulty. If you’re hunting for COG tags or you just don’t want to play Declassified right away, these strategies are crucial for filling up those stars. The fastest way to fill the stars is by earning ribbons, and the strategies are quick to tell you which ribbons are possible to obtain and the best way to earn them in rapid succession. Thanks to these tips, I was able to rack up at least two stars on every mission I played that I did not Declassify–as confusing as that probably sounds.

Since the Declassified mode added an extra set of parameters to each mission, such as adding a time limit, restricting weapons, reducing visibility, or adding more difficult enemies, the guide presented a separate call-out box with the Declassified mode details and its own strategies. I greatly appreciated this for two reasons:

  1. The strategy guide went into more detail about what the Declassified setting actually did than the game would. For example, the game, for one mission, said that Kilo had a reduced ammunition supply. The guide explained that this meant Kilo started with 30 rounds of ammunition for Lancers and there were no ammo boxes on the map.
  2. By knowing fully what I was up against beforehand, I could make an educated decision as to whether I felt like playing the level Declassified or not. I cannot stand time limits in any game, but I played a few of the Declassified missions that imposed time limits thanks to the strategy guide going over how difficult this challenge was, what the time limit was for each level of difficulty, and the level of gaming finesse you had to have to get through it. If the guide said you needed to be a master at performing head shots in quick succession, I skipped it. If the guide said you had to be fast, but by using this or this weapon, you could easily do it, I at least tried it. Believe it or not, I actually did most of the timed missions.

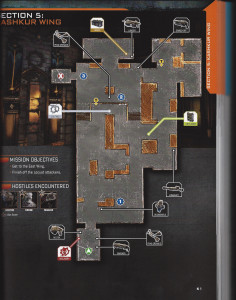
Gears of War: Judgment strategy guideAs I’ve said before, the missions are incredibly short, save for those in the Aftermath campaign, so the maps aren’t that entirely useful for the main campaign unless you’re hunting the COG tags or you REALLY REALLY REALLY need that Onyx Ammo box. That said, it didn’t stop the strategy guide team from creating some really detailed maps. I only found two flaws with all of the maps: one map was missing a COG tag marker, and another did not have the Declassify marker. At least it’s nearly impossible to miss the Declassify markers when traversing through the campaign, and I found that one wayward COG tag easily enough since all COG tags have their own call-out boxes in the walkthrough. (For the record, thanks to the strategy guide, I found all 48 COG tags in my first playthrough.)

Since Gears of War: Judgment itself is so incredibly short, and is not that difficult on a Normal setting with no Declassify modes activated, I cannot recommend the Gears of War: Judgment strategy guide if this is all you’re going to do with the game. However, if you want those COG tags (some are not easy to find, trust me) and you want those three-star ratings on harder difficulties with the Declassify mode turned on, then BradyGames’ strategy guide is your perfect companion to Kilo squad.

SGR Rating: 4.5/5

Authors: Doug Walsh, Michael Owen, Kenny Sims, Jim Morey
Publisher: BradyGames
Editions available: Collector’s Edition
Acquired via Publisher

Filed Under: Strategy Guide Reviews

  • « Previous Page
  • 1
  • 2
  • 3
  • Next Page »

Follow us!

Subscribe!

Upcoming Strategy Guides

 Nothing here. Come back later. 😢

Latest Strategy Guide Reviews

The Walkthrough by Doug Walsh Review

Red Dead Redemption 2 Strategy Guide Review

Mega Man 11 Strategy Guide Review

God of War Strategy Guide Review

Far Cry 5 Strategy Guide Review

Friends of SGR

  • BradyGames
  • Dan Birlew – Guide Writer
  • Doug Walsh – Guide Writer
  • Future Press
  • Game Enthus
  • GameWires.com
  • Piggyback
  • Press the Buttons
  • Prima Games
  • Racing Games

Top Posts & Pages

  • Final Fantasy III Strategy Guide review by FuturePress

Copyright © 2025 · Web crafted by Warkhammer


Loading Comments...